FF851 Freestanding Combination Fridge Freezer Manual for Installation, Use and Maintenance Customer Care Department • The Group Ltd. • Harby Road • Langar • Nottinghamshire • NG13 9HY T : 01949 862 012 F : 01949 862 003 E : customer.care@cda.eu W : www.cda.
Important The CDA Group Ltd cannot be held responsible for injuries or losses caused by incorrect use or installation of this product. Please note that CDA reserve the right to invalidate the guarantee supplied with this product following incorrect installation or misuse of the appliance.
CE Declarations of Conformity: This appliance has been designed, constructed and marketed in compliance with safety requirements of EEC Directive 2006/95/EEC (Low voltage) and requirements of EMC Directive 2004/108/EEC. This appliance has been manufactured to the strictest standards and complies with all applicable legislation, including Electrical safety (LVD) and Electromagnetic interference compatibility (EMC). Parts intended to come into contact with food conform to EEC/89/109.
Important Never store inflammable or explosive items and strong corrosive acids or alkalis in the appliance. This is a household appliance, which is produced in accordance with the national standard. It is intended for food storage only, not for storage of blood, medicine and biological products. To prevent risk of fire, keep the appliance away from petrol or any other inflammables.
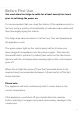
Before First Use You must allow the fridge to settle for at least twenty four hours prior to switching the power on. It is recommended that you clean the interior of the appliance prior to first use, using a solution of bicarbonate of soda and warm water and then thoroughly drying the interior. The fridge may have an odour to it at first use. This will disappear as the appliance cools. The green power light on the control panel will be lit when you have plugged the appliance into the power supply.
Never store inflammable or explosive items and strong corrosive acids or alkalis in the appliance. This fridge cools your food by making the inside back of the cavity cold. It is normal for frost to build up on this surface; it then dissipates and drains through a small drain at the bottom, where it evaporates harmlessly. The presence of frosting at the back is not a malfunction of the fridge. Fridge Use • Never put liquids in the refrigerator uncovered. • Never put hot foods in the refrigerator.
• Thawing frozen foods in the fridge compartment will help to keep the temperature low and save energy. • Only open the door for as long as is necessary. Leaving the door open for long periods will affect the temperature inside the appliance and waste energy. • Ensure all compartments are fully closed after use. Freezer Use • The freezer compartments are designed to store only frozen food. • Never put hot or warm foods in the freezer, allow them to cool fully before putting them into the freezer.
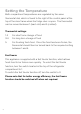
Setting the Temperature Both compartment temperatures are regulated by the same thermostat dial, which is found to the right of the control panel at the top of the door frame when the fridge door is open. The thermostat can be moved between 1 (least cold) and 5 (coldest). Thermostat settings: 1-2 For short term storage of food 3-4 For long term storage of food 5 For freezing fresh food. Once the food has been frozen, the thermostat should then be turned back to the required setting between 1 and 4.
Control Panel The control panel for the fridge has three lights (Fig. 1). A B C fig. 1 A. Orange Fast Freeze light This light is illuminated when the fast freeze function is on. B. Green Power light This light is illuminated when the power supply to appliance is on. C. Red Temperature Warning light This light is illuminated when the freezer compartment temperature is too warm.
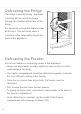
Defrosting the Fridge The fridge is self-defrosting. Any water collected will run out of the fridge through the channel at the back of the fridge. It is important to keep the channel clear at all times. The defrosted water is collected in the evaporating tray at the back of the appliance. fig. 2 Defrosting the Freezer Do not use heaters or defrosting sprays in this appliance. • Never use any metallic or sharp objects to remove the ice as this could damage the lining.
Care and Cleaning Always disconnect the appliance from the power supply before any cleaning or maintenance. The fridge sections should be cleaned using a solution of bicarbonate of soda and lukewarm water. Do not use abrasive products or detergents. After washing, rinse and dry thoroughly. Clean the shelves and balconies separately by hand with soap and water. Do not put them in the dishwasher.
Changing the Light Bulb Disconnect the appliance from the power. • Remove the light cover by pressing on the hooks on both sides of the cover. • Unscrew the light bulb to remove it and replace with a new bulb (not more than 15W). • Replace the light cover and reconnect the power. Troubleshooting If you have any problems with your appliance, you should check the troubleshooting prior to calling CDA Customer Care to prevent unnecessary service calls and potential cost.
• There is enough ventilation at the side and rear walls. • The temperature of the room is adequate (16°C or above). The appliance is noisy • The appliance is level and stable. • The side and rear walls are clear, and there is nothing resting on the appliance. • The cooling gas in the refrigerator will make a slight bubbling noise, even when the compressor is not running.
Reversing the Doors We recommend you seek the help of another individual to support the doors whilst performing this operation. 1. Remove the two screws fixing the central hinge to the appliance and the central cover caps on the left side (fig. 3). fig. 3 2. Remove the fridge and freezer doors by pulling both away from the appliance, along with the central hinge (fig. 4) fig.
3. Remove the kick plate by pulling forwards. Remove the lower hinge fixing screws and the lower hinge. Unscrew the lower hinge pin from position 1 in fig. 5, rotate the lower hinge 90º and then screw the hinge pin into position 2. Relocate the lower hinge into position on the left hand side using the lower hinge fixing screws. Bottom hinge Hole 1 Hole 2 fig. 5 Kick plate 4. Locate the central cover caps as shown. fig. 6 5.
6. Relocate the fridge door upper bushing and upper bushing caps to the alternate side (fig. 8). Remove the right door catch and locate the left door catch (this is supplied with the instruction manual). Fridge door Right door catch fig. 8 7. Relocate the freezer door upper bushing, upper bushing caps and lower bushing to the alternate side (fig. 9). Freezer door fig. 9 8. Rotate the central hinge 180º. Assemble the fridge and freezer doors with the central hinge and replace the doors.
Electrical Information Warning! This appliance must be earthed. The mains lead of this appliance has been fitted with a BS 1363A 13 amp fused plug. To change a fuse in this type of plug, follow the steps below: 1. Remove the fuse cover and fuse. 2. Fit replacement 13A fuse, ASTA approved to BS 1362 type, into the fuse cover. 3. Replace fuse cover. Important: Do not use the appliance without the fuse cover in position.
As the colours of the wires in the mains lead of this appliance may not correspond with the coloured markings identifying the terminals in your plug, proceed as follows:• The wire which is coloured GREEN and YELLOW must be connected to the terminal which is marked with letter (E) or by the Earth symbol or coloured GREEN and YELLOW. • The wire which is coloured BLUE must be connected to the terminal which is marked with the letter (N), or coloured BLACK.
NOTES 19
Please contact our Customer Care Department for Service on the details below Customer Care Department • The Group Ltd. • Harby Road • Langar • Nottinghamshire • NG13 9HY T : 01949 862 012 F : 01949 862 003 E : service@cda.eu W : www.cda.