
Installation Guide


5
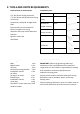
2. TOOLS AND PARTS REQUIREMENTS
Electrical drill or ratchet driver
1/2” drill bit for drilling pilot holes
1 ¼” drill bit for drilling electrical wiring
access hole.
Screwdrivers: Philips & Straight blade
Pliers
Tape measure or ruler and pencil
Electrical supplies for wiring
Aluminum foils tape and/or duct tape
Hammer
Jigsaw or saber saw
Stud finder
Installation parts
Part
QTY
Photo
Bracket for
body
1pcs
Bracket for
upper chimney
1pcs
Bracket for
lower chimney
1pcs
Screw: ST4*8
4pcs
Screw:
ST4.0*30
9pcs
Wall anchor:
9pcs
Parts Supplied
Body 1 pcs
Body bracket 1 pcs
Chimney 2 pcs
Chimney mounting bracket 2 pcs
Installation manual 1 Set
Air outlet
(In bag or on body) 1 Set
Exhaust pipe 1 Pcs
Installation manual 1 Pcs
Screw bag 1 bag
Disclaimer: Screws many vary from
model to model.
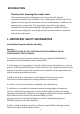
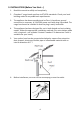
LOCATION REQUIREMENTS
IMPORTANT: Observe all governing codes and
ordinances. Have a qualified technician install the
range hood. It is the installer’s responsibility to comply
with installation clearances specified on the
model/serial rating plate.
Canopy hood's location should be away from strong
draft areas, such as windows, doors, and strong
heating vents.
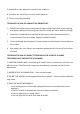
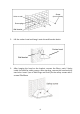
Cabinet opening dimensions that are shown must be
used. Given dimensions provide minimum clearance.