70002 Rev 70002-20080214 Owner’s Manual and Operating Instructions 2700 PSI – 2.
Table of Contents Introduction ..................................... 1 Pressure Washer ....................................... 1 Accessories................................................ 1 This Booklet .............................................. 1 Manual Conventions ......................... 2 Safety Rules ...................................... 3 Controls and Features ....................... 6 Pressure Washer ....................................... 6 Parts Included .....................................
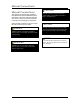
Introduction Introduction Accessories Congratulations on your purchase of a Champion Power Equipment pressure washer. CPE designs and builds pressure washers to strict specifications. With proper use and maintenance, this pressure washer will bring years of satisfying service. Pressure Washer This unit is a gasoline engine driven pressure washer.
Manual Conventions Manual Conventions CAUTION This manual uses the following symbols to help differentiate between different kinds of information. The safety symbol is used with a key word to alert you to potential hazards in operating and owning power equipment. CAUTION indicates a potentially hazardous situation which, if not avoided, may result in minor or moderate injury. Follow all safety messages to avoid or reduce the risk of serious injury or death.
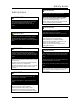
Safety Rules Safety Rules WARNING Read this manual thoroughly before operating your pressure washer. Failure to follow instructions could result in serious injury or death. WARNING Sparks can result in fire or electrical shock. When servicing the pressure washer: Disconnect the spark plug wire and place it where it cannot contact the plug. DO NOT check for spark with the plug removed. Use only approved spark plug testers.
Safety Rules DANGER Fuel and fuel vapors are highly flammable and extremely explosive. Fire or explosion can cause severe burns or death. Unintentional startup can result in entanglement, traumatic amputation or laceration. When adding or removing fuel Turn the engine off and let it cool for at least two minutes before removing the fuel cap. Loosen the cap slowly to relieve pressure in the tank. Only fill or drain fuel outdoors in a well-ventilated area. DO NOT overfill the fuel tank.
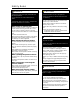
Safety Rules WARNING NEVER run the unit dry. Be sure the water supply is completely turned on before operating the unit. WARNING If water has frozen in the pressure washer, thaw the pressure washer in a warm room before starting. DO NOT pour hot water on or into the pump; internal parts will be damaged and your warranty will be voided.
Controls and Features Controls and Features Read this owner’s manual before operating your pressure washer. Familiarize yourself with the location and function of the controls and features. Save this manual for future reference. Pressure Washer High Pressure Pump (1) – gas-engine driven wobble plate pressure pump. Recoil Starter (6) – Used to start the engine Muffler (2) – Full-size muffler for sound abatement.
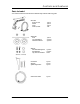
Controls and Features Parts Included Your 70002 Gasoline Powered Pressure Washer ships with the following parts: Rev 70002-20080214 Hose Kit Pressure Gun Wand Hose Hook w/Nuts 1 piece 1 piece 1 piece 1 set Wheel Kit Axle 10” Solid Wheel Vibration Mounts 1 piece 2 pieces 2 pieces Bolt Kit Wheel Retaining Pins Flat Washers Cap Screws and Nuts 2 pieces 2 pieces 6 sets Oil Funnel Wrench Spark Plug Socket 1 piece 1 piece 1 piece Inline Hose Filter 1 piece 7
Assembly Assembly Your pressure washer requires some assembly. This unit ships from our factory without oil. It must be properly serviced with fuel and oil before operation. Install the Support Leg 1. Attach each rubber vibration mount to the base frame with a cap screw (M8x20) and lock nut (M8). 2. Tip the pressure washer slowly so that it rests on the wheels and support leg. If you have any questions regarding the assembly of your pressure washer, call our help line at 1-877-338-0999.
Assembly Add Fuel 1. 2. 3. 4. 5. 6. Use clean, fresh, regular unleaded fuel with a minimum octane rating of 85. DO NOT mix oil with fuel. Clean the area around the fuel cap. Remove the fuel cap Slowly add fuel to the tank. DO NOT overfill. Allow approximately ¼ inch of space for fuel expansion. Screw on the fuel cap and wipe away any spilled fuel. CAUTION Use regular unleaded gasoline with a minimum octane rating of 85. Do not mix oil and gasoline.
Operation Operation Pressure Washer Location This pressure washer must have at least five feet of clearance from combustible material. Leave at least three feet of clearance on all sides of the pressure washer to allow for adequate cooling, maintenance and servicing. Place the pressure washer in a wellventilated area. DO NOT place the pressure washer near vents or intakes where exhaust fumes could be drawn into occupied or confined spaces.
Operation 1. Before triggering the gun, adjust the nozzle or quick connect tip to a wide fan pattern. 3. Place the nozzle approximately 4-5 feet away from the cleaning surface. Then hold the nozzle at a 45 degree angle to the cleaning surface. Trigger the gun. 4. Vary the fan pattern spray angle and the distance to the cleaning surface until optimum cleaning efficiency is achieved without damaging the surface.
Operation CAUTION Operating Tips CAUTION Never operate your pressure washer without water. Release the trigger prior to switching the wand between high and low pressure. Failure to do so may reduce the life of the o-rings in the wand and will void your warranty. Stopping the Engine CAUTION Never connect your pressure washer to a hot water supply. 1. Turn the ignition switch to the “Off” position. 2. Depressurize system. 3. Turn off and unplug all hoses.
Maintenance Maintenance The owner/operator is responsible for all periodic maintenance. WARNING Never operate a damaged or defective pressure washer. Spark Plugs 1. 2. WARNING Improper maintenance will void your warranty. 3. 4. 5. Complete all scheduled maintenance in a timely manner. Correct any issue before operating the pressure washer. NOTE 6. 7. 8. Remove the spark plug cable from the spark plug. Use the spark plug tool that shipped with your pressure washer to remove the plug.
Maintenance Adjustments CPE recommends that you contact our service line at 1-877-338-0999 for all other service and/or adjustment needs. Maintenance Schedule Follow the service intervals indicated in the schedule below. Service your pressure washer more frequently when operating in adverse conditions. Contact our help line at 1-877-338-0999 to locate the nearest Champion Power Equipment certified service dealer for your maintenance needs.
Storage Storage For long term storage, please follow these guidelines. 6. Remove the spark plug and pour about ½ ounce of oil into the cylinder. Crank the engine slowly to distribute the oil and lubricate the cylinder. 7. Reattach the spark plug. Pressure Washer Storage Engine Storage 1. 2. 3. 4. 5. Allow the engine to cool completely before storage. Clean the engine according to the instructions in the Maintenance section.
Specifications Specifications Engine Specifications Engine 6.5 HP OHV CPE EPA & CARB certified NOTE The gross horsepower of this engine was laboratory-rated at our factory in accordance with SAE J1940 as configured to meet safety, emissions, and operating requirements. The actual engine horsepower on this class of engine may be significantly lower.
Specifications Pressure Washer Parts Diagram Rev 70002-20080214 17
Specifications Pressure Washer Parts List Item 1 2 3 4 5 6 7 8 9 10 11 12 13 14 15 16 17 18 19 20 21 22 23 24 25 26 27 28 29 30 31 32 33 34 35 36 37 38 39 40 41 42 43 44 45 46 47 48 49 50 51 18 Part Number ST29QXG-310-0001 ST29QXG-310-0002 ST29QXG-310-0003 ST29QXG-310-0004 ST29QXG-310-0005 ST29QXG-310-0006 ST29QXG-310-0007 ST29QXG-310-0008 ST29QXG-310-0009 ST29QXG-310-0010 ST29QXG-310-0011 ST29QXG-310-0012 GB1667-S8-20 ST29QXG-310-0014 ST29QXG-310-0015 ST29QXG-310-0016 ST29QXG-310-0017 ST29QXG-310-0018 ST
Specifications Item 52 53 54 55 56 57 58 59 60 61 62 63 64 65 66 67 68 69 70 71 72 73 74 75 76 77 78 79 80 81 82 Part Number ST29QXG-310-0051 ST29QXG-310-0052 ST29QXG-310-0053 ST29QXG-310-0054 ST29QXG-310-0055 ST29QXG-310-0056 ST29QXG-310-0057 ST29QXG-310-0058 ST29QXG-310-0059 ST29QXG-310-0060 ST29QXG-310-0061 ST29QXG-310-0062 ST29QXG-310-0063 ST168F-2-100-0001S GB41-N-8 ST29QXG-320-0001 ST29QXG-320-0002 ST29QXG-320-0003 ST29QXG-320-0004 GB90-W-16 GBT91-CP3.
Specifications Engine Parts Diagram 20 Rev 70002-20080214
Specifications Engine Parts List Item 1 2 3 4 5 6 7 8 9 10 11 12 13 14 15 16 17 18 19 20 21 22 23 24 25 26 27 28 29 30 31 32 33 34 35 36 37 38 39 40 41 42 43 44 45 46 47 48 49 Part Number ST168F-107-0001 ST168F-107-0002-000001 ST168F-107-0003 ST168F-107-0004 ST168F-107-0005 ST168F-107-0006-000100 ST168F-111-0001 ST168F-111-0002 ST160F-111-0003 GB41-N-6 ST160F-111-0004 ST160F-111-0005 ST168F-111-0006 GB5789-FB6-12 ST160F-111-0007 ST168F-111-0008 ST160F-111-0009 ST160F-106-0001-000101 ST160F-106-0002-000100
Specifications Item 50 51 52 53 54 55 56 57 58 59 60 61 62 63 64 65 66 67 68 69 70 71 72 73 74 75 76 77 78 79 80 81 82 83 84 85 86 87 88 89 90 91 92 93 94 95 96 97 98 99 100 101 102 103A 22 Part Number ST168F-103-0007 ST160F-103-0008-010100 ST160F-103-0009 ST168F-103-0010-000100 GB5789-FB8-32 GB5789-FB6-8 ST160F-107-0007 ST168F-107-0008-000100 ST168F-107-0009 ST168F-107-0010-000101 ST168F-107-0011 ST168F-107-0012-000100 ST168F-107-0013-010100 GB5789-B6-25 ST168F-112-0005 FMD-DP10-16 GB5789-FB8-55 ST160F-1
Specifications Item 103B 103C 104 105 106 107 108 109 110 111 112 Part Number ST168F-105-0012 ST168F-105-0013 ST168F-2-105-0014 ST168F-105-0015 ST168F-105-0016 ST168F-105-0017 ST168F-104-0018 ST168F-104-0019 ST168F-104-0020 ST168F-104-0021 ST168F-104-0022 Rev 70002-20080214 Description Second Ring (Black) Oil Ring Set Piston Piston Pin Clip Piston Pin Connecting Rod Tappet Lock Nut Exhaust Rocker Arm Tappet Adjusting Bolt Intake Rocker Arm Rocker Arm Pin Qty.
Troubleshooting Troubleshooting Problem Pressure washer will not start Pressure washer will not start; Pressure washer starts but runs roughly Pressure washer shuts down during operation Cause No fuel Faulty spark plug Unit loaded during start up Low oil level Choke in the wrong position.
Warranty Warranty CHAMPION POWER EQUIPMENT 90 DAY LIMITED WARRANTY Effective September 1, 2006. Replaces all undated warranties and all warranties dated before September 1, 2006. Warranty Qualifications Champion Power Equipment (CPE) will register this warranty upon receipt of your Warranty Registration Card and a copy of your sales receipt from one of CPE's retail locations as proof of purchase.
Warranty reference to the purchase date of the original unit. This warranty gives you certain legal rights which may change from state to state. Your state may also have other rights you may be entitled to that are not listed within this warranty. Contact Information Address Champion Power Equipment, Inc. Customer Service 10006 Santa Fe Springs Rd. Santa Fe Springs, CA 90670 Customer Service Mon – Fri 8:30 AM – 5:00 PM (PST/PDT) Toll Free: 1-877-338-0999 Fax no.
Warranty Champion Power Equipment, Inc (CPE), The California Air Resources Board (CARB) and the United States Environment Protection Agency (U.S. EPA.) Emission Control System Warranty Your Champion Power Equipment (CPE) engine complies with both the U.S. EPA and state of California Air Resources Board (CARB) emission regulations.
Warranty EMISSION CONTROL SYSTEM WARRANTY The following are specific provisions relative to your Emission Control System Warranty Coverage. Emission Control System Warranty (ECS Warranty) for 1995 and later model year California small off-road engines (for other states, 1997 and later model year engines): 1. APPLICABILITY: This warranty shall apply to 1995 and later model year California small offroad engines (for other states, 1997 and later model year engines).
Warranty i. Unapproved add-on or modified parts may not be used to modify or repair a CPE engine. Such use voids this ECS Warranty and shall be sufficient grounds for disallowing an ECS Warranty claim. CPE shall not be liable hereunder for failures of any warranted parts of a CPE engine caused by the use of such an unapproved add-on or modified part.
Notes Notes 30 Rev 70002-20080214