'"1 ..., .... _.
Thank you for purchasing this Clarion product. I * Please read this owner's manual in its entirety before operating this equipment. * After reading this manual, be sure to keep it in a handy place (e.g., glove compartment). * Check the contents of the enclosed warranty card and keep it carefully with this manual. * This manual includes the operating procedures of the CD changer, MD changer and TV tuner connected via the CeNET cable.
1. When the inside of the car is very cold and the player is used soon after switching on the heater moisture may form on the disc or the optical parts of the player and proper playback may not be possible. If moisture forms on the disc, wipe it off with a soft cloth. If moisture forms on the optical parts of the player, do not use the player for about one hour. The condensation will disappear naturally allowing normal operation.
Handling Compact Discs Use only compact discs bearing the cQJD~@ or o mark. • Do not use compact discs that have large scratches, are misshapen, cracked, etc. Use of such discs may cause misoperation or damage. Do not play heart-shaped, octagonal, or other specially shaped compact discs. • To remove a compact disc from its storage case, press down on the center of the case and lift the disc out, holding it carefully by the edges. T OIOITAL.AUDIO Some CDs recorded in CD-R/CD-RW mode may not be usable.
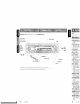
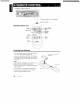
[~] 7'+%:'~<~»'-~~--[Z+] [SW-VOL] [ISR] IS~~~,,~_~="=.=<~ / / ! / [RPT] I / [RDM]",d1 / [PLAY LIST] ~I / l ,/ [DIRECT] ! [ON], [UP] Note: Be sure to unfold this page and refer to the front diagrams as you read each chapter Nota Cuando lea los capftulos, despliegue esta pagina y consulte los diagramas.
II 4. NOMENCLATURE ::> v. " ~ Note: • Be sure to read this chapter referring to the front diagrams of chapter "3. CONTROLS" on page 5 (unfold). Names of the Buttons and their Functions [RELEASE] button [ROM] button • Deeply push in [RELEASE] button to unlock DCP. • Perform random play while in the CD mode. • Press and hold the button for 1 second or longer to perform folder random play while in the MP3IWMA mode. [ROTARY] knob • Adjust the volume by turning the knob clockwise or counterclockwise.
Major button operations when external equipment is connected to this unit • When the CD/MD/DVD changer is connected For details, see the section "CD/MD changer operations". For the DVD changer, refer to the Owner's Manual provided with the DVD changer. [DISP] button • When the button is pressed and held, switches the disc titles or track titles while in the MD changer mode. • When the button is pressed and held, switches the user titles or track titles, etc. while in the CD changer mode. [TITLE] button .
Display Items rSatellite indication l~ Z-Enhancer I II I Plus indication Operation status indication ~['F~ /: J ~:tl::~.C~~:~~~.~ '.a~:.:i:~~:Y: Jt.iiiii ..... iiiii ..... iiiii ..... iiiii ..... iiiii ..... iiiii ..... iiiii ..... iiiii ..... iiiii ..... iiiii . . - J-.... I _ SAT _ ••• -~ :J"J ~ ~ FOLDER ;~:t~ ~ ~='TlTI IfIJI H'il n I In!rl_r~~;<:: ~~~r 1lffJ/.llffJtJfI f ItJfIo:CIJa!l"l:s~ID. 'II,'IlJJ ~,-RDMJ ! r! ; ; i ; I Stereo indication.
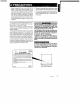
5.DCP " The control panel can be detached to prevent theft. When detaching the control panel, store it in the DCP (DETACHABLE CONTROL PANEL) case to prevent scratches. We recommend taking the DCP with you when leaving the car. " Storing the DCP in the DCP Case Hold the OCr, in the orientation as shown in the figure below, and put it into the supplied DCP case. (Ensure the DCP is in the correct orienta~ tion.) Removing the DCP 1. Press the [FNC] button for 1 second or longer to switch off the power.
€i. BEIIOl:E CONTROL Receiver for remote control unit ---------. Operating range: 30° in all directions transmitter Remote control unit [FUNC]-~I~riil.lli1 ·~. . \. ",,-\--[DUAL ZONE] 11~~~'. ! !.•.~.·.:l \ ::~I]\~>] [A],[.] !.• ·.·.·.i .•. •. .•.••.{.•..•..•..•..•...•.••.•..•..••••• ~~.............,;;~(~ I \ [M~~:;_,,",,-I---I~~~): \\ [SCN] II £fEfIJ -';-II~~ [RPT] r Fl.~!~;~ \ \ clarion 1.Turn the remote control unit over, then slide the rear cover in the direction of the arrow. 2.
Functions of Remote Control Unit Buttons [ [FUNC] Switches among radio, SIRIUS tuner, CD/MP3/WMA, CD/MD changer, DVD changer, TV and AUX. [BAND] Switches reception band. .... ],[~] Plays the first track. Top play. Moves the next disc in increasing order. Switches reception band. Increases and decreases volume (in all modes). Moves preset channels up and down. Moves tracks up and down. When pressed and held for 1 second: Fast-forward/fast-backward. Moves preset channels up and down.
1. f)PEBAIIONS Note: Be sure to read this chapter referring to the front diagrams of chapter "3. CONTROLS" on page 5 (unfold). Adjusting the volume Be sure to lower the volume before switching off the unit power or the ignition key. The unit remembers its last volume setting. If you switch the power off with the volume up, when you switch the power back on, the sudden loud volume may hurt your hearing and damage the unit.
Basic Operations "Z+ OFF" ~ "BASS BOOST" ~ "IMPACT" ~ "EXCITE" ~ "CUSTOM" ~ "Z+ OFF" ... Adjusting the bass (Gain, Frequency, a-curve) - BASS BOOST - IMPACT This adjustment can be performed when the ZEnhancer Plus is set to "CUSTOM". - EXCITE -CUSTOM - Z+ OFF bass emphasized bass and treble emphasized bass and treble emphasized mid de-emphasized user custom no sound effect Adjusting the Z-Enhancer Plus 1. Press the [Z+] button and select the Z-Enhancer Plus mode to adjust. 2.
Basic Operations I Radio Operations Adjusting the balance FM reception 1. Press the [A-M] button and select "SAL 0". For enhanced FM performance the mRIiI=TUNECW tuner includes signal actuated stereo control, Enhanced Multi AGe, Impulse noise reduction curcuits and MUltipath noise reduction circuits. 2. Turning the [ROTARY] knob clockwise emphasizes the sound from the right speaker; turning it counterclockwise emphasizes the sound from the left speaker. * The factory default setting is "BAL 0".
Radio Operations 2. Press the [<....] or [-.>] button to automatically seek a station. When the [-.>] button is pressed, the station is sought in the direction of higher frequencies; if the [. .] button is pressed, the station is sought in the direction of lower frequencies. Manual tuning There are 2 ways available: Quick tuning and step tuning. When you are in the step tuning mode, the frequency changes one step at a time. In the quick tuning mode, you can quickly tune the desired frequency. 1.
CDIMP3IWMA Operations I -M-P-3JW-lIII-)\------What is MP3? MP3 is an audio compression method and classified into audio layer 3 of MPEG standards. This audio compression method has penetrated into PC users and become a standard format. This MPS features the original audio data compression to about 10 percent of its initial size with a high sound quality. This means that about 10 music CDs can be recorded on a CD-R disc or CD-RW disc to allow a long listening time without having to change CDs.
CDIMP3IWMA Operations • Do not try to put your hand or fingers in the disc insertion slot. Also never insert foreign objects into the slot. • Do not insert discs where adhesive comes out from cellophane tape or a rental CD label, or discs with marks where cellophane tape or rental CD labels were removed. It may be impossible to extract these discs from the unit and they may cause the unit to break down. Just pressing the [~J button ejects the disc even if the power to the unit was not turned on.
CDIMP3IWMA Operations Fast-forwardlfast-backward Scan play • Fast-forward Press and hold the [~>] button for 1 second or longer. • Fast-backward Press and hold the [<....] button for 1 second or longer. This function allows you to locate and play the first 10 seconds of all the tracks recorded on a disc. For MP3/WMA discs, it takes some time until the start of searching and between tracks. In addition, the playing time may have a margin of error.
CDIMP3IWMA Operations Folder repeat play Play list mode This function allows you to playa track currently being played in the MP3IWMA folder repeatedly. This function allows you to play tracks, up to latest 5 time stamps, by reading the play list information written on the disc. 1. Press and hold the [RPT) button for about 1 second to perform folder repeat play.
Operations Common to Each Mode I Turning the screen saver function on or oft This unit is provided with the screen saver function which allows you to show various kinds of patterns and characters in the Operation Status indication area of the display in a random order. You can turn on and off this function.
Operations Common to Each Mode Adjusting the display contrast Setting the clock You can adjust the display contrast to match the angle of installation of the unit. ';' The factory default setting is "6". (Adjustment level:1to 11) 1. Press and hold the [TITLE] button for 1 second or longer to switch to the adjustment selection display. 1. Press and hold the [TITLE] button for 1 second or longer to switch to the adjustment selection display. 2. Press the [<....] or [~>] button to select "CONTRAST". 3.
Operations Common to Each Mode Press the [DISP] button to select a character. Each time you press the [DISP] button, the character changes in the following order: Capital letters -+ Small letters -+ Numbers and Symbols -+ Umlaut -+ Capital letters... 7. Turn the [ROTARY] knob to select the desired character. 8. Repeat steps 5 to 7 to enter up to 10 characters for the title. 9. Press and hold the ["-11] button for 2 seconds or longer to store the title into memory and cancel title input mode.
1 _C_O_VM_D_C_h_a_n-=g~e_r_o":''P_e_ra_t_io_n_s CD/MD changer functions When an optional CD/MD changer is connected through the CeNET cable, this unit controls all CD/MD changer functions. This unit can control a total of 2 changers. Press the [FNC] button and select the CD(MD) changer mode to start play. If 2 CD(MD) changers are connected, press the [FNC] button to select the CD{MD) changer for play. ':' If "NO MAG" appears in the display, insert the magazine into the CD changer.
CD/MD Changer Operations I Selecting a track Repeat play • Track~up 1. Press the [..> ] button to move ahead to the beginning of the next track. 2. Each time you press the [..> ] button, the track advances ahead to the beginning of the next track. Repeat play continuously plays the current track. This function continues automatically until it is cancelled. • Track-down 1. Press the [<...] button to move back to the beginning of the current track. 2. Press the [<...
TV Operations TV tuner functions When an optional TV tuner is connected through the CeNET cable, this unit controls all TV tuner functions. To watch TV requires a TV tuner and monitor. Watching a TV 1. Press the [FNC] button and select the TV mode. 2. Press the [BND] button to select the desired TV band (TV1 or TV2). Each time the button is pressed, the input selection toggles between TV1 and TV2. 3. Press the [<....] or [.->] button to tune in the desired TV station. 1.
TV Operations I Preset scan Preset scan allows the user to view each preset position before it automatically advances to the next preset. This function is useful for searching for a desired TV station in memory. 1. Press the [PIA] button. 2. When the desired station is found, press the [PIA] button again to remain tuned to that station. Note: • Do not press and hold the {PIA} button for 2 seconds or longer.
9. III CASE OF DIFEICULTY % ,,.: ~ I ,,;>; Replace with a fuse of the same amperage. If the fuse blows again, consult your store of purchase. No sound output when operating the unit with amplifiers or power antenna attached. Incorrect wiring. Consult your store of purchase. Power antenna lead is shorted to ground or excessive current is required for remote-on the amplifiers or power antenna. 1. Turn the unit off. 2. Remove all wires attached to the power antenna lead.
I If an error occurs, one of the following displays is displayed. Take the measures described below to eliminate the problem. ...•. "", .~:., ~ ..... , " .' ·i.· 1OO"U, ....qt"'Ry. . .. Measure ..... ERROR 2 A CD is caught inside the CD deck and is not ejected. This is a failure of CD deck's mechanism and consult your store of purchase. c. ERROR 3 A CD cannot be played due to scratches, etc. Replace with a non-scratched, non-warped-disc.
A DISC inside the DVD changer cannot be played. This is a failure of DVD mechanism and consult your store of purchase. A DISC cannot be played due to scratches, etc. Retry or replace with a non-scratched, nonwarped-disc. A DISC inside the DVD changer cannot be played because it is loaded upside-down. Eject the disc then reload it properly Parental level error Set the correct Parental level.
I FMTuner Audio Frequency Range: 87.9 MHz to 107.9 MHz Maximum Power Output: 208 W (52 W X 4 ch) Usable Sensitivity: 9 dBt Continuous Average Power Output: 17 W X 4, into 4 n, 20 Hz to 20 kHz, 1% THD 50dB Quieting Sensitivity: 15 dBf Bass Control Action (50 Hz/80 Hz/120 Hz): +16 dB, -12dB Alternate Channel Selectivity: 70 dB Treble Control Action (8 kHzl12 kHz): ±12 dB Stereo Separation (1 kHz): 35 dB Line Output Level (CD 1 kHz): 1.
Clarion Co., Ltd. All Rights Reserved. Copyright © 2002: Clarion Co., Ltd.
2002/12 (AoD) Printed in China Ilmprime en Chine 1 Gedruckt in China / MP3IWMA Operations / Fon~ MP3lWMA-Betrieb I Operazi , Clarion .. Before using any MP3IWMA discs, please read the following supplemental instructions in conjunction with your Owner's Manual. What is WMA? Displaying CD titles .
Printed in China / irnprirne en Chiiie / Impreso en China 2002/11 (D.C) 284-9707-00 InstallationlWire Connection Guide Guia de instalacion/Conexion .. -1. 11III BEFORE STARTINGI 1. This set is exclusively for use in cars with a negative ground, 12 V power supply. 1. Esta unidad ha sido disenada para utilizarse exclusivamente en autom6viles can fuente de alimentaci6n de 12 V, Y negativo amasa. 2. Read these instructions carefully. 2. Lea cuidadosamente estas instrucciones. 3.
• PRECAUTION • 'Precaution Remove the stopper following the procedures below when this source unit is installed without the universal mounting bracket. Retirer la languette en procedant com me suit pour installer Ie module source sans la patte de montage universe/. 1. Remove the screw from the source unit (Figure 5). 1. Retier la vis du module source (Figure 5). 2. Remove the stopper from the source unit (Figure 6). 2. Retirer la languette du module source (Figure 6). 3.
GIlD -6. 11III WIRE CONNECTIONS I CO'NN:EE(:':~I~la~IJ. ,1!E: I CONEXION DE CABLES Note: Some units do not have connecting leads or jacks. (Refer to *.) RemarqLje: Certains nJont pas de conductEHJ(S i /{? ( Nota: Algunas unidades no tienen cables de conexi6n ni conectores. (Refierase a *.) • Rear Layout • Disposition arriere • Disposici6n de la parte posterior Gray To external amplifier To eliminate audio short circuits, do not remove the caps of unused RCA cables.
E:/EJEMPLO DESISTEMA II example of the system using an external amplifier (Audio Visual) illjExE:tnp~e de systerne uUHsant arnpUficateur interne. (audiomvisueO • Ejemplo de sistema utilizando un amplificador interno. (audiovisual) IE)i(ample()fthe system using an internal amplifier (Audio) illlixempieoe systerne utiHsant un ampHficateur interne" (audio) • Ejemplo de sistema utilizando un amplificador interno. (audio) ~t ~ ~ ~t~~~0 ® 6 ~~....-----.
281-0624-00 2002/4 (A) Clarion LIMITED WARRANTY INFORMATION For USA and Canada only This product is warranted against all defects in material workmanship for a period of one year from the date of original purchase. Clarion ProAudio products, except for speakers, are covered by a two year limited warranty when installed by an authorized Clarion dealer.
••••• , 0 • SOU II D " ' u ... o.
100 CHANNELS OF THE BEST ENTERTAINMENT ON THE ROAD Clarion siriusradio.
60 ORIGINAL MUSIC CHANNELS, ALL COMMERCIAL-FREE. PLUS 40 WORLD-CLASS SPORTS, NEWS AND ENTERTAINMENT CHANNELS -~.~- "a.. .. ".,., \ '7 .. T<>p 40 H;lS 3 . "'dol, Coni_a..,. "" Pop Mi. 5 ~- 7 ~ 8 9 ~ 2 ~ ~ Best Bes' Bes' Best me of 70:1 of tile ao. of .... !:IO:I , EcloctJ< RoxI< Rock HI.. ModenoRock Moono_ Rock 23 fl<>dl aa - RoxI<. 24 25 C1a>sK ........ n&tr¥e 26 11 _ 12 tr¥e I _. ~~- M.. 0..... Country eou",')' ao..
GET READY FOR 100 CHANNELS OF THE BEST IN-CAR ENTERTAINMENT. You've just purchased a Sirius Satellite Radio receiver that's going to plug you into 60 original music channels, from today's hits to R&B oldies to classical masterpieces. From authentic country and real bluegrass to cool jazz, hot latin, reggae and rock. Plus 40 channels of world-class sports, news and entertainment, like ESPN, Radio Disney, EI Entertainment Radio, CNBC, Fox News and Discovery Radio. EXPERIENCE SIRIUS IN TWO SIMPLE STEPS.