Owner’s Manual CA-2200 Power Amplifier
WARNING: TO REDUCE THE RISK OF FIRE OR ELECTRIC SHOCK, DO NOT EXPOSE THIS APPLIANCE TO RAIN OR MOISTURE. CAUTION RISK OF ELECTRIC SHOCK DO NOT OPEN CAUTION: TO REDUCE THE RISK OF ELECTRICAL SHOCK, DO NOT REMOVE COVER. NO USER-SERVICEABLE PARTS INSIDE. REFER SERVICING TO QUALIFIED PERSONNEL. NOTICE All of us at Classé take extreme care to ensure that your purchase will remain a prized investment.
Important Safety Instructions 1. Read these instructions. 2. Keep these instructions. 3. Heed all warnings. 4. Follow all instructions. 5. Do not use this apparatus near water. 6. Clean only with dry cloth. 7. Do not block any ventilation openings. Install in accordance with the manufacturer’s instructions. 8. Do not install near any heat sources such as radiators, heat registers, stoves, or other apparatus (including amplifiers) that produce heat. 9.
Contents Welcome to the Classé family ........................................................................... 5 a word about installation ............................................................................ 5 Unpacking and Placement ................................................................................ 6 unpacking your amplifier ........................................................................... 6 placement .......................................................................
Welcome to the Classé family Congratulations on your purchase of a Classé product. It is the result of many years of continuous refinement, and we are sure that you will enjoy it for many years to come. We value our relationship with our customers. Please allow us to stay in touch with you by returning your warranty card now, before you pack up the shipping carton of your new product and forget all about it.
Unpacking and Placement unpacking your amplifier Carefully unpack your power amplifier according to the supplied instructions, and remove all accessories from the carton. Please take care when lifting the amplifier, as it is quite heavy. Important! Keep all packing materials for future transport of your Classé product. Shipping your new component in anything other than its purpose-designed packing material may result in damage that is not covered by the warranty.
custom installations Drawings are included in this manual to facilitate special installations and custom cabinetry (see the section Dimensions). An optional, purpose-designed rack mount kit is available for this product. Contact your Classé dealer for more information. serial number The serial number for your power amplifier is found on the rear of the unit. Please note and record this number on the page entitled Important Safety Instructions for your future reference.
The CA-2200 includes protection circuitry that will prevent the amplifier from operating at dangerously high or low voltages. • At startup: the AC mains voltage must be within a range of approximately -15% to +10% of its nominal value at startup, or the amplifier will not turn on. For example, a 120V unit requires the AC mains to be between approximately 95V–135V in order to turn on.
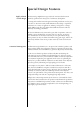
Special Design Features highly refined All Classé analog amplification stages are based on circuits that have been circuit design extensively optimized over many years of continuous development. By starting with excellent circuit designs and working with them over the years, we are able to discover the many small refinements that add up to superlative performance, in a variety of applications.
extraordinary longevity Another benefit of having worked with highly refined circuit designs so extensively over many years is that we have vast experience in what works well over the long term. By using only the highest quality parts to begin with, and then using them in an informed way as a result of both accelerated aging experiments and actual longterm experience, we are able to design and manufacture products which we are confident will stand the test of time.
Front Panel 1 Standby button & LED indicator The front panel Standby button will toggle the amplifier between operate, its fully operational state, and a standby mode that leaves the amplifier off, yet ready to respond to system commands via any of the supported control options (e.g. IR input, DC trigger, CAN-Bus, or RS-232). The current state of the amplifier is indicated by the LED indicator in the center of the Standby button.
Also, it is a good practice to physically disconnect any and all valuable electronics from the AC mains during electrical storms, as a lightning strike anywhere near your home can put a tremendous surge on the AC mains that can easily damage any piece of electronics, no matter how well designed and protected. The best protection in the case of severe electrical storms is to simply remove the electronics from any connection with the power grid.
#!. "53 ). /54 23 7!2.).' ). /54 ). 2%0,!#% &53% 7)4( 3!-% 490% !.$ 2!4).' /.,9 /54 Rear Panel The following descriptions are intended as a quick reference, should you have any questions about your new product. Please see the next section (entitled Initial Setup) for specific advice on incorporating your new amplifier into your system.
The pin assignments of these XLR input connectors are: Pin 1: Signal ground Pin 2: Signal + (non-inverting) Pin 3: Signal – (inverting) Connector ground lug: chassis ground These pin assignments are consistent with the standard adopted by the Audio Engineering Society (AES14-1992). If you are using your Classé power amplifier with a Classé preamplifier, you’re all set – just take standard balanced interconnect cables and plug them in.
Although the binding posts on your Classé amplifier will accept bare wire connections, we strongly recommend the use of high quality spade or hook lugs, crimped and soldered onto the ends of your speaker wires. Using high quality connectors will ensure that your speaker connections do not gradually deteriorate from fraying and oxidizing bare wires. It also helps prevent accidental short-circuits from poorly-terminated connections.
6 DC Trigger Input and Output Many audio/video preamplifiers can supply a DC control voltage to associated equipment in order to induce desired behavior. Your Classé amplifier can take advantage of these capabilities in order to be switched between operate and standby automatically, perhaps in concert with the A/V preamp itself. Two 1/8th-inch mini mono-jacks provide this remote-controlled turn-on (that is, toggling between operate and standby) of the amplifier.
Initial Setup Your new Classé amplifier is quite simple to set up and enjoy. Please follow the steps outlined below in order to safely set up and use your new amplifier. Important: The AC mains connection should be the last connection you make on your new power amplifier. In addition, it is always a good idea to power up your power amplifier(s) last, after everything else has been powered up and has stabilized. .
configuring amplifier turn-on delay/amp no. In a system that contains multiple Classé amplifiers, you may set the number of seconds of turn-on delay for each amplifier, allowing each to turn on in the order you have specified, rather than all at once. This number also acts as an ID when using the CAN-Bus. (Having several powerful amplifiers all turning on at the same time can sometimes stress the AC mains in your home, potentially leading to nuisance tripping of circuit breakers).
If bi-wiring, run a total of four conductors between each amplifier channel and its corresponding loudspeaker: two separate +/– leads, one for the bass and the other for the mids and treble. Make sure that no wires cross between the red (+) and black (–) terminals, at either end. Make sure all the connections are snug and cannot be easily wiggled free, but do not overtighten them. If you can give the speaker wires a reasonable tug without movement, they are snug.
hardware setup 1 20 Classé Delta Series Products Two or more Classé Delta series products are required, at least one of which must have a touchscreen display. 2 Category 5 Network Cables These are ordinary network cables, commonly used for broadband Internet connections. They should be typical “straight through” cables not the “crossed over” type, and the total required will be one less than the total number of Delta series components in your system.
The diagrams below illustrate how to connect the CAN-Bus hardware. Any combination of models in any order without SSP-300 or SSP-600. CAN-BUS IN OUT CAN-BUS IN OUT CAN-BUS IN OUT CAN-BUS IN OUT Any combination of models in any order with SSP-300 or SSP-600. CAN-BUS IN OUT CAN-BUS IN OUT CAN-BUS IN OUT CAN-BUS IN OUT NOTE: Daisy chain may need to be terminated with CAN-Bus Terminator. using CAN-Bus CAN-Bus is controlled via the touchscreen of any Delta series component.
The touchscreen will then display the CAN-Bus devices screen, which lists connected Delta series components by model & serial number. Highlighting a unit on the CAN-Bus devices screen identifies it as the target unit. The front panel LEDs of the target unit will start flashing (unless you highlight the unit that you are using to access CAN-Bus). Once you have chosen the target unit press select. The target unit’s LEDs will stop flashing and the touch screen will list the CAN-Bus features available to it.
global brightness By setting all your components to global brightness you can adjust the touchscreen and LED brightness for your entire system by changing the brightness of a single touchscreen. All CAN-Bus software updates automatically set the updated unit to Global Brightness. If you want a particular unit to be excluded from Global Brightness, deselect Global Brightness for that unit.
PlayLink is automatically active after a software update, and the PlayLink icon will only appear on the CAN-Bus configuration screen of a Delta series disc player. PlayLink can only select a single input per disc player. It is therefore not designed for users who regularly play both CDs and DVDs through different inputs from a single disc player. When PlayLink is active the disc player will default to the same input every time play is pressed, regardless of whether it is playing CD or DVD.
Care and Maintenance To remove dust from the cabinet of your amplifier, use a feather duster or a lintfree soft cloth. To remove dirt and fingerprints, we recommend isopropyl alcohol and a soft cloth. Dampen the cloth with alcohol first and then lightly clean the surface of the amplifier with the cloth. Do not use excessive amounts of alcohol that might drip off the cloth and into the amplifier.
Troubleshooting In general, you should refer any service problems to your Classé dealer. Before contacting your dealer, however, please check to see if the problem is listed here. 1. No sound, and no Channel LED is lit. • The amplifier is not plugged into the AC mains, or the AC mains are down (circuit breaker, fuse). • A brown-out or short-term loss of power might require the internal microprocessor to be reset. Unplug the unit for at least 30 seconds and then plug it in again and try powering it up.
b. If the fuse appears to be blown, replace it only with a fuse of the same type and rating (specified below). Using any other type of fuse, particularly a larger-value fuse, can result in permanent damage to your amplifier. If you are uncomfortable replacing the fuse yourself, contact your Classé dealer for assistance. Mains voltage: Fuse type: Rating: 100/120VAC MDA slow-blow 10A Mains voltage: Fuse type: Rating: 230/240VAC MDL slow-blow 8A c.
Specifications All specifications are accurate at the time of printing. Classé reserves the right to adjust specifications without notice. Power output (both channels driven) Frequency response 200W/ch continuous rms @ 8Ω 400W/ch continuous rms @ 4Ω 10Hz – 22kHz (+0/-0.1dB) 10Hz – 155kHz (+0/-3.0dB) Phase better than -10° @ 22kHz Signal-to-noise ratio 108dB (ref.
Dimensions 29
Classé Audio 5070 François Cusson Lachine, Quebec Canada H8T 1B3 +1 (514) 636-6384 +1 (514) 636-1428 (fax) http://www.classeaudio.com email: cservice@classeaudio.com North America: 1 800 370 3740 email: classe@bwgroupusa.com Europe: 44 (0) 1903 221 700 email: classe@bwgroup.com Asia: (852) 2790 8903 email: classe@bwgroup.hk All Others: +1 514 636 6394 email: cservice@classeaudio.com Copyright © 2007 Classé Audio, Inc. Printed in Canada. V 2.