
Troubleshooting guide


4
up your spa to prevent any damage to the unit.
INITIAL START-UP OF PUMPS (FOR SPAS WITH
WIDE-MOUTH SKIMMER)
• Turnpoweroatthebreaker.
• Makesureallunionttingsaretightenedandvalves
(Gate or Knife) are fully opened.
• Turnpoweronatthemainbreaker.Turnonpump#1.If
circulationisnotvisible,turnopump#1,openbleeder
valve in skimmer cavity and allow air to escape. Re-tight-
en bleeder valve (nger tight only).
Note: Air bleeder valve only needs to be loosened and
not completely removed.
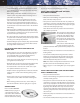
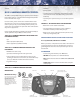
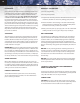
Turnonpump#1.Dependingon
the amount of air trapped in the
pump, this step might need to
be repeated a few times. If this
fails to release air, gently loosen
the pump union until water (and
not air) comes out.
•Oncethereiswaterowfrom
the jets, repeat the process for
pump#2untilwaterowispresentwhenpump#2isac-
tivated.
• Allowbothpumpstocirculatefor2-3minutesbeforeac-
tivating heater.
• Setthedesiredtemperatureusingtheheatercontrol
button on your keypad and the spa will begin to heat.
Depending on initial water temperature, reaching the
desired temperature may take 6-10 hours.
Note: If the water is freshly lled and below the set tem-
perature, the heater will automatically come on.
• Refertopage12-19forsettingltercycleandprogram-
ming.
INITIAL START-UP OF PUMPS (FOR SPAS WITH FRONT
ACCESS SKIMMER/FILTER)
• Turnpoweroatthebreaker.
• Ensureallunionttingsaretightenedandvalves(Gate
or Knife) are fully opened.
• Turnpoweronatthemainbreaker.Turnonpump#1.If
circulationisnotvisible,turnopump#1,openbleeder
valveontopofpump#1andallowairtoescapeuntilwa-
ter comes out steadily. Re-tighten bleeder valve (nger
tight only). Note: Bleeder valve only needs to be loos-
ened and not completely removed. If there is still no cir-
culation, gently loosen the union until only water is pres-
ent and no air.
• Allowbothpumpstocirculatefor2-3minutesbeforeac-
tivating heater.
• Setthedesiredtemperatureusingtheheatercontrol
shipped with ttings disconnected to ensure no dam-
age or freezing occurs during the spa’s route from our
factory to your home.
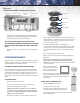
•Beforelling,removelterfromlterhousingandre-
move its plastic bag. Replace lter in housing. Also re-
place lter cap and lock ring.
•FillyourCoastSpawithyourgardenhose.Placethe
hose inside the spa or in the lter canister and secure
the hose in place. Filling through the lter helps to al-
low most of the trapped air in the pumps and heater to
be eliminated. Loosen the bleeder valve in the skimmer
while lling.
•Note:CoastSpasrecommendsyoudonotllyourspa
with hot water. Excessively hot water (over 107 ºF) may
cause damage to components in the spa pack as well as
all plastic and acrylic components.
•Also:Donotllyourspawithwaterfromawatersoften-
er. If your water is extremely hard your Coast Spas dealer
can help you to remedy this problem.
•Continuellingthespatohalf(1/2)wayuptheskimmer
opening. Remove the hose and close the lter canister
(see page 5 lter maintenance).
FILL INSTRUCTIONS FOR CASCADE SERIES SPA
OWNERS ONLY
•TheCascadespaserieshasaspecicllline.Locatedin
the equipment enclosure, on the right-hand side, is a
clear sight tube with a pre-marked (red) ll to line
(8” up from oor of equipment enclosure).
•Fillthespaintheregularmanner(seeabove)byplacing
your garden hose into the spa.
•Allowthewatertospilloverintothedisplacementtank,
until the correct level is reached in the sight tube.
•Donotunderlloroverllasthiscouldcauseaspill-
over problem when the spa is in use.
•Pump#1mustbeprogrammedtocirculatefor24hours.
Failure to do so could result in freezing during colder
weather.
•TheCascadeserieshasapressurizedtoploadlter.
Loosen bleed screw on lter lid before removing lock
ring.
•WhendrainingyourCascadeseries,ensurethatyou
have drained all water. Use the sight glass as a guide.
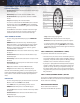
CONTROL PANEL
Please read the CONTROL
PANELS Card (see pages 12
-19) pertaining to the spa
side control and control box
supplied with your unit. This
must be done before starting
BLEEDER VALVE