
Use and Care Manual


Page 9
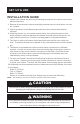
SET UP & USE
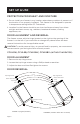
1. Remove any loose items in the freezer and carefully place it on its back.
2. Using a Philips head screwdriver remove the 4 screws and bottom door hinge.
Set them aside.
3. Remove the top hinge cover.
4. Loosen and remove the 4 screws holding the top hinge in place.
5. Remove the top hinge and carefully remove the door.
6. Remove the screw hole cover from the opposite side of the upper cabinet and
reinsert it to the same location to cover the screw hole openings of the just
removed screws.
7. Align the door with the cabinet rst. Then re-install the bottom hinge to the
bottom opposite side of the cabinet. Insert the 4 screws into the holes. Tighten
the screws.
8. Remove the pin cap from the right side of the upper frame of the door, and
then reinsert it to the same location on the opposite side.
9. Align top hinge with screw holes, insert the 4 screws and partially secure.
Make sure the door and cabinet are properly aligned and then secure tightly.
10. Place the unit back in an upright position. Replace the top hinge cover.
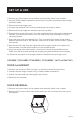
CUL65W, CCUL65B, CCUL65WV, CCUL65BV (WITH WORKTOP)
DOOR ALIGNMENT
1. Remove the worktop. Refer to step 1 on the door reversal instructions.
2. Loosen the top hinge screws using a Phillips head screwdriver.
3. Adjust the door and then Re-tighten the screws.
4. Reattach the worktop.
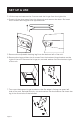
DOOR REVERSAL
1. Remove any loose items in the freezer and carefully place it on its back.
2. Remove the 4 front screw hole covers and then the 4 screws from the top of
the freezer.