
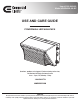
Installation Guide


6
Installation (continued)
2
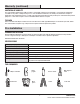
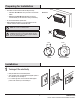
Removing the mounting base plate
□ Loosen the two mounting base plate bolts (E) using an
allen key (CC) and remove the mounting plate (G) from the
xture.
NOTE: Only unscrew the bolts (E) far enough to remove
the mounting plate (G). Do not fully remove the bolts (E).
CC
E
G
3
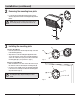
Installing the mounting plate
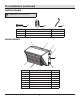
Junction Box Mount
□ Route the junction box wires through the large center hole
in the mounting plate (G).
□ Align the holes on the mounting plate (G) with the holes
on your junction box. Use two #8 screws (AA), depending
on the size of the holes in your junction box, to attach the
mounting plate (G) to your junction box. (Fig. 1)
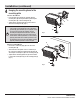
Surface Conduit Mount
□ Mark and drill two to four holes on the wall surface as per
the desired location for attaching the mounting plate (G).
□ Use two or more suitable screws (not included) applicable
to the surface of mounting and attach the mounting plate
(G) on the surface. (Fig. 2)
NOTE: Use the leveling bubble (F) inside the
mounting plate (G) to adjust mounting for a level
install.
Fig. 1
Fig. 2
G
AA
G