
Specifications

Eaton
1121 Highway 74 South
Peachtree City, GA 30269
P: 770-486-4800
www.eaton.com/lighting
Specifications and
dimensions subject to
change without notice.
SEL SERIES
Sure-Lites
SELF-DIAGNOSTIC TESTING OPERATIONS
The Sure-Lites self-diagnostics is continuously monitoring your emergency fixture, and will signal any failure through the 3 color indicator LED.
Initial Operation:
When the unit is first powered up it will go into a 24-hour fast charge and the indicator LED will pulse green. Once the unit has fully charged it
will perform a self calibration. After self calibration, the LED will change to steady green indicating the unit is fully charged and float charging
the battery to maintain readiness.
Automatic Testing:
The unit will perform a battery capacity, lamp/LED, and charge circuit test every 30 days for 30-seconds. During this time, the indicator LED will
change to a steady yellow. It will perform a full battery capacity (90-minute) test once per year. During this time, the indicator LED will change to
a blinking yellow.
Manual Testing:
• 10-Second Installation Test – Press and release the test button once during fast charge (blinking green) to initiate a 10-second quick test. The
sign will switch to emergency mode for 10-seconds allowing the installer to verify proper installation of the unit, and the LED indicator will
turn solid yellow
• 30-Second Test – Press and release the test button once during float charge (steady green). The indicator LED will turn steady yellow to
indicate the unit is performing a 30-second test of the batteries and lamps/LEDs
• 90-Minute Test – Press and release the test button a second time during a 30-second test (steady yellow) to change to a 90-minute test. During
this test, the LED indicator will change to blinking yellow, and the circuit will perform a full battery capacity, charge circuit, and LED test
• Canceling Test – Press and release the test button during the 90-minute test (flashing yellow) to return the fixture to its original state (fast
charge or float charge)
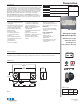
Laser Test:
The SEL SD products are equipped with a Laser Test function that allows the unit to be manually tested without the need to physically press the
test button. Shining a laser pointer in the hole marked “LASER TEST” on the bottom of the unit has the same effect as a press and release of the
test button.
Clearing Failure Codes:
• A battery failure (LED two blink red) can be cleared by replacing the battery. Disconnecting the battery and AC power, or performing a full
90-minute discharge will reset the error code, however, it will return if the battery is faulty
• Charge Circuit (LED three blink red) and lamp/LED failure (LED four blink red) will clear when the unit successfully passes a manual or
automatic 30-second test
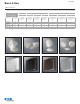
Indicators:
• LED Off - No power to unit, emergency mode
• LED Steady Green - Unit is fully charged and is float charging the battery to maintain readiness
• LED Green Pulse - Unit is in a 24-hour fast charge of the battery
• LED Two Blink Red - Battery has failed a capacity test, or the battery is disconnected. See “Clearing Failure Codes” above
• LED Three Blink Red - Battery charge circuit has failed. See “Clearing Failure Codes” above
• LED Four Blink Red - Lamps have burned out, or on an EXIT/Combo, 50% or more of the LEDs have failed. See “Clearing Failure Codes” above
• LED Steady Yellow - 30-second test or 10-second quick test (Fast Charge only)
• LED Blinking Yellow - 90-minute test
Maintenance:
None required. Replace the batteries as needed according to ambient conditions. However, we recommend that the equipment be tested
regularly in accordance with local codes.