Operator's Manual 9.5 Amp 1314Peak HP F=xed Base Router Model No. 320.17541 0(_)us DOUBLE INSULATED CAUTION Read, understand and follow atl Safety Rules and Operating Instructions in this Manual before using this product. Sears, Roebuck and Co., Hoffman Estates, IL 60179 U.S.A. Visit our Craftsman website: www.craftsman.
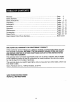
Warranty ..................................................................................................... Safety Symbols ........................................................................................... Safety Instructions ......................................................................................... Unpacking ................................................................................................... Description ..............................................................
The purpose of safety symbols is to attract your attention to possible dangers. The safety symbols, and the explanations with them, deserve your careful attention and understanding. The symbol warnings DO NOT by themselves eliminate any danger. The instructions and warnings they give are no substitutes for proper accident prevention measures.
Z_ WARNING: BE SURE to read and understand all instructions in this manual before using this router. Failure to follow all instructions may result electric shock, fire and/or serious personal injury. WORK AREA SAFETY 1. Keep your work area clean and well lit. Cluttered workbenches and dark areas invite accidents° 2o DO NOT operate power tools in explosive atmospheres, such as in the presence of flammable liquids, gases, or dust. Power tools create sparks which may ignite the dust or fumes. 3.
TOOL USE AND CARE SAFETY Z_ WARNING: operating in electric BE SURE to read and understand this router. Failure to follow all instructions shock, fire and/or serious personal injury. all instructions before listed below may result 1. ALWAYS use clamps or other practical ways to secure and support the workpiece to a stable platform. Holding the work by hand or against your body is unstable and may tead to loss of control° 2, DO NOT force the tool. Use the correct tool and bit for your application.
ELECTRICAL SAFETY cont. 3. BEFORE plugging in the tool, BE SURE that the outlet voltage supplied is within the voltage marked on the tool's data plate. DO NOT use "AC only" rated tools with a DC power supply. 4. AVOID body refrigerators, contact with grounded surfaces, such as pipes, radiators, ranges There is an increased risk of electric shock if your body is grounded. and 5.
SERVICE SAFETY I. If any part of this router is missing or should break, bend, or fail in any way; or should any electrical component fail to perform properly: SHUT OFF the power switch and remove the router plug from the power source and have the missing, damaged or failed parts replaced BEFORE resuming operation_ 2. Tool service must be performed only at a Sears Parts and Repair Center. Service or maintenance performed by unqualified personnel could result in a risk of injury. 3.
SAFETY RULES FOR ROUTERS cont. I3. MAKE SURE the cutter bit is not in contact with the workpiece before the switch is turned on.The bit must ALWAYS be running at full speed before contacting the workpiece. 14_ KEEP HANDS personal 15o PROVIDE CLEARANCE 16_ KEEP CUTTING 17. CLEAR OF CUTTER BIT when motor under workpiece to prevent PRESSURE for router cutter bit when through-cutting, CONSTANT.
A WARNING: Use of this tool can generate dust containing chemicals known to cause cancer, birth defects or other reproductive harm. Some examples of these chemicals are: • Lead from lead-based paints° ° Crystalline silica from bricks and cement and other masonry products o Arsenic and chromium, from chemically treated lumber. Your risk from these exposures varies, depending upon how often you do this type of work.To reduce your exposure to these chemicals: ° Work in a well-ventilated area.
ADDITIONAL RULES FOR SAFE OPERATION cont. 7o ALWAYS check the tool for damaged parts. Before further use of the tool, a guard or other part that is damaged should be carefully checked to determine if it will operate properly and perform its intended function. Check for misalignment or binding of moving parts, breakage of parts, and any other condition that may affect the tool's operation. A guard or other part that is damaged should be properly repaired or replaced at a Sears Service Center,. 8.
PARTSLIST (Fig. 1) 1. Fixed Baseand Motor with1/2-in.Collet/Nut (_ 2. Sawdust Extraction Hood 3. 2 Screws (for attaching Hood) 4. 1/4-in. Collet/Nut 5. Collet/Nut KNOWYOUR FIXED BASE ROUTER (Fig. _p _p Wrench 2) I operating OTE: Before attempting to use your router, familiarize features and safety requirements.
KNOWYOUR FIXED BASE ROUTER cont. (Fig. 2) This Fixed Base 1. 2. Router Powerful, 9.5 Amp routing jobs has the following Soft Start Motor Single speed 25,000 in most materials RPM (no-load features: develops speed) 13/4 Peak HP to handle helps provide most a quality finish 3. Fixed Base features Coarse and Fine Depth Ideal for use with router table, sold separately. 4. Spindle Lock for easy !-wrench bit changes_ Includes 1/4-in.
KNOW YOUR FIXED BASE ROUTER cont. (Fig. 2) Dve Tool Indicator" Light Motor Housing Top Cap Motor Housing Milled Cast Aluminum for Exact Fit Fixed Base Quick Clamp Motor Changing System Handles Clear Plastic Chip Shield Spindfe Lock Non-Marring Sub-Base Self-Releasing Coltets/Nuts System 1/4 and 1/2-inch Cellets/Nuts (1/2-ino installed at factory) Replaceable Brushes (sold., eparately) On/Off Toggle Switch Motor _ Housing, Keystrip "_.
Rating 9°5 Amps ,,, No-load , , 25,000 Speed i ,i ,,,,,,,,,,,,,, , , ,,,,,, RPM' ....... Peak HP 13/4 , ,,,, ,,,,,, i,u,,, ,,,,u,,i 120-volts, Input 60Hz AC , J,t,i Collets/Nuts ............ and Cutter Bi't 's'hank Diameters ,,p, 1/4-in.. 6qnches ,, ,, ,,, Fixed Base Diameter ,, Sub Base Opening ,,,,,.,., (Diameter , , II""'"lll'" for cutter bit use) ..... i ,, 0.23-inches , ,,ll ,, ,,,,,,,, . ,, , ,,, ,,,, ,, , ,.,,.... ,,,, (6ram) ,.
INSTALLING X,,./ AND REMOVING THE CUTTING BIT (Figs. 3, 4 and 4a) _,,. F, 4 I Nut coHet Spindle Lock Fig. 3 Fig. 4a INSTALLING THE CUTTER _._ Cutters BIT 1o Turn motor off and unplug from power source, 2. Remove motor housing from fixed base. fixed pages 17. on removing and installing the motor housing from the NOTE:base See on instructions 3. Set the motor upside down on its top cap, with collet/nut pointing Upo 4.
REMOVING THE CUTTER BIT (Figs. 3 and 4 see page 15) 1. Turn motor off and unplug from power source_ 2. Remove motor from fixed base. 3. Set the motor upside down on its top cap, with collet/nut pointing up.. 4. Press spindle lock button to engage and lock the spindle shaft and cotlet/nut, (Fig. 3). 5.
Fig. 5 INSTALLING ROUTER MOTOR IN BASE (Fig. 5) t, Turn motor off and unplug from power source. 2. Place fixed base on flat surface° 3,_ With back of fixed base facing you, open motor clamp (A) 4. Press in Coarse Adjustment Knob (B) to depart the gears (C) while you align the motor housing's keystrip (D) w{th the keystrip-slot (E) in the fixed base, 5. When the motor's keystrip is aligned and engaged into the base's keystrip slot, slide the motor down into the fixed base_ 6.
ADJUSTING DEPTH OF CUT WARNING: Your router should NEVER BE TURNED ON or be connected to the power source when you are assembling parts, making adjustments, installing or removing collets/ nuts, cutter bits, cleaning or when it is not in use. Disconnecting the router will prevent accidental starting, which could cause serious personal injury. ] NOTE: All depth adjustments motor clamp open.
To Adjust Depth (Figs. 6 and 6a) Turn motor off and unplug from power source° Place router on a flat, level surface with back of fixed base facing you° Open Motor Clamp (A). 2_ With the cutter bit already installed, Press in Coarse Adjustment Knob and lower motor into base until the 3_ (B), cutter bit very close to the flat surface the base is sitting on,turn Fine Adjustment Dial (C) until cutter bit "just" touches the flat surface the base is sitting on,Then lock Motor Clamp (A).
Deep Cuts The proper cutting depth, (for each pass), is always determined the cutter bit size and type, and the power of the motor. by the material, Always make several progressively deeper cuts by starting at one depth and then make several passes, each time increasing the cutting depth until your desired depth is reached.
LED WORKLIGHTS (Fig. 8) Your router motor has 3 built-in worklights located around the collet/nut to provide high visibility of workpiece when cutting. These lights are always "On" when the toggle switch is in the "On "position. Fig • 8 ...... i "t + Fig. 9 "LIVE TOOL INDICATOR" LIGHT (Fig.
EDGE ROUTING OR INTERNAL ROUTING For ease of operation and to maintain proper control, one on each side of the router base. When operating with both hands (see Fig. 10 ). your router has two handles, the router, always hold it firmly Turn the router "On", let the motor build to its full speed, then gradually feed the cutter bit into the workpiece_ ALWAYS be alert and watch what you are doing. NEVER operate the router when you are fatigued,. EDGE ROUTING (Fig.
INTERNAL ROUTING (Figs. 11, 11a, 11b and 12) 1., With depth-of-cut set, tilt router and place on workpiece contacting workpiece first (Fig. 11)_ with leading edge of sub-base 2. Turn motor "On" and let motor build up to its full speed, contact workpiece. being careful not to let cutter 3. To begin your cut, gradually feed the cutter bit into the workpiece is level with the workpiece (see Fig 11 a, 11 b). bit until the subbase 4.
FREEHAND ROUTING WITH THE FIXED BASE (Fig. 13) WARNING: Do not use large cutter bits for freehand routing. Use of large cutter bits when freehand routing could cause loss of control or create other hazardous conditions that could result in personal injury. If using a muter table, large bits should be used for edging only. When used freehand, the router becomes a flexible and versatile tool_ This flexibility makes it possible to easily rout signs, relief sculptures, etc.
EDGING WITH A PILOT BIT (Figs. 14 and 14a) The arbor-type bits with pilots are excellent for edge shaping of any workpiece edge that is either straight, or curved at a curvature as great or greater than the radius of the bit to be used. The pilot prevents the bit from making too deep a cut; and holding the pilot firmiy in contact with the workpiece edge throughout prevents the cut from becoming too shallow.
FEEDING THE ROUTER (Fig. 15) The secret to professional routing is in making a careful set-up for the cut, selecting the proper depth of cut, knowing how the cutter bit reacts in your workpiece, and the rate and direction of feed of the router° Q .< Fig. 15 ROUTER EED DIRECTION ® ROUT END GRAINS FIRST CUTTER BIT (_ DIRECTION OF FEED ROUT,ER FEED DIRECTION - EXTERNAL CUTS (Fig. 15) The router motor and cutter bit rotate clockwise.
DIRECTION OF FEED - INTERNAL CUTS (Figs. '16 and 16a) When making an internal cut, such as a groove, dado or slot, always have the guide you are using with the router (edge guide, straight edge, board guide), on the right-hand side of the router as you make your cut, see Fig_ 16). When the guide is positioned on the right hand side of the router, the router travel should be from left to right and "counterclockwise" around curves (see Fig. 16).
RATE OF FEED (Figs. 17 and 17a) The proper rate of feed depends on several factors: the hardness and moisture content of the workpiece, the depth of cut, and the cutting diameter of the bit. When you are cutting shallow grooves in soft woods such as pine, you may use a faster rate of feed. When making deep cuts in hardwoods such as oak, you should use a slower rate of feed.. FEEDING TOO FAST (Fig.
CHIP SHIELD DEFLECTOR (Fig, 18) _-_ WARNING: ALWAYSis wear eye protection. The chip shield deflector not intended as a safety guard. To remove chip shield from fixed base, press inward on tabs until chip shield releases from base and remove it To attach, place chip shield back in position and flex sides while pushing it in until it snaps back into place (See Fig. 18). Fig.
I WARNING: by a qualified To ensure service safety technician and reliability, at a Sears all repairs Service should be performed Center. GENERAL Only the parts shown on the parts list are intended for repair or replacement customer. All other parts represent an important part of the double insulation and should be serviced only be a qualified Sears@ service technician,.
REPLACEMENT OF CARBON BRUSHES (Fig. 20) Replacement brush sets are available through Sears Parts and Repair Centers° !o Unplug the router motor before inspecting or replacing brushes. 2. Replace both carbon brushes when either has less than !/4-in. length of carbon remaining, or if the spring or wire is damaged or burned. 3.
1 recommended this use tool of might be dangerous and could that result serious injury. [z_ WARNING:for The attachments or accessories areinnot Sears and other Craftsman e outlets offer a large selection of Craftsman router accessories designed for specific routing applications° There is a large selection of Craftsman Router Cutter Bits straight straight .
In additionto a wide variety of routerbits,Sears alsooffers accessoriessuch as: Routertables,various templatesets, universalrouterfence with lock knobs (64181), 11pc. bushingset (64180)and clearsub-basesets; 6pc. fixed base (64182) 6 pcoplungebase (64183)o 1/2-in bead and cove bead cove 1/16-in. ctassic cove with bead [_ 1/4-in roman ogee 3/8-in classic cove & bead Roman ogee rabbeting rabbeting l/4in,yen _ , _i'-'in'_...........
9.5 Amp / 13/4Peak HPMODEL NUMBER 320.17541 The Model Number will be found on the Nameptate_ Always mention the Model Number in all correspondence regarding your too!. Motor Unit ,% # % I I f t ' # # ' 26 # ! t I # I 27 28 28 29 28 70 .,I-31 33-__l' ...... i7 ........
9.5 Amp / 1314Peak HP MODEL NUMBER 320.17541 The Model Number will be found on the Nameplate_ Always mention the Model Number in all correspondence regarding your tool.
9.5 Amp / 1 3/4 Peak HP Fixed Base RouterMODEL NUMBER 320.17541 The Model Number will be found on the Nameplate, Always mention the Model Number in alt correspondence Item No. Parts No. Part regarding ............. Oty_ ...........
9.5 Amp / 1 3/4 Peak HP Fixed Base RouterMODEL NUMBER 320.17541 The Model Number will be found on the Nameplate, Always mention the Model Number in all correspondence Item No. Parts No. Part Description regarding your tool, Qty.
Your Home For repair - in your home - of all major brand appliances, lawn and garden equipment, or heating and cooling systems, no matter who made it, no matter who sold it! For the replacement parts, accessories and owner's manuals that you need to do-it-yourself For Sears professional installation of home appliances and items like garage door openers and water heaters 1-800-4-1VIY-HOME ('I-800-469-4663) wvw_, sears, co m ® Anytime, day or night (USA and Canada) www. sears.