
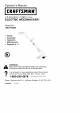
Operator`s manual

GENERALRECOMMENDATIONS
Thewarrantyonthisunitdoesnot
coveritemsthathavebeensubjected
tooperatorabuseornegligence.To
receivefullvaluefromthewarranty,
theoperatormustmaintainunitas
instructedinthismanual.Variousad-
justmentswillneedtobemadeperi-
odicallytoproperlymaintainyourunit.
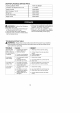
BEFOREEACHUSE
CHECKFORLOOSE
FASTENERSANDPARTS
• HousingScrews
• LockingSleeveAssembly
• AssistHandle
• DebrisShield
• EdgeGuide
CHECKFORDAMAGEDOR
WORNPARTS
ContactaSearsServiceCenterfor
replacementofdamagedorworn
parts.
• TriggerSwitch- Ensureswitchfunc-
tionsproperlybypressingandre-
leasingthetriggerswitch.Makesure
motorstops.
• DebrisShield- Discontinueuseof
unitifdebrisshieldisdamaged.
AFTEREACHUSE
INSPECTANDCLEANUNITANDDE-
CALS
•Aftereachuse,inspectcomplete
unitforlooseordamagedparts.
Cleantheunitusingadampcloth
withamilddetergent.
• Wipeoffunitwithacleandrycloth.
REPLACING THE LINE
• Always use Craftsman replacement
line.
Only use the line size specified and de-
signed for this unit for cutting grass and
small weeds.
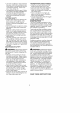
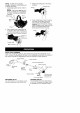
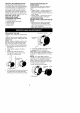
NOTE: Before inserting new line into
the holes in the cutting head, locate
the three hole pattern. Follow direc-
tions as shown on the line glide plate.
1. Remove the old line from the cut-
ting head.
2. Clean entire surface of cutting
head.
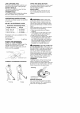
3. Insert both ends of your line
through the proper holes in the
side of the cutting head.
Positioning
Line glide plate
4. Pull the line and make sure the line
is against the hub and extended
full through the positioning tunnels.
5. Correctly installed line will be the
same length on both ends.
CAUTION: If line is installed incor-
rectly, the cutting head will not function
properly and damage to the unit may
occur.
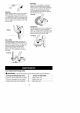
NOTE: Line glide plate must be
installed in cutting head before insert-
ing new line. To reinstall line glide
plate (if needed), align arrow with cen-
ter hole of three hole pattern on side
of cutting head as shown.
Center hole of three hole pattern
Line glide Arrow
Cutting head