
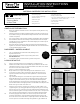
Installation Sheet

• Measuring Tape
• Pencil and Straight Edge
• Rubber Mallet
• Adhesive Tape
• Grout Float
• Margin Trowel
• Microfiber Sponge
• Empty 5 Gallon Pail
• Tile Score & Snap Cutting Tool (dry cut) OR
Wet Saw for corners and curves
• Construction Adhesive
• Silicon Caulk
• Caulking Gun
MATERIALS NEEDED FOR INSTALLATION
INSTALLATION INSTRUCTIONS
FOR LOCKING PORCELAIN TILE
SUBFLOOR PREPARATION
1. Clean the subfloor and make sure it is smooth, flat and dry. Remove any
contaminants.
2. Subfloor must be level with a maximum 3/16 inch in a 10 feet span. If not,
level subfloor using recommended leveling treatments such as Portland
cement compound.
3. For concrete slabs, moisture level should be below 80% relative humidity.
4. Wood subfloors must be structurally sound and deflection free. Repair
squeaky floor prior to installation. Sand down high spots or fill low spots
with patching compound.
5. Check doorframe clearance by placing locking tile with underlayment
against the doorframe. Mark the height and saw the door and doorframe
to the marked height if needed.
RAPIDPREP
™
UNDERLAYMENT
6. Lay out underlayment from wall to wall, making sure it
lays flat and smooth.
7. Allow underlayment sheets to lay touching each other.
DO NOT OVERLAP.
8. Use adhesive tape to fasten sheets together at the joints.
LAYING REVOTILE
™
9. Inspect the locking tiles prior to installation for visible defects.
10. Measure the width of the room and divide by the width of the tile. If the
remainder is 3 inches or less, cut down the width of the first row to allow
the last row to be more than 3 inches.
11. Start at a corner and work left to right.
12. Begin with the two tongue sides facing the two walls in the corner.
13. Use spacers to leave a 1/4 inch expansion gap at the starting corner.
Spacers should be used along the entire perimeter to ensure uniform
1/4 inch gap.
14. Lay the first tile along the corner with the tongue side facing the wall.
Align the adjacent piece on the short side and click it by angling in the
tongue of second tile into the groove of the first tile and then push it
down. Complete the entire first row by repeating this step. Lightly tap
with a rubber mallet and tapping block if needed. Make sure all pieces are
flush on the groove side of the next row.
15. Start the second row by cutting a piece in half or to 33% or 66% of its
original length to get a staggered pattern. Angle the tongue on the long
side into the groove of the first row. Push downwards and make sure the
tiles are clicked together correctly. Hold the next tile close to the previous
tile on the short side and angle in on the long side first and push down.
16. If needed, apply pressure with foot or knee to keep the two tiles level
and in the same plane. Using the mallet and tapping block, tap in the
short side of the second tile until it completely locks into the first. Make
sure the pieces are locked all the way through with no gap visible from
INCORRECT CORRECT
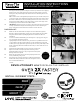
INSTALL KIT
• Perimeter Spacers
• Tapping Block
• Pullbar Tool
Use of
RAPIDPREP
™
is required for
full warranty
protection.