
Install Instructions


5
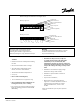
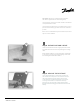
Use a digital ohm meter to measure the resistance of
the LX cable and compare it to the resistance listed on
the product label. Record the measured resistance
on the warranty card. Documenting the resistance at
each stage of installation is required for warranty
purposes. Also, measure the resistance between the
blue, black and shielding/ground wire. Both should read
infinity.
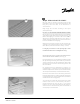
Clean and vacuum the floor thoroughly and remove dust
and debris from the floor that may damage the heating
cable.
Ensure that the subfloor is secure and stable. Carefully fill
in all cracks to prevent any potential damage to the new
tiles resulting from shifts in the subfloor.
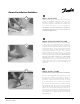
IMPORTANT: the sensor conduit must be centered in
the cable loop (between two red heating wires).
Use duct tape to close the end of the conduit so that thinset
can't penetrate the conduit.
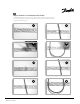
Use duct tape to hold the sensor conduit into the groove to
prevent it from floating up when the mortar or thinset is
poured.
If the sensor is installed directly in the mortar bed, use duct
tape to secure to subfloor.
Step 4. PREPARE SUBFLOOR SURFACE
Step 5. MEASURE THE RESISTANCE
4
5
088L3390 - 06/2009