
User Manual
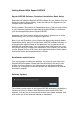


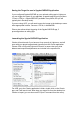

Saving the Target for use in SpyderCHECKR Application
If you configured SpyderCHECKR as your optional editing app in Lightroom,
you can trigger the export of your adjusted, cropped image by going to Menu
> Photo > Edit In > SpyderCHECKR (available in any Mode, but you will
typically be in Develop mode).
If you are using ACR, you will need to save the image to the desktop or some
other appropriate location. Save as a Tiff file, in AdobeRGB.
Phocus also allows direct triggering of the SpyderCHECKR app, if
preconfigured as an editing app.
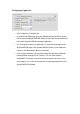
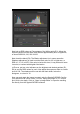
Launching the SpyderCHECKR Application
Checkr will auto-launch if you have set it up correctly in Lightroom, and will
open with your target image already imported into the Checkr application.
Choose “Edit a Copy with Lightroom Presets” to assure that your white
balance and exposure adjustments are included in the exported file.
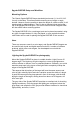
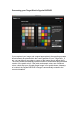
For ACR, go to the Checkr application's folder, double click on the Checkr
app, and it will launch itself. Now drag your target file from the desktop into
Checkr to import (you can also use the "Open" command from the menu).