REFRIGERATEURS INTEGRABLE BUILT-IN REFRIGERATORS INBOUW KOELKASTEN EINBAU KÜHLSCHRÄNKE FRIGORÍFICOS INTEGRABLES REFRIGERADORES UMBUTÍVEIS DRF 313 JE LES NOUVEAUX OBJETS DE VALEUR 2222680-12
Ch•re cliente, cher client, Vous venez dÕacquŽrir un rŽfrigŽrateur De Dietrich et nous vous en remercions. Votre nouvel appareil a ŽtŽ con•u pour vous par nos Žquipes de recherche afin de conserver au mieux vos aliments et rŽpondre ˆ vos exigences les plus ŽlevŽs en termes de performance et de respect de lÕenvironnement. Le design tr•s actuel, des rŽfrigŽrateurs De Dietrich cache de tr•s nombreuses innovations pertinentes.
Avertissements et conseils importants F Il est tr•s important que cette notice dÕutilisation soit gardŽe avec lÕappareil pour toute future consultation. Si cet appareil devait •tre vendu ou transfŽrŽ ˆ une autre personne, assurez- vous que la notice dÕutilisation suive lÕappareil, de fa•on ˆ ce que le nouvel utilisateur puisse •tre informŽ du fonctionnement de celui-ci et des avertissements relatifs. Ces avertissements sont donnŽs pour votre sžretŽ et pour celle dÕautrui.
Protection de lÕenvironnement ¥ Cet appareil ne contient pas, dans son circuit rŽfrigŽrant et ses mati•res isolantes, de gaz rŽfrigŽrant nocifs ˆ la couche dÕozone. LÕappareil ne doit pas •tre mis au rebut avec les ordures urbaines et la ferraille. II faut Žviter dÕendommager le circuit de rŽfrigŽrant, surtout ˆ lÕarri•re de lÕappareil, pr•s de lÕŽchangeur thermique. Vous pouvez vous renseigner sur les centres de ramassage aupr•s de votre bureau municipal.
Utilisation Nettoyage intŽrieur RŽfrigŽration L'appareil Žtant convenablement installŽ, nous vous conseillons de le nettoyer soigneusement avec de l'eau ti•de savonneuse, pour enlever l'odeur caractŽristique de ÇneufÈ. Pour obtenir le meilleur rendement du compartiment rŽfrigŽrateur: ¥ n'introduisez pas d'aliments encore chauds ou de liquides en Žvaporation dans la cuve; ¥ couvrez les aliments, surtout s'ils sont aromatiques; ¥ placez les denrŽes de fa•on ˆ ce que l'air puisse circuler tout autour.
Explication signalŽtique de la zone froide Le symbole ci-contre indique lÕemplacement de la zone la plus froide de votre rŽfrigŽrateur.
Entretien DŽbranchez opŽration. lÕappareil avant toute Attention Cet appareil contient des hydrocarbures dans son circuit rŽfrigŽrant; lÕentretien et la recharge ne doivent donc •tre effectuŽs que par du personnel autorisŽ. DŽgivrage Nettoyage pŽriodique La structure de lÕappareil permet dÕeffectuer un nettoyage de la partie arri•re situŽe pr•s du mur en utilisant Žgalement un aspirateur. Pour effectuer cette opŽration, procŽdez comme suit: 1. Enlevez la plinthe (1); 2.
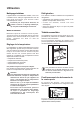
Changement de l'ampoule L'ampoule d'Žclairage dans le compartiment rŽfrigŽrateur est accessible en effectuant les opŽrations ci-dessous: 1. dŽvissez la vis de fixation du plafonnier; 2. dŽcrochez la partie mobile en exer•ant une pression sur celle-ci comme indiquŽ dans la figure. D411 Lorsque la porte est ouverte, si l'ampoule ne s'allume pas, il faut contr™ler qu'elle soit bien vissŽe; si cela n'Žlimine pas le probl•me, mettre une autre ampoule qui ait la m•me puissance.
DŽrangement Rem•de Formation importante de givre dans lÕappareil, Žventuellement aussi au joint de porte - Le joint de porte nÕest pas Žtanche (apr•s changement du sens dÕouverture de la porte); ˆ lÕaide dÕun s•che-cheveux, rŽchauffer avec prŽcaution le joint de porte aux endroits des fuites (pas plus chaud quÕenv. 50¡C). Remettre en m•me temps le joint de porte en forme ˆ la main de mani•re ˆ ce quÕil soit de nouveau en position correcte.
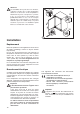
Attention! La réversibilité de la porte une fois effectuée, contrôlez ensuite que le joint magnétique adhère à la carrosserie. Si la température à l'intérieur de la pièce est trop basse (en hiver, p.ex.), il se peut que le joint n'adhère pas parfaitement. Dans ce cas, si on ne veut pas attendre que le joint reprenne ses dimensions naturelles après un certain temps, on pourra accélérer ce processus en chauffant la partie intéressée à l'aide d'un sèche-cheveux.
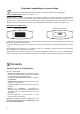
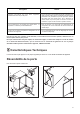
PrŽparation de la grille Ouverture de la porte ˆ gauche: Ouverture porte ˆ droite: - enlevez le c™tŽ gauche (A) de la grille en le coupant de l'arri•re. - enlevez le c™tŽ droit (B) de la grille en le coupant de l'arri•re. ProcŽdez ensuite comme suit pour remettre la grille sur l'appareil: - glissez la grille ˆ la base de l'appareil puis appuyer sur les crochets (a) jusqu'au dŽclic. A B a DO002/2 a DO001 Encastrement sous un plan de travail Dimensions de la niche 1.
3. LÕappareil est ŽquipŽ de pieds rŽgables; pour rŽgler lÕappareil ˆ la hauteur souhaitŽe (870 mm max.), il est nŽcessaire dÕagir sur les 4 pieds rŽglables. 596 5 55 x ma 115° Li89 + 4 4. Pour faciliter le glissement de lÕappareil dans la niche dÕencastrement, appliquez les coussinets fournis sous les deux pieds postŽrieurs. Si nŽcessaire, vous pouvez rŽduire les dimensions des coussinets en les coupant comme lÕindique la figure. 6. Vissez lÕappareil. 5 II52 5.
PARTIE INFƒRIEURE DE LA PORTE DU MEUBLE 275 275 00 x1 ma 9/a 7 1 2 45 ° a b C clic 3 C clic 10 c 8 PARTIE SUPERIEURE DE LA PORTE DU MEUBLE 1 a = = = 10 = 2 9 11 b 13
Montage de la plinthe Attention! Pour ne pas compromettre le bon fonctionnement de lÕappareil, il est nŽcessaire dÕutiliser la grille dÕaŽration dÕorigine. ¥ Si la niche dÕencastrement de lÕappareil a une hauteur de A=820 mm et une hauteur de plinthe a=100 mm, la plinthe peut •tre montŽe sans modification. Il en est de m•me pour une hauteur dÕencastrement de B=870 mm et une hauteur de plinthe b=150 mm.
Important Safety Instructions t It is most important that this instruction book should be retained with the appliance for future reference. Should the appliance be sold or transferred to another owner, or should you move house and leave the appliance, always ensure that the book is supplied with the appliance in order that the new owner can be acquainted with the functioning of the appliance and the relevant warnings. These warnings are provided in the interest of safety.
¥ There are working parts in this product which heat up. Always ensure that there is adequate ventilation as a failure to do this will result in component failure and possible food loss. See installation instructions. ¥ Parts which heat up should not be exposed. Wherever possible the back of the product should be against a wall. ¥ If the appliance has been transported horizontally, it is possible that the oil contained in the compressor flows in the refrigerant circuit.
Use Cleaning the interior Fresh food refrigeration Before using the appliance for the first time, wash the interior and all internal accessories with lukewarm water and some neutral soap so as to remove the typical smell of a brand-new product, then dry thoroughly. The refrigerator compartment is suitable for cooling drinks and for normal food storing.
Explanation of the cold zone signs The symbol shown here on the left indicates the coldest point inside your refrigerator. Coldest area: below or equal to +4¡C Meat, poultry, fish, cold cuts, ready-to-eat meals, mixed salads, egg or cream based mixes and cakes, fresh pasta, cake mixes, pizzas/quiches, fresh foods and fresh-milk cheeses, vegetables ready to be used and packed in plastic bags and all other fresh foods whose expiry date is associated with a preservation temperature below or equal to +4¡C.
Maintenance The structure of the appliance permits cleaning of the rear zone close to the wall, using a vacuum cleaner. 1. Remove the plinth (1), then the ventilation grid (2); 2. Carefully pull the air deflector out (3), checking that there is no water left from the defrosting. Unplug the appliance before carrying out any maintenance operation. Warning This appliance contains hydrocarbons in its cooling unit maintenance and recharging must therefore only be carried out by authorised technicians.
Customer service and spare parts If the appliance is not functioning properly, check that: ¥ the plug is firmly in the wall socket and the mains power switch is on; ¥ there is an electricity supply (find out by plugging in another appliance); ¥ the thermostat knob is in the correct position. ¥ If there are water drops on the bottom of the cabinet, check that the defrost water drain opening is not obstructed (see "Defrosting" section).
Warning! If the ambient temperature is cold (i.e. in Winter), the gasket may not fit perfectly to the cabinet. In that case, wait for the natural fitting of the gasket or accelerate this process by heating up the part involved with a normal hairdrier. 10 13 9 12 11 3 Installation Positioning The appliance should be installed well away from sources of heat such as radiators, boilers, direct sunlight etc.
Grid preparation Left door opening: Remove the left side (A) of the grid cutting it from the rear (see figure). To position the grid on the appliance proceed as follows: Apply the grid to the base of the appliance by pushing on to the clasps (a) until they click. A a B a DO002/2 DO001 Right door opening: Remove the right side (B) of the grid cutting it from the rear (see figure).
2. Push the appliance into place. The plug socket necessary for connection of the appliance to the electricity supply should be positioned, so that the plug is not placed in the recess. 5. The joint cover (B) is to be assembled after having installed the appliance in the recess. 1 2 2 1 B 3 2 3. To adjust the height proceed as follows: - Loosen or tighten the two front feet. - The rear feet are adjusted by turning the screw in the front kick plate to the left or right.
7.
Fitting the plinth Important For the efficient operation of the appliance, it is important that the original ventilation grid is used. = 10 = ¥ For an opening height dimension A=820 mm and a plinth height dimension a=100 mm, the plinth may be fitted without adjustments. The same applies to an opening height dimension B=870 mm and a plinth height dimension b=150 mm.
Waarschuwingen en belangrijke adviezen N Het is uiterst belangrijk dat de bij het apparaat behorende gebruiksaanwijzing bewaard blijft. Zou het apparaat door u aan iemand anders gegeven of verkocht worden, of zou het apparaat in het huis van waaruit u verhuist achterblijven, dan dient de nieuwe gebruik(st)er over de gebruiksaanwijzing en de daarin opgenomen waarschuwingen te kunnen beschikken.
¥ Nooit metalen voorwerpen gebruiken om het apparaat schoon te maken; dit zou het apparaat kunnen beschadigen. ¥ Plaats geen koolzuurhoudende of mousserende dranken in het vriesvak, het vriesgedeelte of de vriezer; de blikjes of flesjes kunnen door bevriezing van de inhoud exploderen. Installatie ¥ Overtuig u er van dat het apparaat niet op het aansluitsnoer staat.
Gebruik Reiniging van de binnenkant Koelen van levensmiddelen Voor u de kast in gebruik neemt, dient u de binnenkant met lauw water en een neutraal schoonmaakmiddel te reinigen om de typische geur van een nieuw apparaat weg te nemen. Droog vervolgens de wanden goed af.
Uitleg van de symbolische tekens van het koude gebied Het symbool hiernaast duidt de plaats aan van het koudste gedeelte van ijskast.
Onderhoud Neem v——r het schoonmaken altijd eerst de stekker uit het stopcontact. Belangrijk Dit apparaat bevat koolwaterstoffen in het koelcircuit; onderhoud en bijvulling dient daarom uitsluitend door door de fabrikant bevoegd personeel uitgevoerd te worden. 1. De sokkel (1) verwijderen; 2. het ventilatierooster (2) demonteren; 3. de verdamperbak (3) voorzichtig verwijderen, let erop dat daarin druppels dooiwater aanwezig kunnen zijn.
Servicedienst en onderdelen Indien het apparaat niet goed funktioneert, kontroleer dan: ¥ of de stekker goed in het zit; ¥ of de elektriciteit soms uitgevallen is; ¥ of de thermostaatknop op de juiste stand staat; ¥ en indien er water op de bodem van de koeler ligt, of het afvoerkanaaltje soms verstopt is (zie hoofdstuk ÒOntdooienÓ). Kunt u de storing niet zelf lokaliseren en verhelpen, raadpleeg dan de dichtsbijzijnde servicedienst. Geef daarbij altijd het model en het typenummer van de kast op.
Attentie! Bij een lage omgevingstemperatuur (bijv. in de winter) kan het voorkomen dat de deurafdichting niet perfect aan de kast hecht. De afdichting wordt na een bepaalde tijd vanzelf in vorm getrokken. Als u dit proces wilt bespoedigen, is het voldoende om de afdichting m.b.v. een haardroger te verwarmen. 10 13 9 12 11 3 Installatie Plaats van opstelling Plaats het apparaat uit de buurt van warmtebronnen: centrale verwarming, kachels, felle zonnestralen enz.
Voorbereiding van het ventilatierooster Neem het rooster uit de onderste verpakkingsschaal. Om het rooster op het apparaat te plaatsen, drukt u het op de haken (a) tot het vastklikt. Deuropening links: - Het linker paneel (A) van het rooster vanaf de achterzijde afsnijden. a A a B DO001 Het rooster met de montagehaken in de nis bevestigen, daarna het rooster monteren. DO002/2 Deuropening rechts: - Het rechter paneel (B) van het rooster vanaf de achterzijde afsnijden.
2. Apparaat naar binnen schuiven. Het stopcontact met randaarde dat het apparaat voor aansluiting nodig heeft, moet zodanig ge•nstalleerd zijn dat het niet door het apparaat wordt bedekt. 5. Voegafdekprofiel op het apparaat plakken (zie afb.). 1 2 2 1 B 3 2 3. Het apparaat is voorzien van verstelbare voeten; u brengt het apparaat op de gewenste hoogte (max. 870 mm) door de voeten in de vier onderhoeken te verstellen. 596 115° 5 55 x ma 4 Li89 + 6. Apparaat vastschroeven 4.
7.
Montage van het sokkelpaneel = 10 = Belangrijk Het originele ventilatie-rooster dient gebruikt te worden opdat de functionaliteit van het apparaat niet belemmerd wordt. ¥ Bij een binnenwerkse inbouwhoogte maat A=820 mm en een sokkelpaneelhoogte maat a=100 mm kan het sokkelpaneel ongewijzigd worden gemonteerd. Dat is ook zo bij een binnenwerkse inbouwhoogte maat B=870 mm en een sokkelpaneelhoogte maat b=150 mm.
Warnungen und wichtige Hinweise D Es ist sehr wichtig, da§ diese Bedienungsanleitung mit dem betreffenden GerŠt aufbewahrt wird. Sollte dieses GerŠt verkauft bzw. einer anderen Person gegeben werden, so ist es nštig, die Anleitung beizufŸgen, damit der neue Kunde Ÿber den Betrieb des GerŠtes bzw. die entsprechenden Warnungen informiert werden kann. Diese Warnungen wurden zu Ihrem bzw. dem Schutz anderer bearbeitet. Wir bitten Sie daher, diese aufmerksam zu lesen, bevor das GerŠt in Betrieb genommen wird.
Die Reifschicht niemals mit MetallgegenstŠnden abkratzen, das GerŠt kšnnte beschŠdigt werden. Dazu nur einen Plastikschaber verwenden. ¥ Benutzen Sie kein mechanisches oder anderes Mittel fŸr einen schnelleren Abtauprozess mit Ausnahme der vom Hersteller empfohlenen. ¥ Zum Lšsen der festgefrorenen Eisschalen keine scharfkantigen oder spitzen GegenstŠnde benutzen. ¥ Es sollten keine kohlensŠurehaltigen GetrŠnke in das Gefrier- bzw. Frosterfach eingestellt werden, sie kšnnten platzen.
Gebrauch Reinigung der Innenteile Richtiges KŸhlen Bevor Sie das GerŠt in Betrieb nehmen, beseitigen Sie den typischen ÇNeugeruchÈ am besten durch Auswaschen der Innenteile mit lauwarmem Wasser und einem neutralen Reinigungsmittel. SorgfŠltig nachtrocknen. Um die besten Leistungen des KŸhlschrankes zu erreichen, beachten Sie bitte folgendes: ¥ keine warmen Speisen oder dampfenden FlŸssigkeiten in den KŸhlschrank einstellen. ¥ Geruchverbreitende Lebensmittel mŸssen abgedeckt oder eingewickelt werden.
ErklŠrung der Symbole des KŸhlraums Das nebenstehende Symbol gibt an, das in diesem Bereich des KŸhlraums die niedrigste Temperatur herrscht.
Wartung Vor jeder Reinigungsarbeit immer den Netzstecker aus der Steckdose ziehen. Achtung Dieses GerŠt erhŠlt im Kaltekreislauf Kohlenwasserstoff. Aus diesem Grund darf die Wartung und das NachfŸllen ausschlie§lich von autorisierten Fachpersonal durchgefŸhrt werden. 1. Nehmen Sie die KŸchenmšbelsockelblende (1) ab; 2. demontieren Sie die BelŸftungsblende (2); 3. ziehen Sie vorsichtig die Verdunsterschale (3) heraus. Achten Sie darauf, da§ sich darin Abtauwasser befinden kann.
Kundendienst und Ersatzteile Falls das GerŠt Stšrungen aufweisen sollte, ŸberprŸfen Sie zuerst folgendes: ¥ Steckt der Netzstecker in der Steckdose? ¥ Befindet sich der Hauptschalter der elektrischen Anlage in der richtigen Stellung? ¥ Ist die Stromzufuhr unterbrochen? ¥ Befindet sich der Thermostatknopf in richtiger Stellung? ¥ WasserpfŸtze auf dem Boden des KŸhlfaches: Abtauwasserloch verstopft? (siehe Abschnitt ÒAbtauenÓ). Sollten Sie nach o.e.
10 13 Achtung! Bei einer niedrigen Raumtemperatur (z.B. im Winter) kann es vorkommen, dass die Dichtung nicht perfekt am Schrank haftet. Die Wiederherstellung der Dichtung erfolgt automatisch nach gewisser Zeit. Wollen Sie aber diesen Prozess beschleunigen, so genŸgt es die Dichtung mit einem Fšn zu erwŠrmen.
Vorbereitung des LŸftungsgitters Nehmen Sie das Gitter aus der unteren Verpackungsschale. FŸr die Positionierung des Gitters am GerŠt drŸcken Sie das Gitter auf die Haken (a) bis diese einrasten. TŸr …ffnung links: - entfernen Sie die linke TŸrlagerblende (A) vom Gitter durch einen Schnitt von hinten. a A a B DO001 Das GerŠt mit den Montagewinkeln in der Nische befestigen, danach das Gitter montieren.
2. GerŠt in die Nische einschieben. Die zum Anschluss des GerŠtes nštige SchutzkontaktSteckdose sollte so positioniert sein, dass sich sie nicht vom GerŠt verdeckt wird. 5. Fugenabdeckprofil am GerŠt ankleben, wie in der Abbildung gezeigt. 1 2 2 1 B 3 2 3. Das GerŠt ist mit regulierbaren FŸssen ausgestattet, um es der gewŸnschten Hšhe (max 870 mm) anzupassen; diese befinden sich an den vier unteren Ecken des GerŠtes. 596 115° 5 55 x ma 4 Li89 + 6. GerŠt festschrauben 4.
7.
Montage der Sockelblende = 10 = Achtung Um die FunktionalitŠt des GerŠtes nicht zu beeintrŠchtigen ist es notwendig das Original-LŸftungsgitter zu benutzen. ¥ Bei einer lichten Einbauhöhe Maß A=820 mm und einer Sockelblendenhöhe Maß a=100 mm kann die Sockelblende unverändert montiert werden. Ebenso bei einer lichten Einbauhöhe Maß B=870 mm und einer Sockelblendenhöhe Maß b=150 mm.
Advertencias y consejos importantes E Es muy importante conservar este libro de instrucciones junto al aparato por si fuera necesario consultarlo. Si el aparato se vendiese o transfiriese a otra persona, acuŽrdese de entregarlo junto con Žl para que el nuevo propietario conozca el funcionamiento de la m‡quina y sus advertencias. Estas advertencias han sido redactadas para su seguridad y para la seguridad de los dem‡s. Le rogamos, por lo tanto, leerlas atentamente antes de instalar y utilizar el aparato.
Protecci—n del ambiente ¥ Este aparato no contiene en el circuito refrigerante y en el aislamiento, gases refrigerantes nocivos para el ozono. El aparato no debe ser eliminado junto con los deshechos urbanos y chatarras. Se debe evitar el da–o del circuito refrigerante, sobre todo en la parte posterior cerca del intercambiador. Las informaciones sobre los centros de recepci—n las suministran las autoridades municipales. Los materiales usados en este aparato marcados con el s’mbolo son reciclables.
Uso Limpieza de las partes internas Refrigeraci—n de los alimentos Antes de utilizar el aparato lavarlo interiormente con agua tibia y jab—n neutro, a fin de eliminar el caracter’stico olor de nuevo y secarlas luego cuidadosamente. Para obtener las mejores prestaciones del compartimento frigor’fico es necesario: ¥ no introducir en la cuba alimentos calientes o l’quidos en evaporaci—n; ¥ cubrir o envolver los alimentos (sobre todo si son arom‡ticos).
Explicaci—n de las se–ales de la zona fr’a El s’mbolo de al lado indica la ubicaci—n de la zona m‡s fr’a en su frigor’fico.
Manutencion Desenchufar el aparato antes de efectuar cualquier operaci—n. Atenci—n Este aparato contiene hidrocarburos en el circuito refrigerante; por lo tanto el mantenimiento y la recarga deben ser efectuados exclusivamente por personal autorizado por la empresa. 1. Sacar el zocalo (1); 2. desarmar la rejilla de ventilaci—n (2); 3. extraer el carter con cautela controlando que no haya huellas de agua.
Si algo no funciona Si el aparato presentase anomal’as ser‡ oportuno controlar: ¥ Que estŽ bien enchufado y que el interruptor de la instalaci—n elŽctrica estŽ conectado. ¥ Que no haya un corte de energ’a elŽctrica. ¥ Que el mando del termostato se encuentre en su posici—n correcta. ¥ Si el compresor funciona sin interrupci—n , verificar que el termostato no se encuentre en una posici—n demasiado elevada.
Atenci—n Completada la operaci—n de reversibilidad de la puerta, controlar que la junta magnŽtica estŽ adherida al mueble. Si la temperatura ambiente es fr’a (por ejemplo en invierno), puede suceder que la junta no adhiera perfectamente al mueble. En este caso esperar que la misma recupere su forma natural o bien acelerar dicho proceso calentando la parte interesada con un normal secador de cabellos.
Preparaci—n de la rejilla Apertura de la puerta a la izquierda: - sacar el lado izquierdo (A) de la rejilla desencaj‡ndolo de atr‡s. DespuŽs, para posici—nar la rejilla en el aparato proceder de la siguiente manera: - acercar la rejilla a la base del aparato, luego apretar en los ganchos (a) hasta el click. A a B a DO002/2 DO001 Apertura de la puerta a la derecha: - sacar el lado derecho (B) de la rejilla desencaj‡ndolo de atr‡s. N.B.
2. Empujar el aparato en el hueco. Se debe poder desenchufar el aparato; por lo tanto una vez efectuada la instalaci—n es necesario que el enchufe no quede escondido. 5. Colocar a presión el cubre-juntas (B) después haber instalado el aparato en el hueco. 1 2 2 1 B 3 2 3. El aparato est‡ dotado de patas regulables (fig.). Para adaptarlo a la altura del espacio (max 870 mm) regule los patas que estan en los quatros ‡ngulos inferiores. Ajustar la altura segœn se indica en la figura.
7. Montar la puerta del mueble.
Montaje del zocalo Importante Para no comprometer la funcionalidad del aparato es necesario utilizar la rejilla de ventilaci—n original. = 10 = ¥ Cuando la altura máxima del hueco es de A=820 mm. ó B=870 mm. y la del zocalo a=100 mm. ó b=150 mm. El montaje se puede realizar sin modificaciones. ¥ Si la altura del zocalo es superior a a=100 mm, b=150 mm, el zocalo debe ser cortado hasta la mitad de la zona cubierta del aparato, a 580 mm de anchura en una altura de a=100 mm, b=150 mm.
Avisos e conselhos importantes P ƒ muito importante que este manual de instru•›es acompanhe o aparelho para garantir uma futura utiliza•‹o correcta. Se o aparelho for vendido ou emprestado a terceiros, o manual de instru•›es deve, como acima citado, acompanh‡-lo, de maneira que o utilizador possa ser informado sobre o seu funcionamento, os avisos e conselhos. Esses avisos t•m a finalidade de garantir a seguran•a dos utilizadores.
¥ Os componentes do aparelho que aquecem devido ao seu funcionamento n‹o devem estar expostos. Sempre que poss’vel as costas do aparelho devem ficar encostadas a uma parede. ¥ Desligue sempre a tomada de corrente antes de proceder ˆ limpeza ou qualquer opera•‹o de manuten•‹o do aparelho. ¥ Ao transportar o aparelho na horizontal, pode acontecer que o —leo contido no compressor escorra para o circuito refrigerante. ƒ portanto aconselh‡vel esperar pelo menos duas horas antes de ligar o aparelho ˆ corrente.
Utiliza•‹o Limpeza das partes internas Estando o aparelho convenientemente instalado, antes de o utilizar, aconselhamos a sua limpeza cuidadosa com ‡gua tŽpida e sab‹o neutro para retirar o cheiro caracter’stico do "novo". Enxague e seque cuidadosamente. N‹o utilize detergentes ou p—s abrasivos, que podem danificar os acabamentos.
Explica•‹o dos sinais da zona frio O s’mbolo aqui ao lado indica a localiza•‹o da zona mais fria no seu refrigerador.
Manuten•‹o Antes de qualquer interven•‹o no aparelho, aconselhamos que se desligue a tomada de corrente. Aten•‹o Este aparelho contŽm hidrocarbonetos no circuito refrigerante, portanto, a manuten•‹o e a recarga devem ser efectuadas exclusivamente por pessoal autorizado pelo produtor. Descongela•‹o A descongela•‹o do refrigerador d‡-se automaticamente durante cada per’odo de paragem do compressor.
2. desengate a parte m—vel carregando como indicado na figura. Se a l‰mpada, com a porta aberta, n‹o acender, verifique se est‡ bem apertada; se o problema persistir, substitua a l‰mpada por uma de igual pot•ncia. A pot•ncia Ž indicada no difusor.
Aten•‹o Depois de terminar de trocar o sentido de abertura das portas, certifique-se que todos os parafusos estejam bem atarraxados e controle se a guarni•‹o magnŽtica est‡ pegada ao m—vel. Se a temperatura ambiente for fria (por ex. no inverno), pode acontecer que a guarni•‹o n‹o pegue perfeitamente ao m—vel. Neste caso, aguarde a natural recupera•‹o da guarni•‹o ou, para tornar mais r‡pido esse processo, aque•a a parte em quest‹o com um normal secador de cabelos.
Prepara•‹o da grade Sentido de abertura da porta para a esquerda: - retirar o lado esquerdo (A) da grade dando um talho por tr‡s. A seguir, para colocar novamente a grade no aparelho proceder conforme a seguir: - aproximar a grade na base da aparelhagem, depois pressionar nos ganchos (a) atŽ o disparo. A a B a DO002/2 DO001 Sentido de abertura da porta para a direita: - remover o lado direito (B) da grade dando um talho por tr‡s. N.B. Montar a grade ap—s ter fixado o aparelho no v‹o com os cal•os.
2. Fa•a escorregar o aparelho para dentro do nicho. O aparelho deve poder ser desligado da rede; uma vez realizada a instala•‹o, portanto, Ž necess‡rio que a ficha fique acess’vel. 5. Coloque a junta de press‹o (B) depois que tendo instalado o aparelho no nicho. 1 2 2 1 B 3 2 3. O aparelho est‡ equipado com pŽs regul‡veis. Para adaptar o aparelho ˆ altura do nicho (m‡x 870 mm), parafusar, ou desaparafusar os pŽs situados em cada ‰ngulo inferior. Igualar a altura como mostrado na figura.
7. Montar a porta do arm‡rio.
Encastrar o rodapŽ Importante Para n‹o comprometer o funcionamento do aparelho Ž necess‡rio utilizar a grade de ventila•‹o original. = 10 = a = 100 b = 150 A = 820 B = 870 11 ¥ No caso de luz m‡xima de medida A=820 mm e de altura do rodapŽ de medida a=100 mm, o rodapŽ pode ser montado do jeito que Ž, sem modifica•›es. Pode-se dizer a mesma coisa no caso de luz m‡xima em altura com medida B=870 mm e de altura do rodapŽ de medida b= 150 mm.
Brandt UK Ltd Intec Four, Wade Road, Basingstoke, Hampshire RG24 8NE Brochures and Stockist information : 08707 505 503 All other departments : 01256 308 000 Service fax : 01256 346 877 Sales Order Processing fax : 01256 843 024 Marketing and Home Economist fax : 01256 325 888 Distributor in Ireland : Quality Electrical Distributors Ltd 143b Slaney Close, Dublin Industrial Estate , Glasnevin, Dublin 11 Sales telephone : 01 878 1996 ; Sales fax : 01 878 1473 Email : sales@qedltd.
Service Consommateurs De Dietrich BP 9526 - 95069 Cergy Pontoise Cedex - France Tel : +33 (0) 825 06 16 04 0,15Eur TTC/MN Service Apr•s vente De Dietrich Tel : +33 (0) 801 63 25 25 Prix appel local Brandt Appliances - 7 rue Henri Becquerel 92854 Rueil-Malmaison cedex - France S.A.S.