
Installation Guide

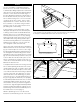

Follow the gapping requirements listed in fig. 1.
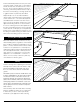
For any decking where two boards meet end-to-
end over a joist, add additional blocking (fig. 2 on
the following page). Allow 1/4" distance between
all decking material and any permanent structure
or post. After all of the decking has been attached,
snap a chalk line (white or yellow chalk
recommended) flush with or up to 1-1/2" out from
the deck framing and trim with a circular saw.
All wood and composite decking products
require proper ventilation and drainage to ensure
their longevity. When using a minimum 2x6 joist
standing on edge and the suggested 1/4" side
gap, there should be a 2" clear space between
the bottom edge of the joists and grade in order to
allow for proper ventilation. Adequate drainage is
also needed to prevent water from pooling under
the deck.
NOTE: ONLY Deckorators Voyage, Vault and
Frontier decking material, manufactured with
Eovations technology, may be installed with the
ground or incidental submersion in water when a
project design requires those conditions.
SLOTTED DECKING INSTALLATION INSTRUCTIONS
USING STOWAWAY
TM
HIDDEN FASTENERS
Each variegated
Deckorators board
has a unique
appearance and
should be arranged
according to the
end user's
preference.
Almacenamiento
Cubra antes de la instalación para evitar manchas
por agua.
Instalación
• Todas las tablas deben distribuirse de forma adecuada
para permitir la expansión y contracción. Permita un
espacio de 1/4 (6.4 mm) entre las orillas de las tablas.
Refiérase a las instrucciones para la instalación completa
para detalles.
• Distribuya todo el material para terrazas a 1/4
(6.4 mm) de distancia de cualquier estructura
permanente o poste.
• Use sujetadores para terrazas resistentes a la corrosión,
de compuesto recubierto para evitar el “efecto hongo”
y la posible decoloración de la terraza.
Espaciado de las vigas
• Espaciado de la viga 16 in (41 cm) en el centro para la
instalación perpendicular a la viga.
• Espaciado de la viga 12 in (31 cm) en el centro para la
instalación diagonal a la viga.
• Consulte el reporte ESR-1573 para opciones de soporte
del escalón.
Visite Deckorators.com para instrucciones completas
de instalación, e información de la garantía y el cuidado
y limpieza.
Deckorators es una marca comercial de Universal Consumer Products, Inc. en
los EE.UU.
La garantía está disponible en www.deckorators.com.
Guarde las etiquetas UPC como comprobante de compra.
Rangement
Couvrez avant l’installation pour prévenir les
taches d’eau.
Installation
• Toutes les planches doivent être espacées
correctement pour permettre la dilatation et le retrait.
Prévoyez un écart d’au moins 6,4 mm (1/4 po) entre
les bords des planches. Consultez les directives
d’installation complètes pour obtenir les détails.
• Éloignez tout le matériau de terrasse de 6,4 mm (1/4
po) de toute structure permanente ou de tout poteau.
• Utilisez des attaches pour matériaux de terrasse
composites, revêtues et résistantes à la corrosion
pour éviter la formation de cloques autour de la tête
d’attache et la décoloration possible de la terrasse.
Espacement des solives
• Espacement aux solives de 41 cm (16 po) entre axes
pour l’installation perpendiculaire aux solives.
• Espacement des solives de 31 cm (12 po) entre axes
pour l’installation diagonale aux solives.
• Veuillez consulter ESR-1573 pour les différentes
options de support de giron.
Visitez Deckorators.com pour les instructions complètes
d’installation, garantie et l’entretien.
Deckorators est une marque de commerce déposée de Universal Consumer
Products, Inc. aux États-Unis.
Le texte de la garantie est disponible à l’adresse www.deckorators.com.
Conservez l’étiquette d’extrémité à code UPC comme preuve d’achat.
Storage
Cover prior to installation to prevent water stains.
Installation
• All boards must be spaced properly to allow for
expansion and contraction. Allow a minimum 1/4-in
gap between board edges. Refer to complete installation
instructions for details.
• Space all decking material 1/4-in away from any
permanent structure or post.
• Use corrosion-resistant, coated composite decking
fasteners to minimize “mushrooming” and possible
decking discoloration.
Joist Spacing
• 16-in on-center for installation perpendicular to the joist.
• 12-in on-center for installation diagonal to the joist.
• Refer to ESR-1573 for stair tread support options.
Visit Deckorators.com for complete installation
instructions, warranty and care and cleaning information.
Deckorators is a trademark of Universal Consumer Products, Inc., in the U.S.
Warranty available at www.deckorators.com.
Save UPC end tags for proof of purchase.
7928 11/14
©2014-2015 Universal Forest Products, Inc. All rights reserved.
1801 E. Lessard, Prairie du Chien, WI 53821, (877) 463-8379
Chaque planche de
platelage possède
une apparence
unique et devrait
donc être
disposée au goût
de l'utilisateur.
Cada tablón tiene
una apariencia
únicay debe ser
colocado de
acuerdo a la
preferencia
del usuario final.
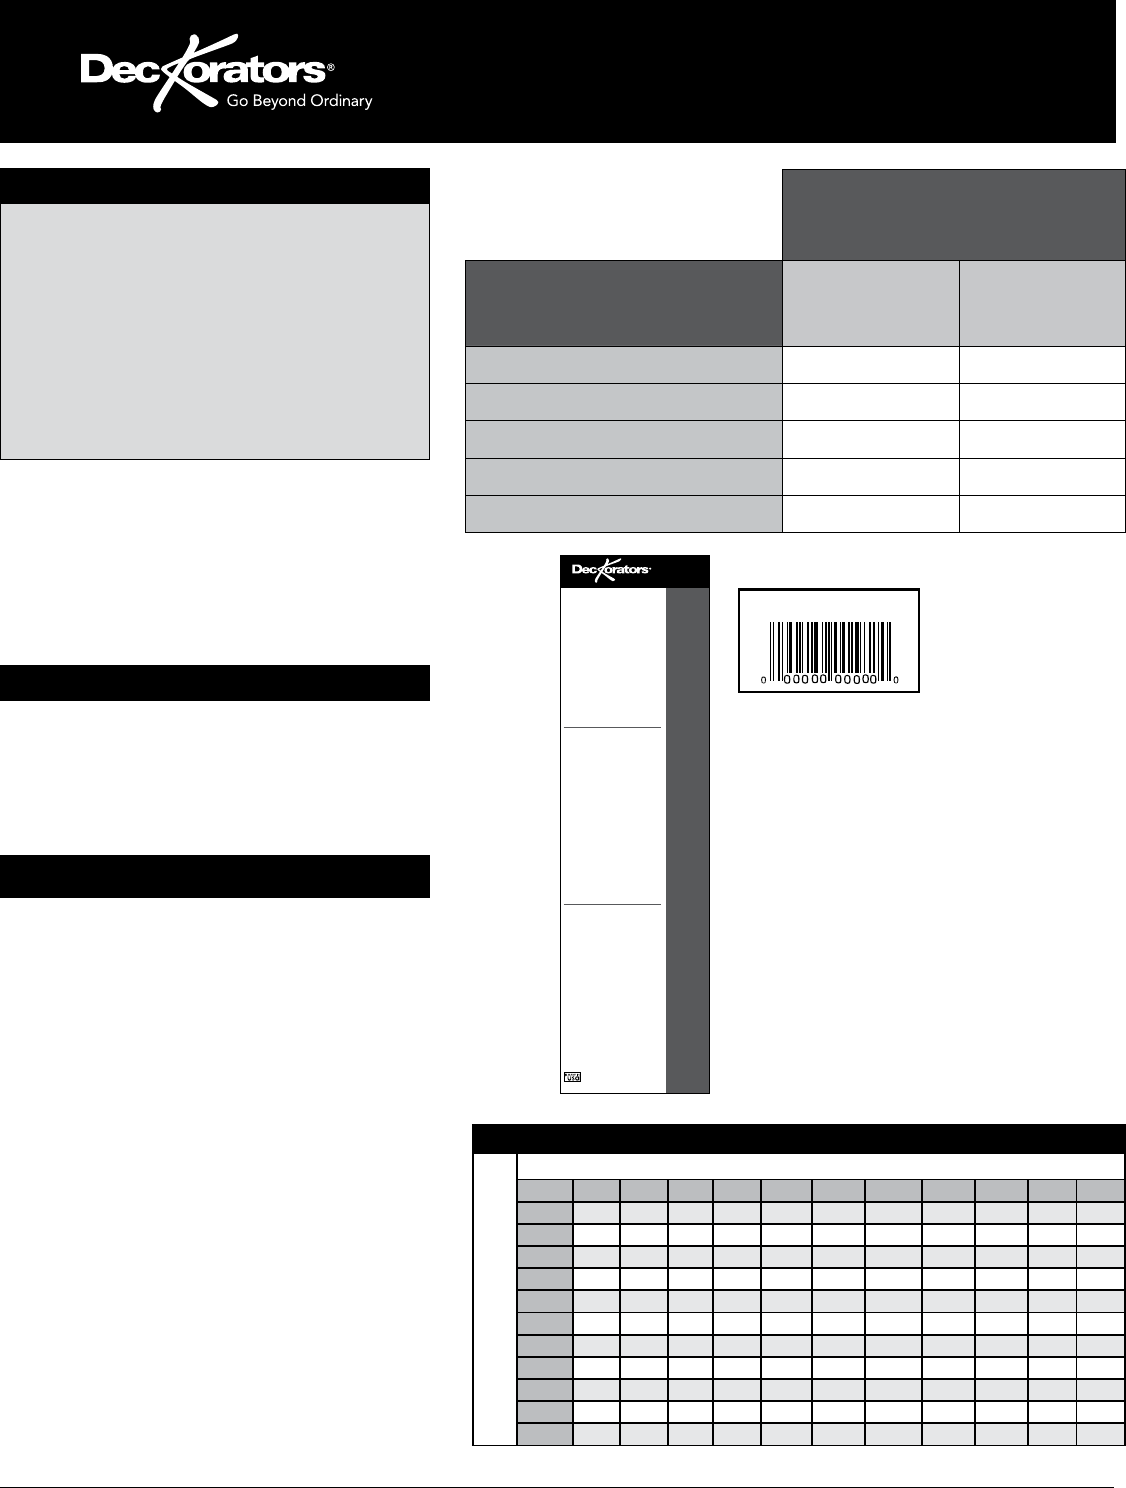
(A) End Tag
(B) Product Sticker
5/4X6-16' GR. DKR.
Each Deckorators Vista, Heritage, Vault and Voyage
board has a unique appearance and should be
arranged according to the end user’s preference.
Prior to construction, check with your local regulatory
agency for special code requirements in your area. For
best results, follow these simple installation instruc-
tions, paying close attention to gapping, spacing and
fastener requirements.
Joist Span
End-to-End Spacing
16" on-center for residential perpendicular appli-
cations. Residential parquet patterns and diago-
nal or herringbone designs require joist spacing
of 12" on-center. Contact Deckorators product
support at 800-332-5724 for commercial appli-
cations. Use 1/4" for side gapping.
fig. 1
Warmest annual temperature °F expected in region
°F 20 30 40 50 60 70 80 90 100 110 120
20 1/8 1/8 1/8 1/8 1/8 3/16 3/16 1/4 1/4 5/16 5/16
30 1/8 1/8 1/8 1/8 1/8 3/16 3/16 1/4 1/4 5/16
40 1/8 1/8 1/8 1/8 1/8 3/16 3/16 1/4 1/4
50 1/8 1/8 1/8 1/8 1/8 3/16 3/16 1/4
60 1/8 1/8 1/8 1/8 1/8 3/16 3/16
70 1/8 1/8 1/8 1/8 1/8 3/16
80 1/8 1/8 1/8 1/8 1/8
90 1/8 1/8 1/8 1/8
100 1/8 1/8 1/8
110 1/8 1/8
120 1/8
Temperature °F on day of installation
Board-End to Board-End Gapping Requirements
Tools and Items Needed
• Drill/power screwdriver
• 1/8" drill bit
• Circular saw with
carbide-tip blade
• Assorted fasteners
(see instructions)
• Tape measure
• Carpenter’s pencil
• Safety glasses/goggles
Notice to installers:
• Use 305 stainless steel,
black head screws
• DO NOT use cordless
impact drivers
• Set drill speed at
1500-1750 RPM
• Max torque not to
exceed 23 inch pounds
• Pre-drill knots
or dense hardwood
JOIST SPACING
DECK SIZE
12” on-center 16” on-center
100 sq. ft. 210 fasteners 175 fasteners
200 sq. ft. 441 fasteners 336 fasteners
300 sq. ft. 672 fasteners 512 fasteners
400 sq. ft. 882 fasteners 672 fasteners
500 sq. ft. 1,113 fasteners 848 fasteners
STOWAWAY
™
HIDDEN FASTENERS
Page 1
Note: Cutting all ends of boards prior to installation recommended.
Note: Always follow best workmanship practices. Including,
and not limited to, square cutting both board ends prior to
installation.