
Use and Care Manual

8
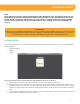
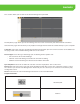
The Live View page is where you will be able to watch a live view of your cameras. If you have not added a
device to your account, access the Device Manager section. See page 13 for more information.
If you have already added a device to your account, you will see the Device name in under the device list on
the left hand side of the screen. Next to the device name will be two icons.
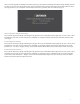
Play: Select Play to start the live stream for all cameras.
Stop: Select Stop to end the live stream for all cameras.
Note that these options will not affect your DVRs recording schedule, and will adjust the live stream only.
The cameras installed are listed under the device as channels. (i.e. CH01, CH02). This list represents the
number of cameras installed, not the number of channels that the DVR has available. This means that if your
DVR has 8 channels, but only 4 have cameras connected, you will only see 4 channel options listed under
the device name.
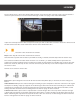
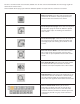
Next to each camera is three icons.
Play: Allows you to begin the live stream for that channel only. When play is selected, the icon changes to
Pause.
Video Camera: Prompts the channel to begin recording to your computer’s hard drive. Select the icon again
to stop the recording. A pop up appears in the lower right corner to indicate that recording has started and
ended. Once recording has ended, the pop will have a Open File option. To adjust the file location, see PC
Storage Location under the Device Management section on page 15 of the manual.
Camera Icon: Allows you to take a snapshot of the current image. Once the snap shot is taken, the image
capture pop up appears in the lower right hand corner of the screen indicating the location of the file and
folder containing the snapshots. To adjust where these files are saved to, see PC Storage Location under the
Device management section on page 15 of the manual.
LIVE VIEW