
Color Printer User Manual

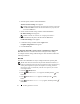
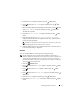

Table Of Contents
- Dell™ 2150cn/2150cdn Color Printer
- User's Guide
- Before Beginning
- Setting up the Printer (Printer Setup)
- Preparing Printer Hardware
- Installing Optional Accessories
- Connecting Your Printer
- Setting the IP Address
- Loading Paper
- Installing Printer Drivers on the Windows Computers
- Installing Printer Drivers on the Macintosh Computers
- Installing Printer Drivers on the Linux Computers (CUPS)
- Using Your Printer
- Dell Printer Configuration Web Tool
- Print Media Guidelines
- Loading Print Media
- Operator Panel
- Printing
- Know Your Printer
- Understanding the Tool Box Menus
- Understanding the Printer Menus
- Understanding Your Printer Software
- Understanding Fonts
- Understanding Printer Messages
- Printing With Web Services on Devices (WSD)
- Specifications
- Maintaining Your Printer
- Maintaining Your Printer
- Removing Options
- Clearing Jams
- Troubleshooting
- Troubleshooting Guide
- Basic Printer Problems
- Display Problems
- Printing Problems
- Print Quality Problems
- The output is too light
- Toner smears or print comes off
- Random spots/Blurred images
- The entire output is blank
- Streaks appear on the output
- Part or the entire output is black
- Pitched color dots
- Vertical blanks
- Ghosting
- Light-induced fatigue
- Fog
- Bead-Carry-Out (BCO)
- Jagged characters
- Banding
- Auger mark
- Wrinkled/Stained paper
- Damage on the leading edge of paper
- Jam/Alignment Problems
- The top and side margins are incorrect
- Color registration is out of alignment
- Images are skewed
- Standard 250-Sheet Tray Misfeed Jam
- SSF Misfeed Jam
- Optional 250-Sheet Feeder Misfeed Jam
- Regi Jam (Exit Sensor On JAM)
- Exit Jam (Exit Sensor Off JAM)
- Standard 250-Sheet Tray/Optional 250-Sheet Feeder Multi-feed Jam
- SSF Multi-feed Jam
- Noise
- Problems With Installed Optional Accessories
- Other Problems
- Contacting Service
- Troubleshooting Guide
- Appendix
- Index

66 Installing Optional Accessories
Constructing a New Wireless Network Environment for Your Computer
When you setup your wireless connection first time, the following settings are
requried on your computer.
For DHCP network:
1
Setting up your computer for wireless connectivity:
NOTE: If your computer provides a wireless adapter tool, change the wireless
settings using this tool. Or you can change the wireless settings using the tool
provided with the operating system. See the instructions below.
For Windows XP and Windows Server 2003:
a
Select
Network Connections
from Control Panel.
b
Right-click
Wireless Network Connection
and select
Properties
.
c
Select the
Wireless Networks
tab.
d
Ensure the check box for
Use Windows to configure my wireless
network settings
is checked.
NOTE: Be sure to write down the current wireless computer settings in step
e and step g so that you can restore them later.
e
Click the
Advanced
button.
f
Select
Computer to Computer
(ad hoc) networks only and close the
Advanced
dialog box.
g
Click the
Add
button to display
Wireless network
properties
.
h
Under the
Association
tab, enter the following information and click
OK
.
Network name (SSID): dell_device
Network Authentication: Open
Data encryption: Disabled
Ad hoc network: checked