
Install Guide


EqualLogic FS7500 Installation and Setup
5 NAS Service Configuration
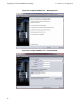
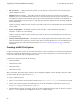
Figure 42: Discover Devices
4. A series of dialog boxes appear, prompting you for the information described in Gathering the NAS Service
Configuration Information on page 49.
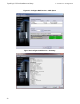
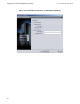
See Figure 43 to Figure 48 for an example of the NAS Service Configuration wizard dialog boxes. When you
click Finish in the final summary dialog box, the NAS Service Configuration Progress window appears,
enabling you to track the progress of the service configuration. The PS Series group remains fully operational
during the NAS service configuration.
By default, the NAS Service will be configured in the default pool (Figure 47). You can select any other
pool that has enough free space for the service; however, you cannot move the NAS Service to a different
pool later. Therefore, select the storage pool carefully, based on expected space usage for the NAS Service
and other pool use (such as volumes, snapshots, and delegated space to replication partners).
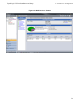
When the NAS service configuration completes, expand Group Configuration in the far-left panel and click
NAS Service service_name. The NAS Service – Status window appears (Figure 49), displaying details
about the NAS service.
After configuring a NAS service, you can create multiple file systems, each with its own size, access controls,
snapshot settings, Common Internet File System (CIFS) shares, and Network File System (NFS) exports. See
Chapter 1, NAS Storage Allocation.
55