
Users Guide


Installing Upgrades 125
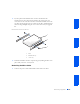
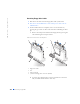
NOTICE: Match the colored strip on the cable with pin 1 on the drive.
Locate the extra connector on the drive cable that is attached to the
first hard drive and attach the connector to the second hard drive.
Floppy Drives
CAUTION: To avoid the possibility of electric shock, turn off the
computer and any devices, disconnect them from their electrical
outlets, and then wait 10 to 20 seconds before you open the
computer cover. Also, before you install a drive, see the other
precautions in “CAUTION: Safety Instructions.”
NOTICE: To avoid possibly damaging the drive by electrostatic discharge
(ESD), ground yourself by touching an unpainted metal surface on the back of
the computer.
1
Unpack the drive and prepare it for installation.
Check the documentation that accompanied the drive to verify that
the drive is configured for your computer. Change any settings
necessary for your configuration.
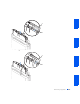
2 If you are installing an IDE drive, configure the drive for the cable
select setting.
You usually configure a drive for cable select by setting a jumper or
switch, depending on the drive. For instructions on configuring the
cable select setting, see the documentation that accompanied the
drive.
3 Open the computer cover.
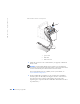
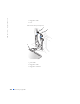
4 If you are replacing a drive, disconnect the power and interface cables
from the back of the drive before you remove the drive.
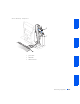
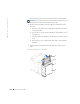
1 rail tabs (2)
2 second hard drive in upper bay
3 first hard drive in lower bay
4 hard drive cage