
Users Guide


6. Press Enter.
The selected physical disk is converted to Non-RAID disks.
Creating the virtual disks
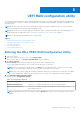
1. Enter the BIOS Configuration Utility. See Entering the BIOS configuration utility on page 21.
2. Select Create Virtual Disks from the Main Menu screen and press <Enter>.
NOTE: The S140 controller supports a maximum of 30 virtual disks per physical disk. You cannot modify any feature
settings in UEFI or OPROM if the number of virtual disks exceeds the maximum limit of 30. For more information about
troubleshooting this issue, see Unable to modify any feature settings in UEFI or OPROM on page 44.
3. In the Physical Disks field, select the physical disk on which you want to create a virtual disk:
a. To select a physical disk, press Insert.
b. After selecting the physical disk to be included in the virtual disk, press Enter.
4. In the User Input field, use the arrow keys to select a virtual disk type (RAID level) and press Enter.
5. Select a size for the virtual disk, depending on the available free space of the physical disks and press Enter.
6. In the User Input field, select a Caching Mode. Press Enter.
7. Press C to confirm that you want to create the virtual disk.
Selecting virtual disk sizes while creating a virtual disk
To create a virtual disk size of < 2.199 TB:
1. Use the up arrow or page up keys to select a size displayed incrementally, or use the down arrow or page down keys to
select a size displayed decrementally.
NOTE:
To increase the size by 10 units use the page up key and to increase the size by one unit use the up arrow key
and conversely.
2. Continue with Creating the virtual disks on page 23.
To create a virtual disk size of > 2.199 TB:
1. Press the Page Up or the up arrow key to increase the virtual disk size. At the maximum size, a dialog box is displayed in the
User Input field. It inquires if you want to limit the size of the virtual disk or exceed the normal maximum size.
2. Press Esc to create a larger virtual disk.
3. Press the Page Up or the up arrow key until the desired or maximum available size has been attained.
4. Continue with Creating the virtual disks on page 23.
Deleting the virtual disks
1. Enter the BIOS Configuration Utility. See Entering the BIOS configuration utility on page 21.
2. In the Main Menu screen, select Deleting Virtual Disk using the arrow keys and press Enter.
3. Select each virtual disk in the Virtual Disks field that you want to delete. Press Insert to confirm each selection.
4. Press Enter.
CAUTION:
Deleting a virtual disk permanently destroys all data that is on the virtual disk, as well as the
virtual disk itself. This action cannot be undone.
5. Press C to confirm the deletion.
NOTE:
When a degraded or a failed virtual disk from one system is added to another system, and if the number of
virtual disks exceeds the maximum limit of 30, you cannot delete the virtual disks that are in the Normal or Ready
states.
BIOS Configuration Utility 23