
Users Guide


46 Using Your Projector
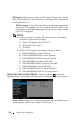
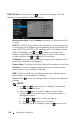
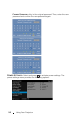
LAN SETTINGS—
Select and press to activate LAN settings. The LAN
settings menu provides the following options:
WIRELESS AND LAN—
Select
Enabled
to activate the Wireless and LAN
function.
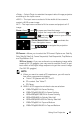
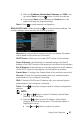
DHCP—
If a DHCP server exists in the network to which the projector
is connected, the IP address will automatically be acquired when you
select DHCP On. If DHCP is Off, manually set the IP Address, Subnet
Mask, and Gateway. Use and to select the number of IP
address, Subnet Mask, and Gateway. Key in enter to confirm each
number and then use and to set the next item.
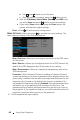
IP ADDRESS—
Automatically or manually assigns the IP address to the
projector connected to the network.
SUBNET MASK—
Configure the Subnet Mask of the network connection.
GATEWAY—
Check the Gateway address with your network/system
administrator if you configure it manually.
DNS—
Check the DNS Server IP address with your network/system
administrator if you configure it manually.
STORE—
Press to save the changes made in network configuration
settings.
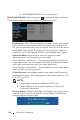
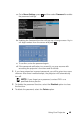
NOTE:
1
Use
and
button to select IP Address, Subnet Mask,
Gateway, DNS, and Store.
2
Press the button to enter IP Address, Subnet Mask,
Gateway or DNS to set the value. (The selected option is
highlighted in blue)
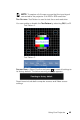
a
Use and button to select the option.
b
Use and button to set the value.
c
After the setup is complete, press the button to exit.