book.book Page 1 Monday, February 2, 2009 12:48 PM Dell™ Vostro™ 1310, 1510, 1710, and 2510 Setup and Quick Reference Guide This guide provides a features overview, specifications, and quick setup, software, and troubleshooting information for your computer. For more information about your operating system, devices, and technologies, see the Dell Technology Guide at support.dell.com Models PP36S, PP36L, and PP36X w w w. d e l l . c o m | s u p p o r t . d e l l .
book.book Page 2 Monday, February 2, 2009 12:48 PM Notes, Notices, and Cautions NOTE: A NOTE indicates important information that helps you make better use of your computer. NOTICE: A NOTICE indicates either potential damage to hardware or loss of data and tells you how to avoid the problem. CAUTION: A CAUTION indicates a potential for property damage, personal injury, or death.
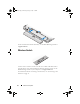
book.book Page 3 Monday, February 2, 2009 12:48 PM Contents 1 About Your Computer . . . . . . . . . . . . . . . . . 7 Front View . . . . . . . . . . . . . . . . . . . . . . . . . 7 Back View . . . . . . . . . . . . . . . . . . . . . . . . . 8 . . . . . . . . . . . . . . . . . . . . . . 9 Battery Removal Wireless Switch . 2 . . . . . . . . . . . . . . . . . . . . Setting Up Your Computer . Quick Setup 10 . . . . . . . . . . . 11 . . . . . . . . . . . . . . . . . . . . . . .
book.book Page 4 Monday, February 2, 2009 12:48 PM Error Messages . . . . . . . . . . . . . . . . . . . 33 Dell Diagnostics . . . . . . . . . . . . . . . . . . . 38 . . . . . . . . . . . . . . . . . . . . 40 . . . . . . . . . . . . . . . . . . 41 . . . . . . . . . . . . . . . . . 42 Solving Problems Power Problems Memory Problems Lockups and Software Problems . . . . . . . . . . 43 . . . . . . . . . . . 45 . . . . . . . . . . . . . . . . .
book.book Page 5 Monday, February 2, 2009 12:48 PM Problems With Your Order . . . . . . . . . . . . . . . . 61 . . . . . . . . . . . . . . . . . . . 61 . . . . . 62 Before You Call . . . . . . . . . . . . . . . . . . . . . 62 Contacting Dell . . . . . . . . . . . . . . . . . . . . . 64 . . . . . . . . . . . . . . . . . . . . . . . . . . . . . . .
book.
book.
book.
book.book Page 9 Monday, February 2, 2009 12:48 PM 1 wireless switch 2 ExpressCard/54 slot 3 USB connectors (2) 4 air vents 5 AC Adapter connector 6 network connector 7 video connector 8 battery CAUTION: Do not block, push objects into, or allow dust to accumulate in the air vents. Do not store your Dell™ computer in a low-airflow environment, such as a closed briefcase, while it is running. Restricting the airflow can damage the computer or cause a fire.
book.book Page 10 Monday, February 2, 2009 12:48 PM For more information about the battery, see the Dell Technology Guide at support.dell.com. Wireless Switch Use the wireless switch to locate networks or to enable or disable wireless network devices. For more information about the wireless switch, see the Dell Technology Guide on your computer or at support.dell.com. For information about connecting to the Internet, see "Connecting to the Internet" on page 13.
book.book Page 11 Monday, February 2, 2009 12:48 PM Setting Up Your Computer Quick Setup CAUTION: Before you begin any of the procedures in this section, follow the safety instructions that shipped with your computer. CAUTION: The AC adapter works with electrical outlets worldwide. However, power connectors and power strips vary among countries. Using an incompatible cable or improperly connecting the cable to the power strip or electrical outlet may cause fire or equipment damage.
book.book Page 12 Monday, February 2, 2009 12:48 PM 3 Connect USB devices, such as a mouse or keyboard (optional). 4 Connect IEEE 1394 devices, such as a media player (optional). 5 Open the computer display and press the power button to turn on the computer. NOTE: It is recommended that you turn on and shut down your computer at least once before you install any cards or connect the computer to a docking device or other external device, such as a printer.
book.book Page 13 Monday, February 2, 2009 12:48 PM 6 Connect to the Internet (optional). See "Connecting to the Internet" on page 13 for more information. 4 5 3 3 2 2 1 1 1 Internet service 2 cable or DSL modem 3 wireless router 4 laptop computer with network adapter 5 laptop computer with wireless network card Connecting to the Internet NOTE: ISPs and ISP offerings vary by country. To connect to the Internet, you need a modem or network connection and an Internet service provider (ISP).
book.book Page 14 Monday, February 2, 2009 12:48 PM Setting Up Your Internet Connection To set up an Internet connection with a desktop shortcut provided by your ISP: 1 Save and close any open files, and exit any open programs. 2 Double-click the ISP icon on the Microsoft® Windows® desktop. 3 Follow the instructions on the screen to complete the setup.
book.book Page 15 Monday, February 2, 2009 12:48 PM Microsoft Windows Vista® 1 Save and close any open files, and exit any open programs. 2 Click the Windows Vista Start button → Control Panel 3 Under Network and Internet, click Connect to the Internet. 4 In the Connect to the Internet window, click either Broadband (PPPoE) or Dial-up, depending on how you want to connect: • Choose Broadband if you will use a DSL, satellite modem, cable TV modem, or Bluetooth wireless technology connection.
book.book Page 16 Monday, February 2, 2009 12:48 PM NOTE: You can transfer information from an old computer to a new computer by directly connecting a serial cable to the input/output (I/O) ports of the two computers. For instructions on setting up a direct cable connection between two computers, see Microsoft Knowledge Base Article #305621, titled How to Set Up a Direct Cable Connection Between Two Computers in Windows XP. This information may not be available in certain countries.
book.book Page 17 Monday, February 2, 2009 12:48 PM 6 On the What do you want to transfer? screen, select the items you want to transfer and click Next. After the information has been copied, the Completing the Collection Phase screen appears. 7 Click Finish. To transfer data to the new computer: 1 On the Now go to your old computer screen on the new computer, click Next. 2 On the Where are the files and settings? screen, select the method you chose for transferring your settings and files and click Next.
book.book Page 18 Monday, February 2, 2009 12:48 PM 6 When the disk creation completes and the Now go to your old computer message appears, do not click Next. 7 Go to the old computer. To copy data from the old computer: 1 On the old computer, insert the wizard disk, and click Start→ Run. 2 In the Open field on the Run window, browse to the path for fastwiz (on the appropriate removable media) and click OK. 3 On the Files and Settings Transfer Wizard welcome screen, click Next.
book.book Page 19 Monday, February 2, 2009 12:48 PM Specifications NOTE: Offerings may vary by region. For more information regarding the configuration of your computer, click Start→ Help and Support and select the option to view information about your computer. Processor Processor type Dell™ Vostro™ 1310, 1510, and 1710: • Intel® Core™2 Duo (1.4–2.6 GHz) • Intel® Celeron® (1.8–2.0 GHz) Dell™ Vostro™ 2510: • Intel® Core™2 Duo (1.4–2.
book.book Page 20 Monday, February 2, 2009 12:48 PM ExpressCard NOTE: The ExpressCard slot is designed only for ExpressCards. It does NOT support PC Cards. ExpressCard controller integrated ExpressCard connector • 54-mm ExpressCard slot (supports both USB- and PCIe-based interfaces) Cards supported ExpressCard/54 (54 mm) (2.126 inches) ExpressCard/34 (34mm) (1.339 inches) ExpressCard connector size 54 mm (2.
book.book Page 21 Monday, February 2, 2009 12:48 PM Memory (continued) Minimum memory Vostro 1310, 1510, and 1710: 512 MB Vostro 2510: 1 GB Maximum memory 4 GB NOTE: In order to take advantage of the dual-channel bandwidth capability, both memory slots must be populated. NOTE: The available memory displayed does not reflect the complete maximum memory installed because some memory is reserved for system files.
book.book Page 22 Monday, February 2, 2009 12:48 PM Communications Modem supports external USB modem Network adapter Vostro 1310, 1510, 1710, and 2510: • 10/100/1000 Ethernet LAN on system board Wireless internal support for PCI-e Mini-Card WLAN and card with Bluetooth V2.0 wireless technology Video NOTE: Optional video controller upgrades are available for your computer subject to availability at the time of purchase.
book.
book.book Page 24 Monday, February 2, 2009 12:48 PM Display (continued) Width Vostro 1310: • 286 mm (11.26 inches) Vostro 1510 and Vostro 2510: • 333.1 mm (13.114 inches) Vostro 1710: • 383.0 mm (15.0 inches) Diagonal Vostro 1310: • 339.5 mm (13.366 inches) Vostro 1510 and Vostro 2510: • 393.2 mm (15.48 inches) Vostro 1710: • 431.71 mm (17.
book.book Page 25 Monday, February 2, 2009 12:48 PM Keyboard Number of keys Vostro 1310, Vostro 1510, and Vostro 2510: • 84 (U.S./Canada); 85 (Europe); 88 (Japan) Vostro 1710: • 105 (U.S./Chinese); 106 (Europe/Brazil); 109 (Japan) Layout QWERTY/AZERTY/Kanji Size: Standard full sized Maximum Vostro 1310, Vostro 1510, and Vostro 2510: • 283.1 mm x 118.9 mm x 5.2 mm (11.146 x 4.681 x 0.205 inches) Vostro 1710: • 359.4 mm x 118.9 mm x 5.2 mm (14.15 x 4.681 x 0.
book.book Page 26 Monday, February 2, 2009 12:48 PM Battery Type Vostro 1310: • 4-cell "smart" lithium ion • 6-cell "smart" lithium ion • 9-cell "smart" lithium ion Vostro 1510 and Vostro 2510: • 6-cell "smart" lithium ion • 9-cell "smart" lithium ion Vostro 1710: • 6-cell "smart" lithium ion • 8-cell "smart" lithium ion Dimensions: Depth 4 cell, 6 cell, and 8 cell: • 50.3 mm (1.980 inches) 9 cell: • 72 mm (2.835 inches) Height Vostro 1310: • 4 cell and 6 cell: 19.9 mm (0.783 inch) • 9 cell: 20.
book.book Page 27 Monday, February 2, 2009 12:48 PM Battery (continued) Ampere hours 6-cell (2.6 AHr) primary battery 6-cell (2.2 AHr) primary battery 9-cell (2.6 AHr) primary battery Voltage 14.8 V (4 cell) 11.1 V (6 cell and 9 cell) Operating time (approximate) 2.5 hours (4 cell) 4–5 hours (6 cell) 7 hours or more (9 cell) NOTE: Battery operating time varies depending on operating conditions and can be significantly reduced under certain power-intensive conditions (see "Power Problems" on page 41).
book.book Page 28 Monday, February 2, 2009 12:48 PM AC Adapter (continued) Dimensions (90 W): Height 33.8–34.6 mm (1.34–1.36 inches) Width 60.9 mm (2.39 inches) Depth 153.4 mm (6.04 inches) Weight (with cables) 0.46 kg (1.01 lb) Temperature range 0° to 35°C (32° to 95°F) Physical Height Vostro 1310: • 23.8–37.2 mm (0.937–1.465 inches) Vostro 1510 and Vostro 2510: • 26.2–38 mm (1.031–1.496 inches) Vostro 1710: • 29–40.5 mm (1.142–1.594 inches) Width Vostro 1310: • 317 mm (12.
book.book Page 29 Monday, February 2, 2009 12:48 PM Physical (continued) Weight Vostro 1310: • minimum 2.1 kg (4.630 lb) with 4-cell battery Vostro 1510 and Vostro 2510: • minimum 2.6 kg (5.72 lb) with 6-cell battery Vostro 1710: • minimum 3.41kg (7.
book.
book.book Page 31 Monday, February 2, 2009 12:48 PM Troubleshooting CAUTION: To guard against the likelihood of electric shock, laceration by moving fan blades, or other expected injuries, always unplug your computer from the electrical outlet before opening the cover. CAUTION: Before you begin any of the procedures in this section, follow the safety instructions that shipped with your computer.
book.book Page 32 Monday, February 2, 2009 12:48 PM If your computer beeps during start-up: 1 Write down the beep code. 2 Run the Dell Diagnostics to identify a more serious cause (see "Dell Diagnostics" on page 38). Code Description (repetitive short beeps) Suggested Remedy 1 BIOS checksum Contact Dell. failure. Possible motherboard failure.
book.book Page 33 Monday, February 2, 2009 12:48 PM Code Description (repetitive short beeps) 5 Real-time clock failure. Possible battery failure or motherboard failure. Suggested Remedy 1 Replace the battery (see your Service Manual at support.dell.com). 2 If the problem persists, contact Dell. 6 Video BIOS Test Failure Contact Dell. 7 CPU-cache test failure Contact Dell.
book.book Page 34 Monday, February 2, 2009 12:48 PM D R I V E N O T R E A D Y — The operation requires a hard drive in the bay before it can continue. Install a hard drive in the hard drive bay. See your Service Manual at support.dell.com for more information. E R R O R R E A D I N G P C M C I A C A R D — The computer cannot identify the ExpressCard. Reinsert the card or try another card. See your Service Manual at support.dell.com for more information.
book.book Page 35 Monday, February 2, 2009 12:48 PM H A R D - D I S K D R I V E F A I L U R E — The hard drive does not respond to commands from the computer. Shut down the computer, remove the hard drive (see your Service Manual at support.dell.com), and boot the computer from a CD. Then, shut down the computer, reinstall the hard drive, and restart the computer. If the problem persists, try another drive. Run the Hard Disk Drive tests in the Dell Diagnostics (see "Dell Diagnostics" on page 38).
book.book Page 36 Monday, February 2, 2009 12:48 PM MEMORY ADDRESS LINE FAILURE AT ADDRESS, READ VALUE EXPECTING VALUE — A memory module may be faulty or improperly seated. Reinstall the memory modules and, if necessary, replace them. See your Service Manual at support.dell.com for more information. M E M O R Y A L L O C A T I O N E R R O R — The software you are attempting to run is conflicting with the operating system, another program, or a utility.
book.book Page 37 Monday, February 2, 2009 12:48 PM O P E R A T I N G S YS T E M N O T F O U N D — Reinstall the hard drive (see your Service Manual at support.dell.com). If the problem persists, run the Dell Diagnostics (see "Dell Diagnostics" on page 38). O P T I O N A L R O M B A D C H E C K S U M — The optional ROM has failed. run the Dell Diagnostics (see "Dell Diagnostics" on page 38). A R E Q U I R E D .
book.book Page 38 Monday, February 2, 2009 12:48 PM T I M E - O F - D A Y C L O C K L O S T P O W E R — System configuration settings are corrupted. Connect your computer to an electrical outlet to charge the battery. If the problem persists, try to restore the data by entering the system setup program, then immediately exit the program (see your Service Manual at support.dell.com). If the message reappears, contact Dell (see "Contacting Dell" on page 64).
book.book Page 39 Monday, February 2, 2009 12:48 PM It is recommended that you print these procedures before you begin. NOTICE: The Dell Diagnostics works only on Dell computers. NOTE: The Drivers and Utilities media is optional and may not ship with your computer. See your Service Manual at support.dell.com to review your computer’s configuration information, and ensure that the device that you want to test displays in the system setup program and is active.
book.book Page 40 Monday, February 2, 2009 12:48 PM Starting the Dell Diagnostics From the Drivers and Utilities Media 1 Insert the Drivers and Utilities media. 2 Shut down and restart the computer. When the DELL logo appears, press immediately. NOTE: If you wait too long and the operating system logo appears, continue to wait until you see the Microsoft® Windows® desktop; then, shut down your computer and try again. NOTE: The next steps change the boot sequence for one time only.
book.book Page 41 Monday, February 2, 2009 12:48 PM Power Problems CAUTION: Before you begin any of the procedures in this section, follow the safety information that shipped with your computer. I F T H E P O W E R L I G H T I S O F F — The computer is either turned off or is not receiving power. • Reseat the power cable in the power connector on the back of the computer and the electrical outlet.
book.book Page 42 Monday, February 2, 2009 12:48 PM E L I M I N A T E I N T E R F E R E N C E — Some possible causes of interference are: • Power, keyboard, and mouse extension cables • Too many devices connected to the same power strip • Multiple power strips connected to the same electrical outlet Memory Problems CAUTION: Before you begin any of the procedures in this section, follow the safety information that shipped with your computer.
book.book Page 43 Monday, February 2, 2009 12:48 PM Lockups and Software Problems CAUTION: Before you begin any of the procedures in this section, follow the safety information that shipped with your computer. The computer does not start up ENSURE THAT THE POWER CABLE IS FIRMLY CONNECTED TO THE COMPUTER AND TO THE ELECTRICAL OUTLET The computer stops responding NOTICE: You may lose data if you are unable to perform an operating system shutdown.
book.book Page 44 Monday, February 2, 2009 12:48 PM A program is designed for an earlier Microsoft® Windows® operating system RUN THE PROGRAM COMPATIBILITY WIZARD — Windows XP: The Program Compatibility Wizard configures a program so that it runs in an environment similar to non-XP operating system environments. 1 Click Start→ All Programs→ Accessories→ Program Compatibility Wizard→ Next. 2 Follow the instructions on the screen.
book.book Page 45 Monday, February 2, 2009 12:48 PM BACK UP YOUR FILES IMMEDIATELY • Use a virus-scanning program to check the hard drive, floppy disks, CDs, or DVDs • Save and close any open files or programs and shut down your computer through the Start menu Dell Technical Update Service The Dell Technical Update service provides proactive e-mail notification of software and hardware updates for your computer.
book.book Page 46 Monday, February 2, 2009 12:48 PM Clicking the Dell Support Icon Click or right-click the icon to perform the following tasks: • Check your computing environment. • View the Dell Support Utility settings. • Access the help file for the Dell Support Utility. • View frequently asked questions. • Learn more about the Dell Support Utility. • Turn off the Dell Support Utility.
book.book Page 47 Monday, February 2, 2009 12:48 PM Reinstalling Software Drivers Identifying Drivers If you experience a problem with any device, identify whether the driver is the source of your problem and, if necessary, update the driver. Windows XP: 1 Click Start→ Control Panel. 2 Under Pick a Category, click Performance and Maintenance, and click System. 3 In the System Properties window, click the Hardware tab, and click Device Manager.
book.book Page 48 Monday, February 2, 2009 12:48 PM Returning to a Previous Device Driver Version Windows XP: 1 Click Start→ My Computer→ Properties→ Hardware→ Device Manager. 2 Right-click the device for which the new driver was installed and click Properties. 3 Click the Drivers tab→ Roll Back Driver. Windows Vista: 1 Click the Windows Vista Start button , and right-click Computer. 2 Click Properties→ Device Manager. NOTE: The User Account Control window may appear.
book.book Page 49 Monday, February 2, 2009 12:48 PM 3 When the InstallShield Wizard Complete window appears, remove the Drivers and Utilities media and click Finish to restart the computer. 4 When you see the Windows desktop, reinsert the Drivers and Utilities media. 5 At the Welcome Dell System Owner screen, click Next. NOTE: The Drivers and Utilities program displays drivers only for hardware that came installed in your computer.
book.book Page 50 Monday, February 2, 2009 12:48 PM 6 Click Browse and browse to the location to which you previously copied the driver files. 7 When the name of the appropriate driver appears, click the name of the driver→ OK→ Next. 8 Click Finish and restart your computer. Restoring Your Operating System You can restore your operating system in the following ways: • Microsoft Windows System Restore returns your computer to an earlier operating state without affecting data files.
book.book Page 51 Monday, February 2, 2009 12:48 PM Starting System Restore Windows Vista: 1 Click Start . 2 In the Start Search box, type System Restore and press . NOTE: The User Account Control window may appear. If you are an administrator on the computer, click Continue; otherwise, contact your administrator to continue the desired action. 3 Click Next and follow the remaining prompts on the screen.
book.book Page 52 Monday, February 2, 2009 12:48 PM Enabling System Restore NOTE: Windows Vista does not disable System Restore; regardless of low disk space. Therefore, the steps below apply only to Windows XP. If you reinstall Windows XP with less than 200 MB of free hard-disk space available, System Restore is automatically disabled. To see if System Restore is enabled: 1 Click Start→ Control Panel→ Performance and Maintenance→ System.
book.book Page 53 Monday, February 2, 2009 12:48 PM 4 To access the recovery options, log on as a local user. To access the command prompt, type administrator in the User name field, then click OK. 5 Click Dell Factory Image Restore. NOTE: Depending upon your configuration, you may need to select Dell Factory Tools, then Dell Factory Image Restore. 6 On the Dell Factory Image Restore welcome screen, click Next. The Confirm Data Deletion screen appears.
book.book Page 54 Monday, February 2, 2009 12:48 PM To reinstall Windows, you need the Dell™ Operating System media and the Dell Drivers and Utilities media. NOTE: The Dell Drivers and Utilities media contains drivers that were installed during the assembly of the computer. Use the Dell Drivers and Utilities media to load any required drivers.
book.book Page 55 Monday, February 2, 2009 12:48 PM 4 To access the recovery options, log on as a local user. To access the command prompt, type administrator in the User name field, then click OK. 5 Click Dell Factory Image Restore. NOTE: Depending upon your configuration, you may need to select Dell Factory Tools, then Dell Factory Image Restore. The Dell Factory Image Restore welcome screen appears. 6 Click Next. The Confirm Data Deletion screen appears.
book.book Page 56 Monday, February 2, 2009 12:48 PM To reinstall Windows, you need the Dell™ Operating System media and the Dell Drivers and Utilities media. NOTE: The Drivers and Utilities media contains drivers that were installed during the assembly of the computer. Use the Dell Drivers and Utilities media to load any required drivers.
book.book Page 57 Monday, February 2, 2009 12:48 PM Finding Information NOTE: Some features or media may be optional and may not ship with your computer. Some features or media may not be available in certain countries. NOTE: Additional information may ship with your computer. Document/Media/Label Contents Service Tag/Express Service Code Label • Use the Service Tag to identify your computer when you use support.dell.com or contact support.
book.book Page 58 Monday, February 2, 2009 12:48 PM Document/Media/Label Contents Safety, Regulatory, Warranty, and Support Documentation • Warranty information This type of information may have shipped with your computer. For additional regulatory information, see the Regulatory Compliance Homepage on www.dell.com at the following location: www.dell.com/regulatory_compliance.
book.book Page 59 Monday, February 2, 2009 12:48 PM Getting Help Obtaining Assistance CAUTION: If you need to remove the computer cover, first disconnect the computer power and modem cables from all electrical outlets. If you experience a problem with your computer, you can complete the following steps to diagnose and troubleshoot the problem: 1 See "Solving Problems" on page 40for information and procedures that pertain to the problem your computer is experiencing.
book.book Page 60 Monday, February 2, 2009 12:48 PM Technical Support and Customer Service Dell's support service is available to answer your questions about Dell™ hardware. Our support staff uses computer-based diagnostics to provide fast, accurate answers. To contact Dell's support service, see "Before You Call" on page 62, and then see the contact information for your region or go to support.dell.com.
book.book Page 61 Monday, February 2, 2009 12:48 PM • Dell Marketing and Sales e-mail addresses apmarketing@dell.com (Asian/Pacific countries only) sales_canada@dell.com (Canada only) • Anonymous file transfer protocol (FTP) ftp.dell.com Log in as user: anonymous, and use your e-mail address as your password. AutoTech Service Dell's automated support service—AutoTech—provides recorded answers to the questions most frequently asked by Dell customers about their portable and desktop computers.
book.book Page 62 Monday, February 2, 2009 12:48 PM Returning Items for Warranty Repair or Credit Prepare all items being returned, whether for repair or credit, as follows: 1 Call Dell to obtain a Return Material Authorization Number, and write it clearly and prominently on the outside of the box. For the telephone number to call for your region, see "Contacting Dell" on page 64. Include a copy of the invoice and a letter describing the reason for the return.
book.
book.book Page 64 Monday, February 2, 2009 12:48 PM Contacting Dell For customers in the United States, call 800-WWW-DELL (800-999-3355). NOTE: If you do not have an active Internet connection, you can find contact information on your purchase invoice, packing slip, bill, or Dell product catalog. Dell provides several online and telephone-based support and service options. Availability varies by country and product, and some services may not be available in your area.
book.
book.
book.
book.