
Deployment Guide

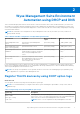
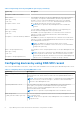
Table Of Contents
- Dell Wyse ThinOS Version 9.1 Migration Guide
- Contents
- Introduction
- Wyse Management Suite Environment Automation using DHCP and DNS
- Register ThinOS devices using Wyse Device Agent
- Add a ThinOS 8.6 device to a group in Wyse Management Suite
- Download the ThinOS firmware, BIOS, and application packages
- Add ThinOS firmware to the Wyse Management Suite repository
- Upgrading ThinOS firmware
- Configuring a ThinOS 9.1 client using Wyse Management Suite
- BIOS Installation
- Delete ThinOS application packages
- Downgrade to previous versions of ThinOS
- Resources and support
- Contacting Dell

Register ThinOS devices using Wyse Device
Agent
If you do not use DHCP or DNS as described in the previous section, you can configure the WDA agent from within the ThinOS
GUI. This has to be configured on every thin client.
Steps
1. From the desktop menu of the thin client, go to System Setup > Central Configuration.
The Central Configuration window is displayed.
NOTE: Privilege must be set to High or Admin Mode must be activated to gain access to the ThinOS Central
Configuration menu.
2. Based on your current ThinOS version, do either of the following:
a. If you are using the ThinOS 8.6 version, go to WDA > WMS tab, and enter the Group Registration Key as configured
by your administrator for the wanted group.
b. If you are using the ThinOS 9.x version, go to WMS tab, and enter the Group Registration Key as configured by your
administrator for the wanted group.
3. Select the Enable WMS Advanced Settings check box.
4. In the WMS server field, enter the Wyse Management Server URL in the format https://server.domain.
This value represents the Wyse Management Suite server from which ThinOS clients are managed and the client
configurations are obtained over SSL.
5. In the Group Registration Key field, enter the group registration key as configured by your Wyse Management Suite
administrator for your group. To verify the setup, click Validate Key.
If the key is not validated, verify the group key and Wyse Management Suite server URL which you have provided. Ensure
that ports mentioned are not blocked by the network. The default ports are 443 and 1883.
NOTE: If the Group Token parameter is not specified, the device is moved to the unmanaged group or quarantine group.
NOTE: If you publish WDA settings or WMS settings policies on the Wyse Management Suite server, ensure that
you specify the Group prefix, Group token field, and enable the Show Advanced Configuration option for providing the
Wyse Management Suite server details. If not specified, the Wyse Management Suite Group Registration Key is cleared
and the Wyse Management Suite server is changed to the default URL—https://us1.wysemanagementsuite.com on the
client side. If you publish the WDA settings using Wyse Management Suite 3.3 or later versions, then this note is not
applicable.
6.
Enable or disable CA validation based on your license type. For public cloud, select the Enable CA Validation check box. For
private cloud, select the Enable CA Validation check box if you have imported certificates from a well-known certificate
authority into your Wyse Management Suite server.
To enable the CA validation option in the private cloud, you must install the same self-signed certificate on the ThinOS
device. If you have not installed the self-signed certificate in the ThinOS device, do not select the Enable CA Validation
check box. You can install the certificate to the device by using Wyse Management Suite after registration, and then enable
the CA validation option.
7. Validate the newly added devices enrollment in Wyse Management Suite, to become manageable. You can enable the
Enrollment Validation option to allow administrators to control the manual and auto registration of thin clients to a group.
When the Enrollment Validation option is enabled, the manual or autodiscovered devices are in the Enrollment Validation
Pending state on the Devices page. The tenant can select a single device or multiple devices on the Devices page and
validate the enrollment. The devices are moved to the intended group after they are validated. For more information about
how to validate the devices, see the Wyse Management Suite 2.0 Administrator's guide at www.dell.com/support.
8. Click OK.
The device checks in to the Wyse Management Suite and the policy settings are applied.
3
10 Register ThinOS devices using Wyse Device Agent