
Users Guide


Installing Dell Wyse USB Imaging Tool
You can install Dell Wyse USB Imaging tool version 3.4.0 on any thin client device that meets the operating system and disk
space requirements.
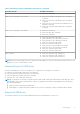
Supported operating systems for USB Imaging Tool installation
Downloading USB imaging tool
Installing USB imaging tool
Uninstalling USB imaging tool
Supported operating systems for Dell Wyse USB
Imaging Tool installation
The following are the supported operating systems:
● Windows Server 2016 Standard
● Windows Server 2019 Standard
● Windows 10 Enterprise Build 1709 (64–bit)
● Windows 10 Enterprise Build 1809 (64–bit)
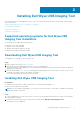
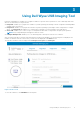
Downloading Dell Wyse USB Imaging Tool
USB Imaging Tool is available on the Dell Support site.
Steps
1. Open a web browser and go to dell.com/support.
2. Click the directory path that displays the latest version of USB Imaging tool.
The download link for USB Imaging tool software along with relevant pdf files such as Release Notes and User’s Guide are
displayed on the web page.
3. Click the download link (.exe file) for USB Imaging tool and navigate to the location where you want to save the self-
extracting .exe file that contains USB Imaging Tool installer.
The file is downloaded in the location you have specified.
Installing Dell Wyse USB Imaging Tool
Prerequisites
● A minimum free disk space of 2 GB to download, extract, and install USB Imaging Tool.
● Microsoft Net Framework 3.5 installed.
NOTE:
If you are installing USB Imaging Tool version 3.4.0 on a thin client device, ensure that you disable the File-Based
Write Filter (FBWF) on the device.
Steps
1. Log in as Administrator in to the system where you want to run the installation and extract the contents of the Dell Wyse
USB Imaging Tool installer.
2. Navigate to the folder where you have extracted the installer and run Dell Wyse USB Imaging Tool.exe.
The Welcome screen is displayed.
2
Installing Dell Wyse USB Imaging Tool 7