
Users Guide


3. Click the Dell Application software EULA link to read the license agreements.
4. Click Next.
The default installation path is displayed.
5. Click Change if you want to specify a custom installation path, and click Next after you specify the path.
6. Click Next to start the installation process.
7. Click Exit to close the installer window.
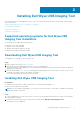
Uninstalling Dell Wyse USB Imaging Tool
Steps
1. Go to Control Panel, and click Programs and Features.
2. From the programs list, select Dell Wyse USB Imaging Tool.
3. Click Uninstall.
The Dell Wyse USB Imaging Tool Uninstallation screen is displayed.
4. Click Next.
After the uninstallation is complete, the Uninstallation Complete message is displayed.
5. Click EXIT to close the Uninstaller window.
NOTE: You can also re-run the Dell Wyse USB Imaging Tool.exe file on your thin client to uninstall USB
Imaging tool.
8 Installing Dell Wyse USB Imaging Tool