Protocol Plus Owner’s Manual Version 2 PREFACE 1 PROTOCOL PLUS™ Controller OWNER’S MANUAL E-98 PN 143895 VERSION 2 12/2010 Copyright © 2010 by Despatch Industries. All rights reserved.
PREFACE 2 Protocol Plus Owner’s Manual Version 2 Revision History Revision P 2.0 Date C-195 7/10 12/2010 Author K. Livingston K. Livingston Description Revise format. Also based on E98 Rev P (12/2008). Remove Protocol Plus Controller to separate Owner’s Manual Copyright © 2010 by Despatch Industries. All rights reserved.
Protocol Plus Owner’s Manual Version 2 PREFACE 3 Table of Contents About This Manual .............................................................................................. 6 1. 1.1. Important User Information ........................................................................ 6 1.2. Manufacturer & Service ............................................................................. 7 1.3. Organization of this Manual ....................................................................... 8 1.
PREFACE 4 Protocol Plus Owner’s Manual Version 2 6. 7. 8. 5.6.6. Setting Up PID Page ............................................................................. 33 5.6.6.1. Access the PID Page ......................................................................... 33 5.6.6.2. Setting up Auto Tune ........................................................................ 34 5.6.7. Setting up the Control Page .................................................................. 34 5.6.7.1.
Protocol Plus Owner’s Manual Version 2 PREFACE 5 Figure 3. Protocol Plus Controller Faceplate. ................................................................. 14 Figure 4. Protocol Plus Menu System—Setup Detail ..................................................... 15 Figure 5. Protocol Plus Controller with Rear Cover Removed, Showing Locations for Optional components. .................................................................................................... 17 Figure 6.
ABOUT THIS M ANUAL 6 1. Protocol Plus Owner’s Manual Version 2 About This Manual 1.1. Important User Information Copyright © 2010 by Despatch Industries. All rights reserved. No part of the contents of this manual may be reproduced, copied, or transmitted in any form or by any means including graphic, electronic, or mechanical methods or photocopying, recording, or information storage and retrieval systems without the written permission of the publisher, unless it is for the purchaser's personal use.
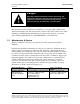
Protocol Plus Owner’s Manual Version 2 ABOUT THIS M ANUAL 7 Danger! Only fully-trained and qualified personnel should setup and maintain this equipment. Improper setup and operation of this equipment could cause an explosion that may result in equipment damage, personal injury or possible death. The information in this document is not intended to cover all possible conditions and situations that might occur.
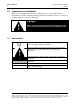
ABOUT THIS M ANUAL 8 Protocol Plus Owner’s Manual Version 2 1.3. Organization of this Manual This owner’s manual contains the most comprehensive set of information for the Despatch Protocol Plus controller, including installation instructions, theory of operation, operating instructions, among other things. Danger! Failure to heed warnings in this instruction manual and on the oven could result in personal injury, property damage or death. 1.4. Conventions O This icon signifies important information.
Protocol Plus Owner’s Manual Version 2 ABOUT THIS M ANUAL 9 1.5.
SAFETY 10 2. Protocol Plus Owner’s Manual Version 2 Safety 2.1. Safety Information Do not work on the Protocol Plus controller without reading and understanding this section which contains important information and warnings. Ignoring these warnings can result in death, serious injury or damage to the machine and product. 2.1.1. Lockout Machine lockout places the Protocol Plus controller into a zero energy state and prevents accidental machine start up.
Protocol Plus Owner’s Manual Version 2 SAFETY 11 2.2. Maintenance Only qualified and trained personnel should perform maintenance or repair. 2.3. Electrical Power Only qualified and trained personnel should perform electrical maintenance or electrical repair. Danger! Contact with energized electrical sources may result in serious injury or death. • • • Before performing maintenance, disconnect all electrical power from the machine.
THEORY OF OPERATION 12 3. Protocol Plus Owner’s Manual Version 2 Theory of Operation The Protocol Plus is a modular microprocessor based digital temperature controller (Figure 1). The Protocol Plus controller operates as a dualfunctioning controller/high limit instrument. The control portion utilizes a time-proportioning voltage signal to control heating devices with minimal temperature fluctuations. The high limit portion protects the product and/or the oven from overheating.
Protocol Plus Owner’s Manual Version 2 THEORY OF OPERATION 13 3.1. System Control—In General • • • The Protocol Plus controller provides outputs for the cooling fan, door lock switch/door release pushbutton, and optional beacon light As many as eight profiles for oven heating cycles are stored in the Protocol Plus controller. Access profiles using the Protocol Plus keypad. The Protocol Plus controls the solenoid valves in an inert atmosphere oven for purge and maintain operation 3.1.1.
THEORY OF OPERATION 14 Protocol Plus Owner’s Manual Version 2 Oven Temperature Select mode of operation Run/Hold:Press to activate mode of operation Power Stop: Press to Stop any Mode Heater Profile Hi-Limit Alarm Timer Soak Alarm Manual Outputs 1-4 Cycle Complete Information on control status Page Reset Menu View Adjust parameter settings up or down as necessary Figure 2. Protocol Plus Displays and Control Buttons. Figure 3. Protocol Plus Controller Faceplate.
Protocol Plus Owner’s Manual Version 2 THEORY OF OPERATION 15 3.3. Modes and Menus The Protocol Plus controller uses a menu system to display, setup and run the different modes and configurations available for the LCC Oven (Figure 4). Figure 4. Protocol Plus Menu System—Setup Detail Copyright © 2010 by Despatch Industries. All rights reserved.
THEORY OF OPERATION 16 Protocol Plus Owner’s Manual Version 2 3.4. Indicators Refer to Figure 2: • Power LED: Indicates power supplied to instrument • Heater LED: Indicates heater output active • Profile LED: Indicates Profile Mode is in operation • Timer LED: Indicates Timer Mode is in operation • Manual LED: Indicates Manual Mode is in operation • Cycle Complete LED: Indicates control is in Stopped or Standby modes. • Hi-Limit Alarm LED: Indicates high limit relay has tripped (de-energized).
Protocol Plus Owner’s Manual Version 2 • • • • THEORY OF OPERATION 17 Heating output: The control output is a DC voltage open-collector output which is time-proportioned and designed to control a heat control device such as a solid state relay. High limit: The high limit output is a form C relay which is energized under normal operating conditions.
ASSEMBLY & SETUP 18 4. Protocol Plus Owner’s Manual Version 2 Assembly & Setup Danger! All grounding and safety equipment must be in compliance with applicable codes, ordinances and accepted safe practices. Warning! Disconnect the main power switch or power cord before attempting any repair or adjustment. 4.1. Install the Protocol Plus Controller When replacing a Protocol Plus controller, follow the steps below. Tools required for installation include ¼” socket set with #1 bit, #2 Philips screwdriver.
Protocol Plus Owner’s Manual Version 2 ASSEMBLY & SETUP 19 Figure 6. Protocol Plus Wiring Diagram. 4.2. MRC5000 Setup (Optional) O Refer to instructions provided recorder manufacturer for more specific installation notes. Temperature is retransmitted to the MRC5000 recorder from the controller. Set up the recorder by: 1. Ensure hardware jumper JU1 is in place for the 5 VDC setting (Refer to MRC5000 Manual included). 2. Move Mode to PROG/TEST/CAL to display Prog. 3. Press ▼ twice to display Inps.
ASSEMBLY & SETUP 20 Protocol Plus Owner’s Manual Version 2 Table 1. MRC 5000 Settings. Parameter Code Degrees C Inps 18 Degrees F 18 Icor 0 0 diSP On On dPOS 0 0 EUU 1 400 752 EUL1 0 32 ChUP 400 800 ChLO DFF 0 1 0 1 2 1 These values must match the settings RetOutLo and RetOutHi on the Protocol Plus Control page. For example, if RetOutLo is 32, EUL must read 32. 2 Change 0-400 chart paper to 0-800 chart paper.
Protocol Plus Owner’s Manual Version 2 5. OPERATION 21 Working with Operating Modes O Users and operators of this controller must comply with operating procedures and training of operating personnel as required by the Occupational Safety and Health Act (OSHA) of 1970, Section 5 and relevant safety standards, and other safety rules and regulations of state and local governments. Refer to the relevant safety standards in OSHA and National Fire Protection Association (NFPA), Section 86 of 1990. 5.1.
OPERATION 22 Protocol Plus Owner’s Manual Version 2 O Control can be configured to automatically activate Manual, Timer or Profile Mode when power is applied (power switch ON). Refer to Section 5.5. 5.2. Manual Mode 1. Press Select until Manual displays. O Press Run at any time in the procedure to activate Manual Mode. 2. Press Menu to display the Process Temperature Setpoint (Setpt). Change Setpoint (Setpt) by pressing ▲ or ▼.
Protocol Plus Owner’s Manual Version 2 OPERATION 23 5.3. Timer Mode 1. Press Select until Timer displays. O Press Run at any time in the procedure to activate Timer Mode. 2. Press Menu to display the Process Temperature Setpoint (Setpt). Change Setpoint (Setpt) by using ▲ or ▼ to change the value. O If the SPChange on the Enable page in Setup Mode has been set to DISABLED, it must be changed to ENABLED before any changes to the process temperature and high limit setpoints can be made. 3.
OPERATION 24 Protocol Plus Owner’s Manual Version 2 5.4. Profile Mode 1. Press Select until Profile is displayed. None may display if a profile has not been selected or no profiles have been entered. 2. Press ▲ or ▼ to display the desired profile. 3. Start Profile Mode by pressing Run. The display will change from Stop to Run and show segment time remaining, Temperature Setpoint, Profile #, and the current segment number. To return to Stopped Mode, press Stop.
Protocol Plus Owner’s Manual Version 2 OPERATION 25 To activate Auto Start: 1. On Auto Start page, set Enable to Yes. 2. LCD displays Active, current date and time To deactivate Auto Start, on Auto Start page, set Enable to No. Once Auto Start is activated, continue to use all operating modes as you normally would.
OPERATION 26 Protocol Plus Owner’s Manual Version 2 Exit Setup by pressing Page and holding for three seconds. Access each of individual Setup pages by pressing Page until the desired heading displays. Press Menu to access Menu parameters. Press ▲ or ▼ to change Menu parameter settings. Refer to the Quick Reference and Default Values Appendix (Section 8.1) for default and available settings. 5.6.2.
Protocol Plus Owner’s Manual Version 2 OPERATION 27 5.6.3.1. Using the Program Page After entering the Program Page, press Select to reach the profile you desire to enter/edit. Press Menu to select the profile. The first parameter displays: Profile #, Segment 1, Ramp Time. Adjust the value by pressing ▲ or ▼. When the proper value is displayed, press Menu to continue to the next parameter. Continue using the Menu to view and adjust each parameter.
OPERATION 28 • • • Protocol Plus Owner’s Manual Version 2 Relay 2: End of cycle relay Relay 3: Optional N2 purge event Relay 4: Optional N2 maintain event Table 2. Program Page Menu Items and Explanation.
Protocol Plus Owner’s Manual Version 2 OPERATION 29 Table 3. Parameter Definitions and/or Ranges. Parameter Definition and/or Range Profile # Segment # Eight profiles are available Program recipe segments one through eight. Give each segment its own set of events, ramp and soak times and soak temperature. Ramp Time Time required to move oven temperature from one setpoint to another. Values between 0 and 99:59 are allowed. The Protocol Plus controller stores profile ramp and soak times without units.
OPERATION 30 Protocol Plus Owner’s Manual Version 2 5.6.4. Sample Profile Figure 7 shows a graphic representation of the sample profile, while Figure 8 shows the parameters entered to achieve that profile. Figure 7. Sample Profile. Copyright © 2010 by Despatch Industries. All rights reserved.
Protocol Plus Owner’s Manual Version 2 OPERATION 31 Figure 8. Sample Profile Values. 5.6.5. Setting Up Auto Start Auto Start allows the operator to start Manual, Timer, or Profile modes automatically at a preset time and day. Table 4 shows the menu items available. Table 4. Auto Start Menu Parameters and Values.
OPERATION 32 Protocol Plus Owner’s Manual Version 2 Menu Item Display Description Tuesday time Wednesday mode Wednesday time Thursday mode Thursday time Friday mode Auto Start Tue Time Auto Start Wed Mode Auto Start Wed Time Auto Start Thu Mode Auto Start Thu Time Auto Start Fri Mode Auto Start Fri Time Auto Start Sat Mode Auto Start Sat Time Set time on Tuesday for mode to activate Set mode on Wednesday to activate Set time on Wednesday for mode to activate Set mode on Thursday to activate Set time
Protocol Plus Owner’s Manual Version 2 OPERATION 33 5.6.5.2. Activate Auto Start 1. On Auto Start page, set Enable to Yes. 2. LCD displays Active, current date and time 5.6.5.3. Deactivate Auto Start On Auto Start page, set Enable to No. Once Auto Start is activated, continue to use all operating modes as you normally would.
OPERATION 34 Protocol Plus Owner’s Manual Version 2 5.6.6.2. Setting up Auto Tune The AutoTune parameter disables or enables the AutoTune function. To use AutoTune: 1. Enter Setup Mode. 2. Press Page key until AutoTune displays. 3. Enable Autotune by pressing ▲ . 4. Press Page for three seconds to exit Setup Mode. 5. Cycle power to the instrument. 6. Set Manual Mode to Run. The display will alternate between AutoTune and Manual.
Protocol Plus Owner’s Manual Version 2 OPERATION 35 Menu Item Display Power fail recovery Recovery time limit Control PwrFRec Powerup start enable Powerup Start Mode Hysteresis Process out low Process out high Time scale Key press beep End of cycle beep Alarm beep Description Controls response to loss of power Control PFRTime Control aborts to Stopped mode if power is lost for time period longer then set value ControlPwrUpStrt Allows mode to automatically start when power is first applied Control St
OPERATION 36 Protocol Plus Owner’s Manual Version 2 Table 7. Communication Page Parameters and Values. Menu Item Display Description Range Address 1 to 247 Mode Baud Rate Parity Communication CommAddr Communication Comm Mode Communication Baud Rate Communication Parity Sets address node for control Turns on/off communications Sets interface speed Sets parity for interface OFF, Modbus 2400, 4800, 9600, 19.2K, 38.4K None, Odd, Even 5.6.8.2.
Protocol Plus Owner’s Manual Version 2 OPERATION 37 5.6.9.1. Access Relay Outputs Page 1. Enter Setup Mode. 2. Press Page until Relay displays. 3. Press Select until the desired relay output is selected. 4. Press Menu. 5. Change each parameter by pressing Menu until the desired parameter is displayed, and then press ▲ or ▼ to change the value. 6. To configure a specific relay, press Select until the desired relay displays. O If Relay 0 appears, no relays are installed. See relay kit assembly p.n.
OPERATION 38 Protocol Plus Owner’s Manual Version 2 5.6.10. Setting up the Test Page The Test Page contains parameters which allow manual control of the heat control and optional relay outputs. Table 10 shows the menu items available. O Use the Test Page only for testing the functionality of the control instrument. Do not operate the oven for processes using the Test Page. 5.6.10.1. Access Relay Outputs Page 1. Enter Setup Mode. 2. Press Page until Test displays. 3. Press Menu. 4.
Protocol Plus Owner’s Manual Version 2 OPERATION 39 certain conditions where the center of the oven chamber is not the same temperature as the control thermocouple. This temperature differential may occur when the oven is not allowed to soak at a constant temperature for long periods of time, or when the oven is being used at high temperature. Table 11 shows the menu items available. 5.6.10.3. Access Zone Calibration Page 1. Enter Setup Mode. 2. Press Page until Zone Cal displays. 3. Press Menu. 4.
OPERATION 40 Protocol Plus Owner’s Manual Version 2 5.6.10.5. Adjusting Actual Versus Displayed Parameters Two points of display calibration (temperature offset) are available. The Zone 1 Actual and Zone 2 Actual parameters are the two temperature points where the offset is to take effect. These values are adjustable. The Zone 1 and Zone 2 Displayed parameters are the values the user wishes to have displayed at the Actual temperatures, and are also adjustable.
Protocol Plus Owner’s Manual Version 2 OPERATION 41 2. Connect a calibration instrument with a type J thermocouple output to the control sensor input. Allow the control to warm up at least 30 minutes. 3. Access Setup Mode. 4. Press Page until Sensor Cal displays. 5. Press Menu key until Sensor Cal -100F displays. 6. With Ctrl Sens -100F displayed, adjust the calibration instrument to Type J thermocouple, -100 degrees Fahrenheit output. 7. Wait 30 seconds. Press ▲. 8.
OPERATION 42 Protocol Plus Owner’s Manual Version 2 29. Verify that the control and high limit sensor thermocouples are connected. Table 12. Sensor Calibration Page Parameters and Values.
Protocol Plus Owner’s Manual Version 2 OPERATION 43 Table 13. Enable Page Parameters and Values.
OPERATION 44 Protocol Plus Owner’s Manual Version 2 O A profile must be created in the program page before trying to run a profile number. Table 14. Digital Input Parameters and Values. Input 1 Input 2 Input 3 Profile Selected ON OFF OFF 1 OFF ON OFF 2 ON ON OFF 3 OFF OFF ON 4 ON OFF ON 5 OFF ON ON 6 ON ON ON 7 OFF OFF OFF none • • • To start the selected profile, set Inputs 1, 2 and 3. Then set Input 4 to ON. To hold a profile, set Input 4 to OFF.
Protocol Plus Owner’s Manual Version 2 6. M AINTENANCE & TROUBLESHOOTING 45 Maintenance 6.1. Replacement Parts To order or return parts, contact the Service Products Division at Despatch. The Service Products features our Response Center for customer service. When returning parts, a Despatch representative will provide you with an MRA (Material Return Authorization) number. Attach the MRA number to the returned part for identification.
M AINTENANCE & TROUBLESHOOTING 46 Protocol Plus Owner’s Manual Version 2 Alarm Status in rapid succession) Batt (Beep code: three beeps in rapid succession) RTC (Beep code: two beeps in rapid succession) O Possible Problem memory failure. Weak or dead battery. Battery failure. Loss of time in real time clock circuit. Control memory loss. Next Step Consult factory Reset time in real time clock page. The lower LCD intermittently display HL Temp.
Protocol Plus Owner’s Manual Version 2 8. APPENDICES 47 Appendices 8.1. Quick Reference and Default Values 8.1.1. Program Page Default Values Table 16. Program Page Default Values.
APPENDICES 48 Protocol Plus Owner’s Manual Version 2 8.1.2.
Protocol Plus Owner’s Manual Version 2 APPENDICES 49 8.1.4. Programming Table Worksheet Profile Name: Profile Number: Segment Time Ramp Events 1 2 3 Soak 4 Temperature Time 1 Events 2 3 1 2 3 4 5 6 7 8 High Limit Setpoint Loop From Seg Loop To Seg Loop Number Link To Profile Guar Soak Band Copyright © 2010 by Despatch Industries. All rights reserved.
APPENDICES 50 8.1.5.
Protocol Plus Owner’s Manual Version 2 APPENDICES 51 8.1.7. Real Time Clock Page Default Values Menu Item Day of the week Display Clock Day Default Mon Time of day Clock HH:MM 00:00 Range Sun, Mon, Tue, Wed, Thu, Fri, Sat 00:00 to 23:59 Reset clock Clock UP to Reset 25 CLK Ready Ready, Done Setting If ▲ is not pressed, the clock will retain original values, the display will change to Done if the clock is reset. 25 Copyright © 2010 by Despatch Industries. All rights reserved.
APPENDICES 52 Protocol Plus Owner’s Manual Version 2 8.1.8. Relay Outputs (Optional) Page Default Values Press Select to choose relay. If Relay 0 displays, no relays are installed.
Protocol Plus Owner’s Manual Version 2 APPENDICES 53 8.1.9. Test Page Default Values Menu Item Heater output Display Test HeatOut Default Off Range On High limit relay Test HiLimOut Off On Relay 1 output Test Rly1 Out Off On Relay 2 output Test Rly2 Out Off On Relay 3 output Test Rly3 Out Off On Relay 4 output Test Rly4 Out Off On High Limit Sensor Test HL Temp (sensor reading) Setting 8.1.10.
APPENDICES 54 Protocol Plus Owner’s Manual Version 2 8.1.12.
Protocol Plus Owner’s Manual Version 2 APPENDICES 55 8.2. Standard Products Warranty Copyright © 2010 by Despatch Industries. All rights reserved. No part of the contents of this manual may be reproduced, copied or transmitted in any form or by any means including graphic, electronic, or mechanical methods or photocopying, recording, or information storage and retrieval systems without the written permission of Despatch Industries, unless for purchaser's personal use.
APPENDICES 56 Protocol Plus Owner’s Manual Version 2 3rdDraft— Despatch INDUSTRIES GLOBAL HEADQUARTERS Despatch Industries 8860 207th Street West Minneapolis, MN 55044 USA US toll free: 1-888-337-7282 international/main: 1-952-469-5424 fax: 1-952-469-4513 info@despatch.com www.despatch.com SERVICE AND TECHNICAL SUPPORT service parts: 1-800-473-7373 international service/main: 1-952-469-8230 service fax: 1-952-469-8193 service@despatch.com © 2010 Despatch Industries. All rights reserved.