Wireless PCCAM user manual
Introduction Firstly, thank you for using the wireless camera of a new generation. It can be of avail once it is inserted. It is the ideal product for real-time wireless image transmission. Its appearance is exquisite and it is portable; both the definition and the transmission speed are high.
1-Take photos, press Key /Code-matching key, 2-Power switch, 3-USB Interface for charging, 4-Power indicator light/Indication of charging /Indication of code-matching, 5-Microphone 6-Receiving terminal inserted into computer, 7-Operation indicator light /Code-matching indicator light, 8.- Code-matching key Parameters ·Digital 2.4GHZ, high-quality image compression ·Wireless ideal distance 3M-5M ·Working current about 80mA ·Built-in battery 600mA/3.
·Support hardware photo-taking ·Adjustable of brightness, contrast and saturation is available ·Software interpolation 5M (2560x1920) System requirements * IBM PC with USB interface or the desktop computer and laptop computer that is compatible with it. * Pentium200 or higher CPU. * WINDOWS XP/VISTA System Software. * Free space of over 20MB. * CD—ROM Driver. * Usable memory of over 32MB. * Support DIRECTX的VGA Display Card.
desktop, the drive program inside the optical disc shall be installed. There will be a CamApp on the desktop after the installation is finished. The image can be opened by just using the CamApp. Code-matching When conducting code-matching, insert USB receiving terminal into the computer. At this moment, the red light is on. Please press the key of the receiving terminal and release it until the red light of the receiving terminal flickers.
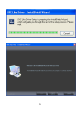
will be extremely fast (about 20 times each second). At this time please give charging to the camera. When it is to be charged, only by inserting the USB power cord into another side of the computer, the charging of the camera will begin. The time for charging shall cover about 3 hours. It can work for 6 hours after one charging is completed. Driver program installation 1.
6
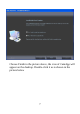
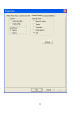
Choose Finish in the picture above, the icon of CamApp will appear on the desktop.
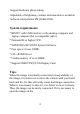
In the Drop Down Menu of option in the picture above, there are the following function options (Special effect / Frame / Interpola 8
9
10
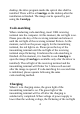
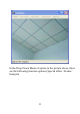
Taking photos in static state under the Drop Down Menu of capture in the picture below can reach 20 M. However, the photo has neither special effect nor frame.
This equipment has been tested and found to comply with the limits for a Class B digital device, pursuant to part 15 of the FCC Rules. These limits are designed to provide reasonable protection against harmful interference in a residential installation. This equipment generates, uses and can radiate radio frequency energy and, if not installed and used in accordance with the instructions, may cause harmful interference to radio communications.
to radio or television reception, which can be determined by turning the equipment off and on, the user is encouraged to try to correct the interference by one or more of the following measures: • Reorient or relocate the receiving antenna. • Increase the separation between the equipment and receiver. • Connect the equipment into an outlet on a circuit different from that to which the receiver is connected. • Consult the dealer or an experienced radio/TV technician for help.