868 Special Sewing Machine Instruction manual Postfach 17 03 51, D-33703 Bielefeld • Potsdamer Straße 190, D-33719 Bielefeld Telefon +49 (0) 521 / 9 25-00 • Telefax +49 (0) 521 / 9 25 24 35 • www.duerkopp-adler.com Ausgabe / Edition: 03/2011 Änderungsindex Rev. index: 00.0 Printed in Federal Republic of Germany Teile-Nr./Part.-No.
All rights reserved. Property of Dürkopp Adler AG and copyrighted. Reproduction or publication of the content in any manner, even in extracts, without prior written permission of Dürkopp Adler AG, is prohibited.
Foreword This instruction manual is intended to help the user to become familiar with the machine and take advantage of its application possibilities in accordance with the recommendations. The instruction manual contains important information on how to operate the machine securely, properly and economically. Observation of the instructions eliminates danger, reduces costs for repair and down-times, and increases the reliability and life of the machine.
General safety instructions The non-observance of the following safety instructions can cause bodily injuries or damages to the machine. 1. The machine must only be commissioned in full knowledge of the instruction book and operated by persons with appropriate training. 2. Before putting into service also read the safety rules and instructions of the motor supplier. 3. The machine must be used only for the purpose intended. Use of the machine without the safety devices is not permitted.
Contents Page: Preface and general safety instructions Part 1: Operating Instructions Class 868 – Original Instructions (Edition 03/2011) 1 Product description . . . . . . . . . . . . . . . . . . . . . . . . . . . . . . . . . . . . . . . . . . . . 5 2 Designated use . . . . . . . . . . . . . . . . . . . . . . . . . . . . . . . . . . . . . . . . . . . . . . . 5 3 Subclasses . . . . . . . . . . . . . . . . . . . . . . . . . . . . . . . . . . . . . . . . . . . . . . . . . . 6 4 Optional equipment.
Contents Page: 9 9.1 9.2 Maintenance Cleaning and testing . . . . . . . . . . . . . . . . . . . . . . . . . . . . . . . . . . . . . . . . . . . . . Lubrication. . . . . . . . . . . . . . . . . . . . . . . . . . . . . . . . . . . . . . . . . . . . . . . . . . . 35 37 10 10.1 10.2 Optional equipment Seam center guide . . . . . . . . . . . . . . . . . . . . . . . . . . . . . . . . . . . . . . . . . . . . . . Repair . . . . . . . . . . . . . . . . . . . . . . . . . . . . . . . . . . . . . . . . . . . . .
1 Product description The DÜRKOPP ADLER 868 is a special sewing machine for universal use. · · · · · · · 2 It is a flatbed double-lockstitch machine with bottom feed, needle feed and alternating upper foot feed. Depending on the subclass it comes as single or double needle automat, with or without electromagnetic thread cutter, with or without edge trimmer. Equipped with a large or oversized two-piece vertical hook. With a maximum of 20 mm fabric clearance when sewing feet are lifted.
This special sewing machine may be set up and operated only in dry, well-maintained premises. If the sewing machine is used in premises which are not dry and well-maintained it may be necessary to take further precautions, which should be agreed upon in advance (see EN 60204-31:1999).
868-390322 Double-needle double-lockstitch post bed machine with bottom feed, needle feed, alternating upper foot feed, electro-pneumatic rapid stroke adjustment with automatic speed limitation, operated via knee lever, electro-magnetic thread cutter, electro-pneumatic seam bartacking, electro-pneumatic second stitch length and sewing foot lifting. With large hook, with integrated sewing lamp. Left post.
4 Optional equipments For the 868 the following optional equipments are available: Optional equipment Subclasses 0867 590014 Electro-pneumatic needle cooler from the top 0867 590064 Pneumatic connection x x x x x 9780 000108 WE-8 maintenance unit for pneumatic optional equipments x x o o o 9822 510003 Halogen sewing lamp x x x x x 9880 867100 Sewing lamp add-on kit x x x x x 0798 500088 Sewing lamp transformer x x x x x 9880 867103 Sewing lamp LED x x x x x 9880 867102 Integrated sew
Please contact our Application Center (APC) for further optional equipment. E-Mail: marketing@duerkopp-adler.
5 Technical data Noise: Workplace-related emission value in accordance with DIN 45635-48-A-1-KL2 868-190020 LC = _dB (A) Stitch length: _ mm Sewing foot stroke: mm Speed: ____ min -1 Material: 868-290020 LC = _dB (A) Stitch length: _ mm Sewing foot stroke: mm Speed: ____ min -1 Material: 868-190322 LC = _dB (A) Stitch length: _ mm Sewing foot stroke: mm Speed: ____ min -1 Material: 868-290322 LC = _dB (A) Stitch length: _ mm Sewing foot stroke: mm Speed: ____ min -1 Material: 868-390322 LC = _d
868-290322 868-390322 large large 1 2 1 2 Type of stitch 868-290020 large 868-190322 large 868-190020 Technical data subclasses large 5.1 Lockstitch 301 Hook type Number of needles Needle system 1 134-35 Needle size (depending on E-No.) [Nm] 170 Max. thread thickness [Nm] Stitch length - Forward - Backward [mm] 10 / 3 12 12 Number adj. stitch lengths 1 2 1 2 2 Max.
Threading scheme single-needle machine 11 1 2 10 3 9 4 8 5 7 6 0868 190xxx 0868 390xxx Threading scheme double-needle machine - 22 12 13 21 14 15 20 16 19 18 17 12
6 6.1 Operation Threading the needle thread Caution: danger of injury ! Turn off the main switch. The needle thread may only be threaded with the sewing machine switched off. – – – – – – – – Put the thread reel on the thread stand and lead the needle thread through the unwinder arm. The unwinder arm must be in vertical position above the thread reels. Thread in the thread through threading guide 1 and 2. Conduct the thread clockwise around the pre-tensioner wheel 3.
3 14 2 1 5 4 Fig. A: Correct thread interlacing in the center of the material Fig. B: Needle-thread tension too low or hook-thread tension too high Fig.
6.2 Adjusting the needle-thread tension Pre-tensioner When the main tensioner 2 and supplementary tensioner 3 are open (e.g. when the sewing feet are raised) the needle thread must be under slight residual tension. This residual tension is produced by the pre-tensioner 1. The pre-tensioner 1 simultaneously affects the length of the end of the severed needle thread (the starting thread for the next seam). – Basic setting: Turn knurled nut 4 until its front is flush with the bolt 5.
6.2.1 Function of the thread main tension and the thread supplementary tension in relation to the sewing foot lifting Only Efka DC 1550 DA 321G The thread supplementary tension can, at any time, be switched on or off by actuating the switch key 1 (see chapter 6.17) on the key block of the machine. To this end, the parameter F-255 must be set on “7". Parameter Sewing foot lifting Sewing foot lifting withing a seam after thread trimming Thread main tension Thread supplement.
6.2.3 Function of the thread’s supplementary tension in relation to the stroke adjustment and the Speedomat Only Efka DC 1550 DA 321G The thread’s supplementary tension can, at any time, be switched on and off by actuating the key 1 (see chapter 6.17) of the machine’s keypad. To that end, the parameter F-255 must be set to “7". Parameter Setting F-197 F-197 F-197 F-197 = = = = stroke adjustment max.
6.4 Short stitch The short stitch can be set mechanically forward as well as backward. The short stitch is set by turning the stop screw 2 with an Allen wrench (size 3): Clockwise à forward. Counterclockwise à backward. 6.4.1 Short stitch at the seam beginning When sewing without initial bartack the reliability of the seam beginning can be increased by beginning the seam with a short stitch.
6.5 Switching the supplementary tension on and off with machines without thread trimmer 1 2 The supplementary tension is being switched on and off with lever 1. Switching on – Push the handle 2 of lever 1 to the left. Switching off – Push the handle 2 of the lever 1 to the right.
6.6 Adjusting the thread regulator 3 2 1 Caution: danger of injury ! Turn off the main switch. The thread regulator may only be adjusted with the sewing machine switched off. The thread regulator 1 controls the quantity of needle thread required for stitch formation. The thread regulator must be precisely adjusted for an optimum result. At the correct setting the needle-thread loop must slide at low tension over the thickest point of the hook. – Undo screw 2. – Adjust the thread regulator 1.
6.7 Winding on the hook thread 5 4 3 2 – – – – – – – – 1 2 6 Put the thread reel on the thread stand and conduct the needle thread through the unwinder arm. Conduct the thread through the thread guide 5, around the tensioner 4 and through the thread guide 3. Place the thread behind the blade 6 and sever it (in the arrow direction). Fit the bobbin 1 onto the bobbin winder. There is no need to wind the thread onto the bobbin by hand. Press the bobbin-winder lever 2 into the bobbin.
6.8 Changing the hook-thread bobbin 1 7 6 5 4 3 2 Caution: danger of injury ! Turn off the main switch. The hook-thread bobbin may only be changed with the machine switched off. Removing the empty bobbin – Raise the sewing foot. – Pull the hook cover 1 upwards and open it. – Lift the flap 5 and remove the empty bobbin 2. Inserting a full bobbin – Insert the full bobbin 2 so that it moves in the opposite direction of the hook when unwinding.
6.9 Setting the hook thread tension 1 2 Caution: danger of injury ! Turn off the main switch. The hook-thread tension may only be adjusted with the machine switched off. Setting the tension spring 2 – Set the tension spring 2 by turning the adjustment screw 1.
6.10 Inserting and changing the needle with single-needle machines 1 2 3 2 1 Caution: danger of injury ! Turn off the main switch. The needle may only be changed with the sewing machine switched off. – Turn the hand wheel, until the needle bar 1 has reached its highest position. – Loosen screw 2. – Pull the needle downwards out of the needle bar 1. – Push in the new needle into the hole of the needle bar 1 as far as it will go. Attention! The needle scarf 3 must point towards the hook.
6.11 Inserting and changing the needle with double-needle machines 1 2 3 4 Caution: danger of injury ! Turn off the main switch. The needle may only be changed with the sewing machine switched off. – Turn the hand wheel until the needle bar 1 has reached its highest position. – Loosen screw 3. – Pull the needle downwards out of the needle holder 2. – Push the new needle into the hole of the needle holder 2 as far as it will go.
6.12 Lifting the sewing foot 2 1 Subclasses 868-190020, 868-290020 The sewing feet can be lifted mechanically by actuating the knee lever 1. Subclasses 868-190322, 868-290322, 868-390322 The sewing feet can be lifted electro-pneumatically by actuating the pedal 2 or the knee lever 1. Raising the sewing foot mechanically (knee lever) – To adjust the position of the material (e.g. for corrective purposes), push the knee lever 1 to the right.
6.13 Locking the sewing feet in lifted position 1 1 – Push the lever 1 downwards. The sewing feet are locked in lifted position. – Push the lever 1 upward. The sewing feet’s position is unlocked. 2 Or – Lift the sewing feet pneumatically by pushing the knee switch. The lever 1 then moves back into its initial position. 6.14 Sewing-foot pressure The required sewing-foot pressure is set with the setting wheel 2. CAUTION ! The material must not ”swim”. Do not set a higher pressure than is necessary.
6.15 Sewing-foot stroke 2 1 3 The special sewing machine 868 has, depending on the subclass, as standard equipment two setting wheels for the sewing foot stroke. With the left setting wheel 2 the standard sewing foot stroke from 1 to 9 mm is selected. With the right setting wheel 1 an increased sewing foot stroke from 1 to 9 mm is selected.
Operation mode of the quick stroke adjustment The activation period of the maximum sewing foot stroke depends on the set operation mode. It is possible to choose between three operation modes. The individual operation modes are determined by the adjustment of the parameters F-138 and F-184 at the control panel (see enclosed instructions of the motor manufacturer).
6.16 Setting the stitch length 3 2 1 The special sewing machines 868 are, depending on the subclass, equipped with two setting wheels. Thus, two different stitch lengths can be sewn, that are activated by actuating a key (see chapter 6.17). The two stitch lengths are set with the setting wheels 1 and 2 on the machine arm. – Set the higher stitch length with the upper setting wheel 1. Setting 1 = min. stitch length Setting 12 = max.
6.17 Key pad on the machine arm 10 9 8 Key 7 6 5 4 3 2 1 Function 1 Supplementary thread tension If the key is lit up: Supplementary thread tension is switched on. If the key is not lit up: Supplementary thread tension is switched off. 2 2 stitch length If the key is lit up: Higher stitch length (upper setting wheel) is active If the key is not lit up: Smaller stitch length (lower setting wheel) is active 3 Recalling or suppressing the initial or final bartack.
LED Function 7 and 8 Display for empty bobbin with residual thread monitor (left/ right bobbin) 10 LED display “power on" The function of key 9 can be selected with the screw 6 underneath the key 5. – Select a function. Example: 5 = Manually sewing backward. – Turn in the screw 6 underneath the key 5 and turn it 90° to the right (the slot stands vertically). The function can now be called via both keys 5 and 9.
8 Sewing This description is based on the following assumptions: – The machine is a single-needle machine equipped with a: - thread trimmer - electro-pneumatic seam bartacking and sewing foot lifting - electro-pneumatic rapid stroke adjustment – The following functions are set at the operating panel: Initial bartack: ON Final bartack: ON Position of the sewing foot before and after the cutting DOWN Needle position before the cutting: – – DOWN (Position 1) Needle position after the cutting: UP Main
6 Sewing an intermediate bartack 5 4 3 - Push down the stitch regulator lever 6. The machine sews reverse stitches as long as the stitch regulator lever is pressed down. The rotation speed is determined through the pedal. or - Actuate key 5. Sewing over a cross seam. (max. sewing foot stroke) The max. sewing foot stroke is switched on. The rotation speed is limited to 1600 min . Operation modes of the max. sewing foot stroke: - 1 - Press briefly the knee switch to switch on the max.
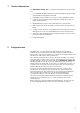
9 9.1 Maintenance Cleaning and testing Caution: danger of injury ! Turn off the main switch. Maintenance may only be carried out with the machine switched off! Maintenance work must be carried out no less frequently than at the intervals given in the tables (see ”operating hours” column). Maintenance intervals may need to be shorter when processing heavy-shedding materials. A clean machine is a trouble-free machine.
6 4 8 2 10 3 1 4 2 Maintenance work to be carried out 5 Explanation Operating hours Sewing drive Clean fan grille 2. (e.g. with an air blow gun) Remove lint and pieces of thread from air-intake openings. 8 Check condition and tension of V-belt 1. It must be possible to depress the V-belt by about 10 mm by pressing it with a finger at its mid-point. 160 Check water level in pressure regulator. The water level must not rise to the level of the filter cartridge 3.
9.2 Lubrication 1 2 3 Caution: danger of injury ! Oil can cause skin eruptions. Avoid protracted contact with the skin. In the event of contact, thoroughly wash the affected area. CAUTION: The handling and disposal of mineral oils is subject to legal regulation. Deliver used oil to an authorised collection point. Protect your environment. Take care not to spill oil.
10 Optional equipment 10.1 Seam center guide General information The seam center guide serves as guiding aid when topstitching. It is used for guiding the center of two seams with equal distance so that the distance to the left and to the right needle is equal. Attention! The pressure for the seam center guide must not exceed 3 bar. Check the pressure at the manometer 1 and set it using the turning handle 2.
10.2 Repair When the machine is damaged or parts are worn please contact: DÜRKOPP ADLER AG Potsdamer Str. 190 D-33719 Bielefeld Phone: +49 (0) 180 5 383 756 Fax: +49 (0) 521 925 2594 E-mail: service@duerkopp-adler.com Internet: www.duerkopp-adler.
Contents Page: Part 2: Installation Instructions Class 868 1 Scope of Delivery . . . . . . . . . . . . . . . . . . . . . . . . . . . . . . . . . . . . . . . . . . . . 5 2 General and transport packing . . . . . . . . . . . . . . . . . . . . . . . . . . . . . . . . . . . . 5 3 3.1 3.2 3.3 Assembling the stand Assembling the stand components (Standard). . . . . . . . . . . . . . . . . . . . . . . . . . . . Assembling the table plate . . . . . . . . . . . . . . . . . . . . . . . . . . . . . . . . . .
Contents Page: 6.8.3 6.8.4 6.8.5 6.8.6 6.8.7 6.8.8 6.9 Connection to the DA321G control unit . . . . . . . . . Connecting the sockets of the DA321G control unit . Connecting the DA321G control unit . . . . . . . . . . Checking the direction of rotation of the sewing drive Checking the positioning. . . . . . . . . . . . . . . . . . Machine-specific parameters . . . . . . . . . . . . . . . Masterreset . . . . . . . . . . . . . . . . . . . . . . . . . . . . . . . . . . . . . . . . . . . . . . . . . . .
1 11 2 3 4 10 5 9 8 7 6
1 Scope of Delivery What items are supplied depends on your order. Prior to setting up, please check that all the required parts are present. This description refers to a special sewing machine, of which all individual components can completely be delivered by Dürkopp Adler AG.
Observe the punch-marks of the table plate! 1 13 15 4,5x15 (x 4) 2 14 12 3 11 4 5 3,5x17 (x 6) 6 10 3,9x15 (x 5) 3,5x17 (x 2) 7 9 B8x35 (x 4) 8 6
3 3.1 3.2 Assembling the stand Assembling the stand components (Standard) – Assemble the individual stand components as shown in the illustration. – Adjust the set screws 8 to insure the stability of the stand. Make sure that the stand is safe by insuring that every single foot of the stand touches the ground.
3.3 Setting the working height 1 1 8 – The working height is adjustable between 750 and 900 mm (measured to the upper edge of the table plate). – – Undo screws 1 on the stand braces. Adjust the table plate horizontally to the required working height. To prevent tilting, pull the table plate out or push it in by the same distance on both sides. – Tighten both screws 1.
4 Sewing drives 4. 1 Drive category, type and use The following sewing drives are available: Subclass Clutch motor DC-positioning drive 868-190020 FIR 1147-F.752.3 * Efka DC1550/DA321G 868-290020 FIR 1148-F.752.3 Efka DC1550/DA321G** 868-190322 Efka DC1550/DA321G 868-190341 Efka DC1550/DA321G** 868-290322 868-290341 868-390322 * This clutch motor incorporates an electromagnetic brake that rapidly stops the rotor when it runs on after the motor has been switched off.
4.3 Fitting the sewing drive 8 1 1 2 2 7 6 7 6 5 5 3 4 4.4 4 – Attach the sewing drive 2 with its base 1 on the bottom side of the table plate by screwing the three hexagonal screws (M8 x 15) with washers into the nuts 8 of the table plate bottom. – – Attach the pedal 4 to the stand brace 3. For ergonomic reasons align the pedal 4 as follows: The center of the pedal must be approximately under the needle. There are slots in the stand brace 3 to help align the pedal.
4.5 Fitting the sewing-drive control for machines with Efka DC 1550 / DA 321G 8 7 1 2 – – 4.6 Fix the sewing-drive control 1 with 4 screws underneath the table plate 2. Fix the power supply cable of the sewing-drive control with the traction relief clip 3 underneath the table plate. Fitting the set value initiator – Screw angle 7 under the table plate 8. – Screw the set value initiator 2 onto the angle 7.
5 Assembling the machine head The sewing machine heads of the class 868 can be fitted into the stand horizontally straight as well as inclined. Therefore the positions of the hinges on the machine head and the fastening of the direct drive must be considered. 5.
5.2 Fitting the direct drive 2 1 Position of the motor support for the inclined set-up of the machine Position of the motor support for the straight set-up of the machine 5.3 Tensioning the toothed belt of the direct drive Loosen the screws 1 in order to tighten the toothed belt. The belt tension can be altered by shifting the motor with its support in the oblong hole 2. Afterwards the screws 1 must be tightened again.
5.4 Placing the sewing machine head on the stand 2 1 3 – – – – 14 If the sewing machine is equipped with motor on the table plate bottom, place the machine head 1 vertically into the table plate’s cutout. If the machine is equipped with motor on the machine head, incline the machine head 2 in order to place it into the table plate’s cutout. After placing the machine head immediately fix the retaining plate that prevents the machine head from falling out when being tilted.
5.5 Fitting and tensioning the V-belt Only concerns machines with motor on the table plate bottom. 6 2 9 11 10 4 3 1 5 V-belt 2, V-belt pulley 1 and belt guard are part of the drive set – Fix the V-belt pulley 1 on the shaft of the sewing drive. – Put the V-belt on the belt pulley 6 on the machine head. – – Pass the V-belt 2 down through the cutout of the table plate. Tilt the sewing machine head to the back. – – Place the V-belt 2 on the V-belt pulley 1.
5.6 Fitting the belt cover 1 1 4 2 5 – – – – 16 Remove the handwheel 1. When the machine’s motor is situated underneath the table plate mount the belt cover 2 on the machine head . (The belt cover is part of the drive package) When the machine’s motor is situated on the sewing machine head mount the belt cover 4 and 5 . (The belt guard is part of the drive package) Mount the handwheel 1.
5.7 Fitting the oil suction tube 5 2 1 3 4 – Remove the cap from the end of the suction tube 3. – Put the end of the suction tube 3 into the fitting of the cover 1. – Snap the tube into the tube holder 5 in the oil sump 2. – Screw the cover 4 onto the base plate.
5.8 Attaching the knee lever 3 2 The knee lever 2 mechanically raises the sewing foot. – Attach the knee lever 2. – – Undo the screws on the joint 1. Adjust the knee lever so that it can be conveniently operated with the right knee. – Tighten the screws on joint 1 again. – – Undo screw 3. Align the knee-pad. – Tighten screw 3 again.
5.9 Fitting the operating panel 3 4 1 6 5 – Fix the control panel fixing angle 1 together with the thread guide 2. – Remove the valve cap 4. – Lay the power supply cable 5 of the operating panel as follows: Lay the power supply cable behind valve cap 4 and arm cover 3 in the machine arm and down through the table plate cutout 6. Plug in the plug of the connection cable into the socket B776 of the drive control unit. Replace the arm cover 3 and the valve cap 4.
5.10 Fitting the sewing lamp (optional equipment) Caution ! Turning off the main switch does not turn off the current for the sewing lamp. Remove the mains plug before connecting.
The sewing lamp is mounted on the arm cover. In order to do so lift off the arm cover 3. Drill through the fastening holes with a 4,5 mm drill and fasten the holder. – Stick the safety warning label on the front of the main switch 7. – Fix the sewing light on the holder. – Lift off the arm cover 3 and the valve cap 4. – Lay the power supply cable in the cutout of the machine arm. – Pass the power supply cable down through the hole in the table plate 6.
6 6.1 Electrical connection General Caution ! All work on the electrical equipment of this special sewing machine may only be carried out by qualified electricians or other appropriately trained persons. While working on the electrical equipment the mains plug must be removed! 6.2 Checking the mains voltage Caution ! The mains voltage must coincide with the rated voltage specified on the model-identification plate. 6.3 Connecting the sewing drive 6.3.1 Connecting the clutch motor – – 6.3.
6.4 Earthing 1 2 The earthing cable 1 is in the machine’s accessory pack. The earthing cable 1 takes static charges from the machine head to earth via the motor base. – Connect the earthing cable 1 to the flat plug 2 (already screwed on the machine head) and lay it through the cable duct to the motor base. – Screw the earthing cable 1 onto the motor base at the point provided. – Additionally attach the earthing cable 1 under the table plate with the nail clamps.
6.5 Connecting the sewing drive to the mains Caution: The sewing machine must be connected to the mains with a plug. Clutch motors must be connected to a 3 x 380 - 415V 50/60Hz or 3 x 220 - 240V 50/60Hz three-phase AC. The connection is done according to the connection diagrams 9800 110002 A or 9800 120009 D. The direct-current positioning actuator is operated with a single-phase alternating current of 190 - 240V 50/60 Hz.
6.7 Connecting the sewing light transformer (optional equipment) 2 1 – Remove the machine’s mains plug. – Pass the mains cable 1 of the sewing-lamp transformer through the cable duct 2 to the main switch. It is connected to the mains-connection side of the main switch (or motor-protection switch). See connection diagram 9800 120009 A or 9800 110002 A or 9800 130014 R. Stick the adhesive label with the safety instruction on the front of the main switch .
6.8 6.8.1 Connecting the direct drive Connecting the Hall-effect sensor (Optional Equipment) Only with DC 1550 drive: · · Motor mounted under the table Gear reduction motor - machine 1,55:1 Attention ! Turn off the main switch. Connect the Hall-effect sensor only with the sewing machine switched off. – 2 – – 26 Fit the Hall-effect sensor 1 onto the machine head. 1 4 3 Check whether a magnet is fitted into the belt pulley 2 of the machine.
– – – B 4 1 M Connect the 9-pole SuB-D plug of the Hall-effect sensor to the bushing “B18" (IPG / HSM / LSM) of the Efka control drive DA321G. Set the correct machine class with parameter F-290 according to the corresponding parameter sheet 9800 331104 PBXX. In order to position the machine correctly and to optimize all functions the following parameters must still be set: Parameter F-111: set to 3.000 rpm or less.
6.8.2 Attaching and connecting the sewing light transformer (optional equipment) – – Remove the machine’s mains plug! Connect the mains cable of the sewing light transformer to the mains input side of the control unit. Caution ! The sewing-light transformer is directly connected to the mains. It is therefore live even when the main switch is switched off. The mains plug must be removed before carrying out any work on the sewing-light transformer, e.g. changing the fuse. 6.8.
6.8.4 Connecting the sockets of the DA321G control unit B 4 1 M B 2 B 8 0 M E B ... 2 B 1 8 B 7 7 6 L S M ... V 8 . . 1 A 6.8.5 Connecting the DA321G control unit – – – – – – Plug the cable from the controller (pedal) into socket B80 of the controls. Plug the cable from the motor sensor 1 into socket B2 of the controls. Plug the cable 2 from the motor into socket B41 of the controls. Plug the cable to the sewing machine into socket A of the control unit. Lay all cables through the cable duct.
6.8.6 Checking the direction of rotation of the sewing drive Caution ! Before putting the special sewing machine into operation, the direction of rotation of the sewing drive must imperatively be checked. Operating the special sewing machine in the wrong direction of rotation can lead to damages. The arrow on the belt guard indicates the correct direction of rotation of the machine.
Position 2 – First push the pedal forward and then completely backwards. – The needle positions in position 2 ( about 66° on the handwheel). – Check the needle position. If one or both needle positions are not correct then carry out the correction of the needle position. (see operating instructions) 6.8.8 Machine-specific parameters 6.8.8.1 General The functions of the sewing-drive control are determined by the program and the parameter settings.
1 2 3 4 2 6 8 10 4 5 6 32 7
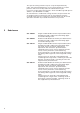
7 Pneumatic connection Caution: The pneumatic units will only operate properly at a supply pressure of 8 to 10 bar. The special sewing machine’s operating pressure is 6 bar. Pneumatic-connection pack A pneumatic connection pack for stands with compressed-air maintenance unit is available under order no. 0797 003031.
8 Lubrication 1 2 3 Caution: danger of injury ! Oil can cause skin eruptions. Avoid protracted contact with the skin. In the event of contact, thoroughly wash the affected area. CAUTION ! The handling and disposal of mineral oil is subject to legal regulation. Deliver used oil to an authorised collection point. Protect your environment. Take care not to spill oil.
9 Sewing test A sewing test must be carried out when setting-up is complete. – Insert the mains plug. Caution: danger of injury ! Turn off the main switch. The needle and looper threads may only be threaded with the sewing machine switched off. – – – – – – – – – Thread the bobbin-winder thread (see operating instructions). Turn on the main switch. Lock the sewing feet in lifted position (see operating instructions). Fill the bobbin at low speed. Turn off the main switch.
36
Änderung der technischen Dokumentation Modification of the technical documentation Modification de la documentation tecnique Modificación de la documentación técnica Modificazione della documentazione tecnica Die vorliegende Anleitung hat sich nach Drucklegung geändert. Bitte tauschen Sie die beiliegenden Seiten in Ihrer Landessprache aus. The present instructions have changed since their last print out. Please insert the present new pages for replacing the old onces.
887 Additional nstructions Machines with ntegrated otor
About this manual 1 About this manual These additional instructions are supplementary to the manual of class 887 machines. They describe operation and functioning measures of machines with integrated motor that differ from machines without integrated motor. The additional instructions do not constitute a self-contained document, but are only valid in combination with the respective instruction manual. instruction manual before setting up Make sure to read the and operating the machine.
ECO-machines 3 ECO-machines 3.1 Operation Fig. 1: Switching ECO-machines on and off 1 2 (1) - LEDs indicating the status (2) - Main switch for the power supply ECO-machines with integrated motor are switched on and off via the main switch (5) on the machine post. Switching the machine on 1. Press the main switch (2). ª Of the two LED lights (1) indicating the status, the top one will be lit. Switching the machine off 1. Press the main switch (2).
ECO-machines Fig. 2: Operator settings with ECO-machines 1 (1) - Potentiometer P1 to decrease the speed 2 (2) - Button S1 for the needle's stopping position 3 (3) - Button S2 for the softstart Setting the maximum speed 1. Turn the potentiometer P1 (1). • To decrease the speed: Turn counter-clockwise. • To increase the speed: Turn clockwise The initial value is the maximum speed defined for this machine class. It cannot be increased, only decreased.
CLASSIC-machines 4 CLASSIC-machines 4.1 Operation Fig. 3: Switching CLASSIC-machines on and off Operating panel on the machine post Control beneath the table top 2 1 3 4 (1) - LEDs indicating the status (2) - Button for the sewing light (3) - Main switch for power supply (4) - Control light CLASSIC-machines are switched on and off at the control underneath the table top ( instruction manual). The two LEDs (1) on the machine post indicate the status of the power supply.
CLASSIC-machines Fig. 4: Switching the sewing light on and setting the light intensity 1 (1) - Potentiometer P1 for an infinitely variable setting of intensity 2 (2) - Button S1 for the single-diode sewing light 3 (3) - Button S2 for the integrated sewing light Switching the sewing lights on and off 1. Press the button for the requested sewing light (S1 or S2). ªThe lamp lights up. 2. Press button (S1 or S2) again. ªThe lamp goes out. Setting the light intensity 1.
CLASSIC-machines . Sewing light connection DANGER Risk of death due to electric shock The sewing light control is directly connected to the mains supply and is live even when the main switch is switched off. Therefore it is essential to pull out the mains plug, before you connect the sewing light. Make sure that the mains plug cannot be plugged in again by mistake. The PCB plug connector for the for the sewing light cable is situated on an extra PCB on the left side behind the valve cap. Fig.
Subject to design changes - Printed in Germany - © Dürkopp Adler AG - Additional Instructions - 0791 867691 - 00.0 - DÜRKOPP ADLER AG Potsdamer Str. 190 33719 Bielefeld Germany Phone +49 (0) 521 925 00 E-Mail: service@duerkopp-adler.com www.duerkopp-adler.