
User's Manual


8
Setting up the product for Windows
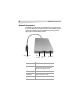
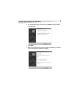
6 After restarting the computer, connect the USB cable to the USB port on the
computer. Windows 98 or Windows 98 SE automatically detects the USB
FDD and adds the drive to the computer drive configuration.
Note: Unlike a general disk drive, the USB FDD is not always assigned the
“Drive A” designation. The drive letter assigned depends on your
computer’s configuration. If there is an internal floppy drive installed on
your computer, it will always be assigned as Drive A.
Assigning a Windows drive letter
In “legacy-free” computers, the USB FDD may be set up to use drive letter (A:),
disabling the Standard Floppy Disk Controller. This is an optional setting for power
users and it may not work on all PCs. If the PC responds incorrectly, re-enable the
Standard Floppy Disk Controller to its original setting.
If the Standard Floppy Disk Controller is disabled, the built-in legacy FDD is
inaccessible. If the use of the legacy FDD is required, do not disable the Standard
Floppy Disk Controller.
To disable the Standard Floppy Disk Controller:
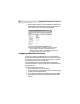
1 Double click the System icon in the control panel.
2 Locate and enter the Device Manager, then select the Standard Floppy Disk
Controller and click the Properties button.
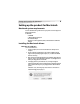
3 Select Disable in this hardware profile or Disable this device and click OK.
4 After re-starting the computer, the USB FDD should be assigned as drive
letter (A:).