
Warranty Guide


Crucial Points to Remember:
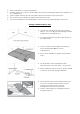
1. Plan your project by making an installation sketch. Determine the installation starting point.
Consider if it is one regular-shaped room; a number of rooms with landings; or rooms on one
floor, including a hall or main room. Think about how to get the most out of your budget. If in
doubt, ask your dealer for advice.
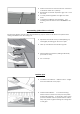
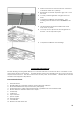
2. Choose the floor plank direction. It is strongly recommended that you install boards at a 45
0
or
90
0
angle to the joist direction. This is NOT applicable for installation on concrete.
3. Take precautions at all times not to damage the finish. For example, place tools on a protective
mat during installation. Vacuum or sweep floor frequently to eliminate sawdust and abrasives.
Do not use vacuums with beater bars or hard plastic attachments.
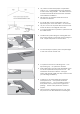
4. Before starting installation, cut the bottom moldings around door frames to insert the floor planks
underneath. Leaving an expansion joint is necessary. This allows the wood to react to changes
in ambient humidity. The expansion joint will be hidden by wood flooring moldings such as T-
molding, quarter round, etc. Moldings will be nailed to the walls and not the floor.
5. Clean your floor with Bona Hardwood Floor Polish after installation, this will remove any hair-like
scratch you may have cause during the installation or due to transportation.
Jobsite Preparation:
Laying the floor should be the last step of your installation. Prior to the delivery of your flooring,
make sure that:
The jobsite is properly enclosed, with all doors and windows installed
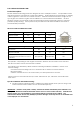
Installation site are climate controlled at all time with relative humidity (RH) at 35 to 60% and
temperature between 65 to 85
0
F (18.3 to 29.5
0
C)
Concrete, plaster, paint and the sub-floor are completely dry (Always measure!)
Any depressions in the sub-floor should not exceed 1/8" (3.17 mm) and the floor must be level not
to exceed 1/8" over a 6’ length (1860 mm)
Flooring planks has been at the jobsite for at least 3 days
The surface must be clean and free of all debris. Remove any glue residue and/or staples and
drive in any protruding nails.
Install your floor under good lighting conditions
Wood Sub-floor:
The sub-floor (plywood or OSB) moisture content should not exceed 12%. The difference in
moisture between the sub-floor and floor planks should not be greater than 4%. Do not carry out
the installation when condition not met.
Wooden sub-floors must be securely screwed down to joists to prevent any movement or
squeaking. Inspect the existing subfloor and replace any subfloor that exhibits signs of water
damage or structural weakness.
The floor of the crawl space (if there is one) is completely covered by 6-8 mil black polyethylene
film and has had adequate cross ventilation
Concrete Sub-floor:
Moisture readings must not exceed 4.5% with a moisture meter for concrete (Tramex Moisture
Encounter) as defined by NWFA (National Wood Flooring Association).
In the presence of moisture, perform a calcium chloride test. The moisture level measured using
the calcium chloride test must not exceed 3 lb/1,000 sq. ft. /24 hours. If the reading exceeds 3 lb.
but is below 7 lb., install a waterproof membrane such as Bostik MVP or equivalent.
IMPORTANT: When it comes to floor installation, moisture is an important element that should
be emphasized. The installer and the homeowner are jointly responsible for checking the sub-
floor moisture content. If the moisture content is too high, installation of flooring must be
postponed. Never install a hardwood floor on a wooden sub-floor if a moisture test reading