
Warranty Guide


4
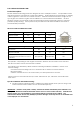
exceeds 12%. Any responsibility for failures or deficiencies related to job site quality is
declined by the manufacturer.
Installation Work:
Once you are ready to install your floor planks, open a case to check that product species, grade,
color, size and quality are correct. If everything is in order, then open several cartons of flooring at
the same time for installation. This will allow you to balance plank length, color and variations in the
grain of the wood. This will ensure that planks can be arranged to reflect a homogenous floor
covering.
Please advise your dealer immediately if any problems occur. Our in-house installation team could
be contracted to take over the installation if required.
IMPORTANT: Prior to installing the floor, the installer and the homeowner must ensure that the
installation site and sub-floor meet the conditions in this document. The installer and the
homeowner are responsible for inspecting floor planks prior to installing them. Depending on the
type of installation, you may also need special moldings for your floor such as nosing and reducer
strips. Installer is responsible to ensure the proper selection and installation of molding pieces.
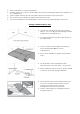
FLOATING INSTALLATION
EZ Click hardwood flooring planks are suitable for floating installation at any grade level. This
includes above grade, on grade or even below grade onto a concrete sub-floor, wood sub-floor,
ceramic tiling, or linoleum with proper site preparation.
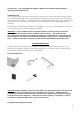
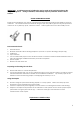
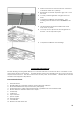
Recommended tools:
Underlayment Chalk Reel Ruler
Expansion Spacer Hand Saw
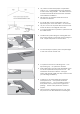
Important: Floating Installation is where the floors planks are joined together but are not attached to
either the sub-floor or the wall and thus are suspended on the sub-floor. Floating installation
method allows more movement on the floors and thus is more potential for squeaking or cracking
sound to develop when stepped on. Manufacturer declines warranty on squeaking or cracking
sound due to floating installation when vertical movement exist.
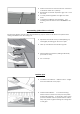
Preparing and leveling the sub-floor: