
Warranty Guide


8
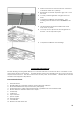
IMPORTANT: A minimum amount of adhesive can be used on the end joint between the
tongue and groove. During Installation, immediately wipe any adhesive from the floor’s
surface.
STAPLE DOWN INSTALLATION
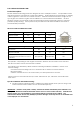
Staple down installation can only be used with PS-2 rated oriented strand board (OSB) or plywood
sub-floors. The manufacturer recommends using 3/4" (18 mm) OSB or plywood on joists spaced no
more than 19.2" (450 mm) apart, center-to-center. OSB or plywood must be structurally sound.
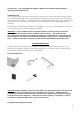
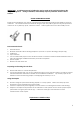
Recommended tools:
1. Moisture Meter
2. Bostitch LHF97125-2 Floor Flooring Stapler for 1/4-inch to 1/2-inch Flooring (U-Staple only)
3. Chalk reel
4. Tape measure
5. Use non-tarred felt paper on the sub-floor surface to reduce normal mechanical friction and a 6
mil. Poly sheeting if additional moisture protection is required.
6. Speed square
7. Electric saw OR Hand saw
Preparing and leveling the sub-floor:
Please refer back to Job Site Preparation.
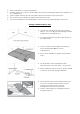
It is recommended that you use non-tarred felt paper on the sub-floor surface to reduce normal
mechanical friction between materials and to facilitate installation. Lay the felt paper in the
direction of the boards using staples, overlapping the ends by 3" to 4".
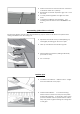
Using the stapler:
Practice using the pneumatic flooring stapler on a scrap plank. Follow the safety tips and
instructions of the manufacturer of the stapler.
Clean the staple base plate regularly to ensure it does not damage the finish of the flooring.
Adjust the compressor air pressure for the hardness of the species and to ensure proper staple
placement in tongue (about 50-90 psi). Follow the safety tips and instructions of the
manufacturer of the staples.
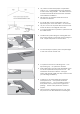
Staple Down Installation Steps: