
USB Audio Interface/ MIDI Keybroad Controller PC-80 Owner's Manual
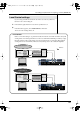
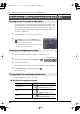
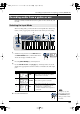
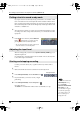
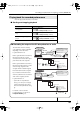


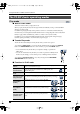
Table Of Contents
- USING THE UNIT SAFELY
- Important Notes
- Contents
- Contents of the package
- Names of things and what they do
- Setup
- Operation
- Appendix
- Using the PC-80 as a MIDI controller keyboard
- Basic connection example and signal flow
- The PC-80’s basic operating modes
- Transmitting various MIDI messages from the PC-80
- Setting the MIDI transmit channel
- Selecting sounds—Transmitting Program Change and Bank Select Massages
- Starting/stopping playback data—Transmitting a Start/Stop/Continue message
- Transmitting messages to an external MIDI sound module
- Setting the split points
- Using the VALUE encoder to transmit values for a specified parameter
- Using the PC-80 as a MIDI interface
- Using the PC-80 as an audio interface
- System settings for the PC-80
- PC-80 driver settings
- Troubleshooting
- Driver-related problems (Windows)
- Can’t record or play back audio or MIDI/No sound
- Noise or pops are heard when recording/playing on your computer
- Noise or distortion occurs when the PC-80 is not connected to your computer
- The sound is too weak
- Problems with the PC-80 Software Synthesizer
- Won’t start up
- The menu does not appear correctly (can’t select it)
- No sound
- Sound is too loud/too soft
- Clicks, pops, or noise occurs in the sound
- Sounds you play from the keyboard are delayed
- Can’t control sounds or parameters from the PC-80
- Can’t play back song data/Playback is incorrect
- Can’t use the PC-80 software synthesizer from other software
- Uninstalling the PC-80 software synthesizer
- MIDI implementation
- Main specifications
- Index
- Using the PC-80 as a MIDI controller keyboard
54
Recording your performance in sequencer software (SONAR LE)
If you put a track in record-ready mode, you’ll be able to record data on that
track. A track that is in record-ready mode will record data from the device
that’s assigned as the input for that track. If a track is in record-ready mode,
the record-ready button of the track will light red, and the clip indicator area
will turn to a reddish color.
1
Select the track on which you want to record, and in the In field, choose the
recording source that corresponds to the device you connected to the audio
input jacks.
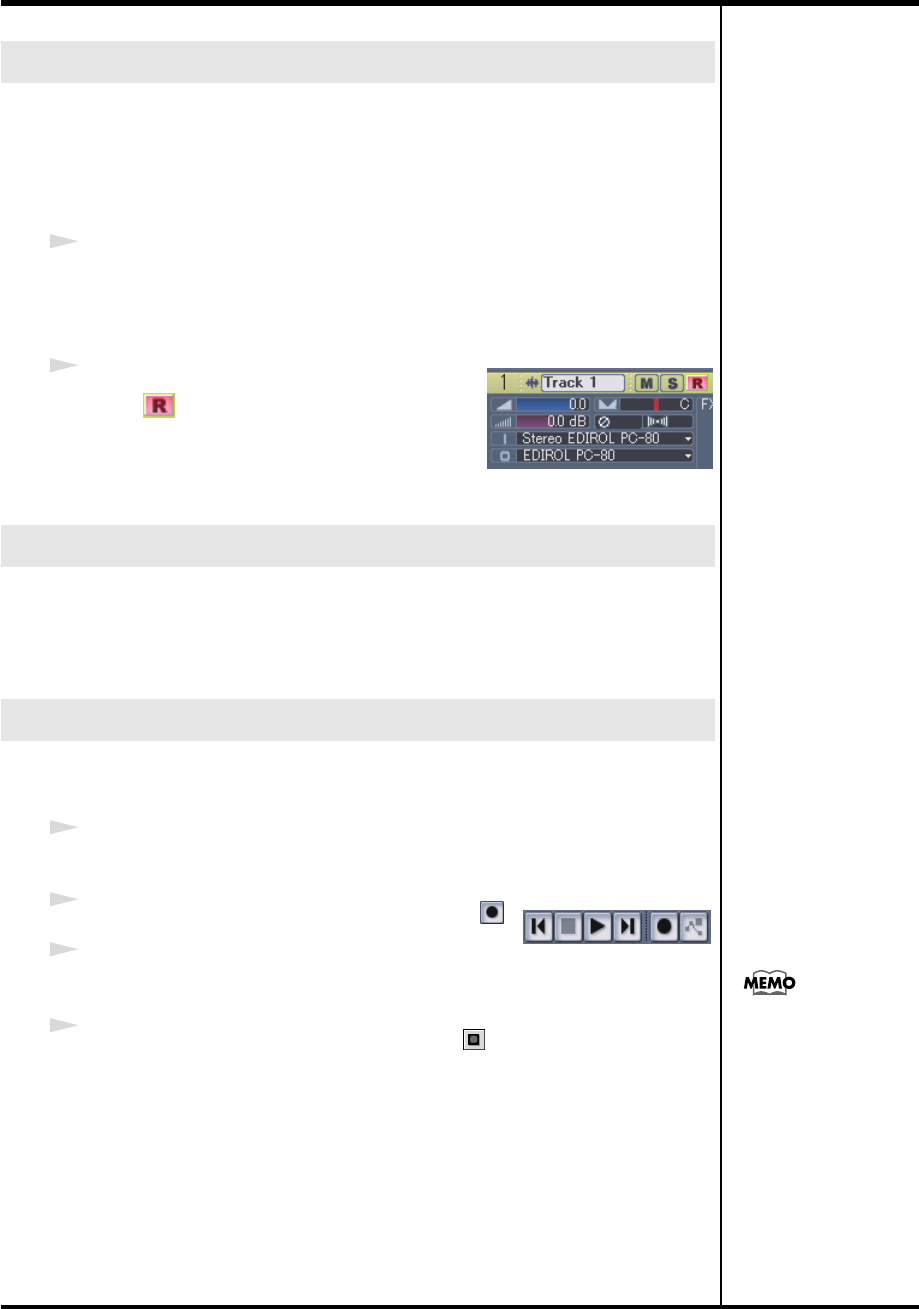
2
In the
Track
view window, click the
Record
button of the track you want to record,
placing the track in record-ready mode.
* The record-ready button of a track will turn red
when the track is in record-ready mode.
When recording audio, use the PC-80’s
Input Level Knob (LEVEL)
(p. 13) to
adjust the input level.
Use SONAR LE to check the input level. For details on how to do this, refer
to the online help for SONAR LE.
Connect your audio device, mic, or guitar to the PC-80, and record it as
follows.
1
Make sure that the track to be recorded is in record-ready mode.
2
In the
transport toolbar
, click the
record
button .
3
Play back the data you want to record, or begin
performing.
4
In the
transport toolbar
, click the
stop
button .
Recording will stop.
The
track
view of SONAR LE will show the recorded data as a clip.
Putting a track in record-ready mode
Adjusting the input level
Starting and stopping recording
Transport toolbar
If in the General tab of the
Global Options dialog
b
ox, the Display
Waveform Preview While
Recording is on, the
recorded data will appear
in red in the clip display
area. If this option is off,
the recorded region is
displayed in red.
PC-80_e.book 54 ページ 2005年11月10日 木曜日 午前11時34分