
Installation Instructions

CAUTION
EXCESSIVE WEIGHT HAZARD
To avoid back or other injury, have more than one person move or
lift the dryer.
IMPORTANT
If this is a new installation, washer should now be moved to within
4 feet of its fi nal location. Refer to INSTALLATION INSTRUCTIONS,
including connections and leveling, before continuing.
IMPORTANT
DO NOT REMOVE BACKING FROM ADHESIVE STRIP YET!
IMPORTANT
DO NOT REMOVE ANY EXISTING SCREWS FROM FRONT PANEL!
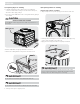
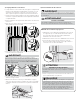
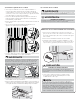
1. If already installed, disconnect dryer from electrical and gas
connections and exhaust venting. On models with Steam Option,
disconnect water supply to dryer.
2. Protect fl oor with cardboard or other covering and carefully tip dryer
onto its back.
3. Remove adjustable leveling legs and save for future use.
4. Attach front stacking bracket to dryer front with 2 #10 screws.
5. Carefully return dryer to upright position.
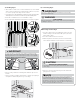
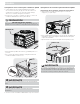
2. Carefully remove backing from clear self-adhesive strips. Apply long
strips to each side edge of the washer top.
3. Apply the short strips just inside the long strips at the back.
Prepare top surface of washer
1. Wipe front portion of top with isopropyl alcohol and a clean cloth.
A) Preparing dryer for stacking B) Preparing washer for stacking
ENGLISH
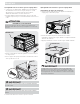
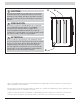
REMOVE (x4)
LONG (x2)
SHORT (x2)