
User Instructions
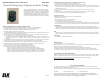

The ELK-6010 Keychain Remote “Fob” Transceiver is small
and lightweight handheld device. It features 5 pushbuttons, 1
for system status inquiry, and 4 which may be programmed to
perform system functions. The 6010 is compatible with Elk’s
Two-Way Wireless Technology Receivers, which currently
includes the ELK-M1 model M1XRFTW. Stand-alone “Slave
receivers” with voltage/relay outputs are also being designed.
Keychain Remote “Fob” Transciever ELK-6010
Enrolling, Programming, and Testing with M1 Control
1. Enter Keypad Installer Level Programming and navigate to Menu 14 - Wireless Definitions
2. Press the right arrow and scroll or navigate to Option 3 - Learn Wireless Transmitter.
3. Press the right arrow and scroll or navigate to the first desired zone number.
4. Press the right arrow to activate the enroll mode.
The keypad will display Push Transmitter Button and the M1 will speak “Press Transmitter button for zone xx.
5. Press and hold any one of the 5 buttons on the 6010.
6. Upon successful enrollment the keypad will briefly display the ID of the new transmitter and M1 will speak
“Zone xx Enrollment.” [If not successful try repeat the process again.]
The Transmitter ID (TXID) is 6 hexadecimal digits. For a Keychain Remote “FOB” the 1st digit will be “F”
followed by 5 digits of “0” to “F”. Examples: F12345, F9ABCF. This TXID is printed on the device and the
packaging.
7. The Rapid Enroll feature of M1 will advance to the next zone automatically. M1 will speak “Press Transmitter
button for zone xx (the next zone) and wait for you to install the battery in the next transmitter.
8. For each additional transmitter begin at step 4. When enrollment is completed press the ELK key twice.
9. Navigate to Menu 5 - Zone Definitions and program the Zone Definition for each wireless sensor.
For a Keychain Remote “Fob” program the Zone Definition as “Keyfob”.
10. Perform a Test of every sensor using the Keypad Walk Test (User Menu 3).
In the Elk M1 Control there are factory default definitions for the the buttons:
Button #1 (top position printed with a secure padlock symbol) will Arm the M1.
Button #2, (bottom position printed with a unsecure padlock symbol) will DISARM the M1.
Button #3, (left position printed with a light bulb symbol) is available for use by the installer.
Button #4, (right position printed with a asterisk symbol) is available for use by the installer.
Button #9, (center position printed with “i” for inquiry) will query the M1 for current status.
SPECIFICATIONS:
Low Profile Dimensions: .45” H x 1.37” W x 2.24” L
Battery: CR2032 coin cell, 3 volt. Service life of up to 5 years dependent on transmission power level and usage.
Frequency: 902 Mhz - 928 Mhz (frequency hopping over 50 channels)
Supervisor Check-in Intervals: N/A Keychain Remotes are not intended to be supervised
Transmission Duration (on-time): 50 milliseconds to transmit its data and receive an acknowledgement.
Anti-Jamming: Frequency hopping and short transmission time makes Elk’s sensor difficult to detect or jam.
BATTERY INSTALLATION AND REPLACEMENT
Using a small screwdriver, pry apart the unit at the mid line. Be careful when dividing the two halves. Partially
remove the printed circuit board until you are able to slide out the old battery from its holder. Replace with a
fresh new battery, then reposition the circuit board and snap the two halves back together.
Warning: Do not reverse the battery direction.
Using ElkRP Remote Program Software to add Wireless Sensors to M1
1. On the ElkRP Account Details screen open Wireless Setup.
2. Navigate to the Transmitters tab and double click the desired Zone number.
3. Place a check mark in the Enabled box. Because this is a Keychain Remote, select the Supervision type as:
0=Not Supervised. Keychain Remotes DO NOT send supervisory check-in signals since they typically are
carried off-site by the user.
4. Type in the TXID number of the Keychain Remote as printed on the sensor and the packaging.
5. Click Save.
6. Navigate to Menu 5 - Zone Definitions and program the Zone Definition for the 6010 as “Keyfob”.
7. Perform a Test of every sensor using the Keypad Walk Test (User Menu 3).
Operation and Testing
Operating the 6010 Keychain Remote “Fob” is very straightforward:
1. Select the desired button.
2. Press and hold the button for at least 1 full second.
3. You should receive the following feedbacks:
a. The operation to which the button is programmed should occur.
b. The bi-color LED on the 6010 will illuminate as part of the two-way feedback from the control and receiver.
4. In most cases the definition or meaning of the bi-color LED on the 6010 will depend on the button pressed:
SOLID GREEN
If button #2 (Disarm) or #9 (Info Status) was pressed this indicates the Control is presently Disarmed.
If button #1 (Arm) was pressed, this indicates the Control was unable to Arm possibly due to a violated zone.
If button #3 or #4 was pressed this indicates the message was received and asknowledged by the Control.
RED
If button #1 (Arm) or #9 (Info Status) was pressed this indicates the Control was (or just has been) Armed.
If button #2 (Disarm) was pressed this indicates the Control is Armed and that the attempt to disarm failed.
Blinking RED
Alarm Memory - Alarm has been activated
Featuring Elk’s Industry Leading Two-Way Supervised Wireless Technology.
FCC COMPLIANCE STATEMENT:
This device complies with Part 15 of the FCC Rules. Operation is subject to the following two conditions:
(1) this device may not cause harmful interference, and
(2) this device must accept any interference received, including interference that may cause undesired operation.
ELK-6010 KeyChain Remote "FOB" FCC ID: TMA ELK-6010
NOTE: ELK PRODUCTS IS NOT RESPONSIBLE FOR ANY CHANGES OR MODIFICATIONS NOT
EXPRESSLY APPROVED BY THE PARTY RESPONSIBLE FOR COMPLIANCE. SUCH MODIFICATIONS
COULD VOID THE USER’S AUTHORITY TO OPERATE THE EQUIPMENT.
6/13/2011
Page 1 Page 2