User’s Guide
AACR53700001K4.book Page 2 Friday, September 5, 2003 1:52 PM © 2003 eMachines, Inc. © 2003 Aesbus Knowledge Solutions This publication contains proprietary content and is protected by copyright. No part of this document may be reproduced, copied, or translated into other languages without prior written consent from eMachines, Inc. and Aesbus Knowledge Solutions. eMachines, Inc.
AACR53700001K4.book Page 3 Friday, September 5, 2003 1:52 PM first things first thank you for purchasing our notebook! You’ve made an excellent decision choosing eMachines. We’re sure that you’ll be pleased with the outstanding quality, reliability, and performance of your new notebook. Each and every eMachines notebook uses the latest technology and passes through the most stringent quality control tests to ensure that you are provided with the best product possible.
AACR53700001K4.book Page 4 Friday, September 5, 2003 1:52 PM getting started eMachines Customer Care eMachines is committed to delivering a great computer experience — not only with an exciting line of affordable performance products, but with friendly and knowledgeable people who stand behind them. We work hard to make your eMachines experience easy.
AACR53700001K4.book Page 5 Friday, September 5, 2003 1:52 PM first things first how to contact us When you need help or information, or want to get in touch with us, first try our website. If you don’t find what you need on the Web, just give us a call! on the Web To begin with, you may want to go to our home page at http://www.emachines.com. On our home page, you can learn about eMachines as a company, learn about the other products that we make, and navigate to our primary Customer Care support page.
AACR53700001K4.book Page 6 Friday, September 5, 2003 1:52 PM getting started by telephone Our call center team is highly trained and ready to help answer your questions, troubleshoot any problems, or direct you to other service options if necessary. Our goal is to solve your problem on the first call, so you can get back to enjoying your eMachines notebook. To speak with a support representative, call the phone number for your country: United States: 1-801-401-1419 6 a.m. to 10 p.
AACR53700001K4.book Page 7 Friday, September 5, 2003 1:52 PM first things first help tools We’ve developed this book and its companion poster to help you learn about your notebook and how to use it, but other tools are also available. The provided quick setup poster includes all of the steps you need to get started. This user’s guide provides detailed information about your notebook and basic instructions for its use and care. Online help is included in the software preloaded on your notebook.
AACR53700001K4.book Page 8 Friday, September 5, 2003 1:52 PM getting started basic care and safety Your notebook is designed and tested to meet the latest standards for information technology equipment safety. To ensure safe use of your notebook: ❂ Read and follow all safety instructions marked on the notebook and in this guide before you use your notebook. Retain this information for future use. ❂ Always set your notebook on a stable work surface.
AACR53700001K4.book Page 9 Friday, September 5, 2003 1:52 PM first things first ❂ Do not obstruct the air vents on the notebook or use it on a bed, sofa, rug, or other similar surface. The air vents are necessary for proper airflow and cooling of your notebook. If these air vents are blocked, your notebook may overheat. ❂ Do not work for long periods with the notebook resting on your lap.
AACR53700001K4.book Page 10 Friday, September 5, 2003 1:52 PM getting started ❂ This notebook contains an internal, lithium battery-powered, real-time clock. Only an authorized service technician should replace this internal battery. There is a risk of explosion and injury if the battery is incorrectly replaced or handled. Do not disassemble, crush or puncture the battery, short its external contacts, immerse it in water, or dispose of it in fire.
AACR53700001K4.book Page 11 Friday, September 5, 2003 1:52 PM contents first things first . . . . . . . . . . . . . . . . . . . . . . . . . . . . . 3 eMachines Customer Care . . . . . . . . . . . . . . . . . . . . . . . . . . . . . . . . . . . . . . . before you contact us . . . . . . . . . . . . . . . . . . . . . . . . . . . . . . . . . . . . . . . . how to contact us . . . . . . . . . . . . . . . . . . . . . . . . . . . . . . . . . . . . . . . . . . . help tools . . . . . . . . . . . . . . . . . . . . .
AACR53700001K4.book Page 12 Friday, September 5, 2003 1:52 PM getting started battery . . . . . . . . . . . . . . . . . . . . . . . . . . . . . . . . . . 47 charging your battery . . . . . . . . . . . . . . . . . . . . . . . . . . . . . . . . . . . . . . . . . . . initial charge . . . . . . . . . . . . . . . . . . . . . . . . . . . . . . . . . . . . . . . . . . . . . . . subsequent charges. . . . . . . . . . . . . . . . . . . . . . . . . . . . . . . . . . . . . . . . . managing your battery consumption .
AACR53700001K4.book Page 13 Friday, September 5, 2003 1:52 PM getting started 1 Your eMachines notebook has been designed so that you can set it up quickly and start using it right away.
AACR53700001K4.book Page 14 Friday, September 5, 2003 1:52 PM getting started 2. Turn your notebook right-side up and connect the AC power adapter to the notebook and a wall outlet. A yellow status light on the front-center of your notebook will light up, indicating that the battery is being charged. For more information about status lights, see chapter 3, “using your notebook.” Use only the AC adapter and power cord that were shipped with your notebook.
AACR53700001K4.book Page 15 Friday, September 5, 2003 1:52 PM getting started 3. Open your notebook: Slide the latch on the front of the notebook to the right 1 and, at the same time, lift the top panel 2. Adjust the position of the display to a comfortable viewing angle.
AACR53700001K4.book Page 16 Friday, September 5, 2003 1:52 PM getting started 4. Press the power button at the top right of the keyboard area to turn on your notebook. A blue light bar to the right of the power button lights up, showing you that your notebook is on. As your notebook starts up, you’ll see the eMachines logo. When you turn on your notebook for the first time, you will be prompted to enter some setup information. The process is simple.
AACR53700001K4.book Page 17 Friday, September 5, 2003 1:52 PM getting started 5. To turn off your notebook, do the following: a. Exit all programs you may have opened. Important: Always save open documents and files before turning off your notebook. b. From the Windows desktop, click Start 1 > Turn Off Computer 2. c. At the prompt, click Turn Off 3. When the blue power bar goes off, your notebook is completely powered down.
AACR53700001K4.book Page 19 Friday, September 5, 2003 1:52 PM quick tour 2 Before you begin using your eMachines notebook, let’s look at it from different views and tour its basic features. This chapter looks at your notebook from the following views: ❂ open ❂ left side ❂ right side ❂ back ❂ bottom This chapter provides a quick overview of the external features on your notebook.
AACR53700001K4.book Page 20 Friday, September 5, 2003 1:52 PM getting started open To begin with, look at your opened notebook and locate its main features.
AACR53700001K4.
AACR53700001K4.
AACR53700001K4.book Page 23 Friday, September 5, 2003 1:52 PM quick tour back 1 printer port 5 USB ports (3) 2 external monitor (VGA) port 6 air vents 3 S-Video (TV out) 7 AC power connector 4 FireWire (1394) port (on select models) Do not obstruct the air vents. They are necessary for proper airflow and cooling. If any of these vents are partially blocked or obscured, your notebook may overheat.
AACR53700001K4.book Page 24 Friday, September 5, 2003 1:52 PM getting started bottom 1 mini-PCI 4 battery release button 2 air vents 5 battery 3 memory Do not obstruct the air vents. They are necessary for proper airflow and cooling. If any of these vents are partially blocked or obscured, your notebook may overheat.
AACR53700001K4.
AACR53700001K4.book Page 26 Friday, September 5, 2003 1:52 PM getting started using the power button Your power button has three uses: ❂ turn on: If the notebook is off, press the power button to turn it on. ❂ turn off: If the notebook is on, press the power button to turn it off. Important: Always save any open documents and files before you turn off your notebook.
AACR53700001K4.book Page 27 Friday, September 5, 2003 1:52 PM using your notebook using the touchpad The built-in touchpad includes all the functionality of a traditional mouse. Just like a mouse, the touchpad lets you point to items on the Windows desktop and in applications, such as word processing documents, spreadsheets, and presentation programs. To move the pointer on the display, move your finger across the touchpad.
AACR53700001K4.book Page 28 Friday, September 5, 2003 1:52 PM getting started scrolling In some applications, you can drag your finger up or down on the scroll zone to roll the display up or down. tapping A unique feature of a touchpad, as compared to a traditional mouse, is the ability to recognize taps on the touchpad area as clicks of the left click button. If you’ve never used a touchpad with this feature, you may find it helpful.
AACR53700001K4.book Page 29 Friday, September 5, 2003 1:52 PM using your notebook using the keyboard In addition to full-sized keys, your keyboard includes special function keys and a numeric keypad. Familiarize yourself with these keyboard features by reading the following paragraphs. special function keys Many of the function keys across the top of the keyboard have two uses — one use set by your software programs and the other specific to eMachines notebooks.
AACR53700001K4.book Page 30 Friday, September 5, 2003 1:52 PM getting started To use a special function key, press and hold down the Fn key, press the key with the desired image on it, and then release both keys. See the following table for definitions of the special function keys.
AACR53700001K4.book Page 31 Friday, September 5, 2003 1:52 PM using your notebook numeric keypad To lock in the numeric keypad, press Fn + . When the numeric keypad is locked in, the letters on the number keys are deactivated. To help you identify the status of the numeric keypad, the num lock status light turns on and off when the keypad is turned on and off. See “interpreting status lights” for more information. To unlock in the numeric keypad, press Fn + 31 again.
AACR53700001K4.book Page 32 Friday, September 5, 2003 1:52 PM getting started using quick action buttons Seven buttons are located along the top right of the keyboard area. These buttons are used to launch programs, perform specific activities, or power the notebook on and off.
AACR53700001K4.
AACR53700001K4.book Page 34 Friday, September 5, 2003 1:52 PM getting started using the display This section discusses the most common display-related tasks you may need to perform, including: ❂ cleaning the display ❂ adjusting the brightness ❂ adjusting the resolution ❂ enabling TV output cleaning the display If you ever need to clean the display, use only a soft cloth moistened with water. Do not use household chemicals to clean your notebook.
AACR53700001K4.book Page 35 Friday, September 5, 2003 1:52 PM using your notebook adjusting the resolution Your notebook is already set to the optimal resolution for your display. If you use an external monitor or projector, you may need to adjust the resolution to best suit that device. The resolution setting and other display-related options are viewed and changed through your Windows Control Panel. From your desktop, click Start > Control Panel > Appearance and Themes > Display.
AACR53700001K4.book Page 36 Friday, September 5, 2003 1:52 PM getting started 3. If you want to change the settings for the TV, click Start > Control Panel > Appearance and Themes > Display. Click the Settings tab. Then click the Advanced button and then the Displays tab. a. If the image on the TV is not clear, you may need to adjust the country identification, display brightness, contrast, color saturation, or size.
AACR53700001K4.book Page 37 Friday, September 5, 2003 1:52 PM using your notebook using CDs and DVDs Your notebook includes a combination CD-RW/DVD drive. This drive can be used to store and transport data, to play music and movies, and to create your own music and data CDs.
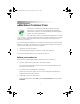
AACR53700001K4.book Page 38 Friday, September 5, 2003 1:52 PM getting started caring for and handling discs When handling CDs and DVDs, touch only the center and outside edges. Touching the reflective surface of the disc may damage it. inserting a disc 1. Press the eject button on the CD/DVD drive to open the tray. 2. After the tray pops open, slide it completely out. 3. Place the disc in the tray with the label facing up. Press gently on the disc until it snaps into place on the spindle. 4.
AACR53700001K4.book Page 39 Friday, September 5, 2003 1:52 PM using your notebook listening to audio CDs To play an audio CD: 1. Insert your CD into the CD/DVD drive. Wait a moment for your notebook to recognize the CD. 2. One of the following three things will happen: ❂ The CD plays automatically. ❂ A Windows message asks you what you want to do with the disc. Select Play Audio CD using Windows Media Player from the list and then click OK.
AACR53700001K4.book Page 40 Friday, September 5, 2003 1:52 PM getting started viewing DVDs It’s fun, convenient, and easy to watch a DVD on your notebook! 1. Insert your DVD into the CD/DVD drive. Wait a moment for the notebook to recognize the disc and begin playback. 2. If your DVD does not play automatically, open PowerDVD from the Windows desktop. Click Start > All Programs > eMachines PowerDVD. The emachines PowerDVD player is displayed. 3. Click the play button to begin playing the DVD.
AACR53700001K4.book Page 41 Friday, September 5, 2003 1:52 PM using your notebook creating CDs Your notebook comes with an integrated CD-RW drive, which allows you to create your own music and data CDs. The information in this section will walk you through creating your own CDs. creating an audio CD You create audio CDs through Windows Media Player. 1. Insert a standard CD-R or CD-RW into the CD drive. Wait a moment for your notebook to recognize the disc.
AACR53700001K4.book Page 42 Friday, September 5, 2003 1:52 PM getting started 3. Select Copy to CD or Device from the list of options on the taskbar. 4. Above the title bar on the Music to Copy side of the window, click the down arrow and select the playlist you want to copy. The songs on the playlist are displayed. 5. Click the check box next to each song you want to copy. 6. After you have selected all of the songs you want, click the red Copy Music button.
AACR53700001K4.book Page 43 Friday, September 5, 2003 1:52 PM using your notebook creating a data CD This section walks you through the process of creating a data CD, which consists of the following basic steps: ❂ inserting a standard CD-R or CD-RW into the CD drive ❂ selecting the items that you want to copy to CD ❂ copying the files! Each of these steps is discussed in detail below. 1. Insert a standard CD-R or CD-RW into the CD drive. Wait a moment for your notebook to recognize the disc.
AACR53700001K4.book Page 44 Friday, September 5, 2003 1:52 PM getting started d. In the File and Folder Tasks area of the screen, select Copy this folder (or Copy this file, depending on your selection). e. Select the CD drive (D:) as the destination and then click Copy. This copy process assembles the selected files in a temporary holding area. A progress bar is displayed while your notebook copies the selected files to the temporary holding area.
AACR53700001K4.book Page 45 Friday, September 5, 2003 1:52 PM using your notebook 3. After you have selected and assembled all of the items that you want, you are ready to copy the files to the CD. a. Click the icon in the system tray. A window for the CD drive (D:) is displayed, showing all of your selected folders and files. b. In the Writing Tasks area of the window, click Write these files to CD. The following wizard is displayed. c. Enter a name for the CD and then click Next. d.
AACR53700001K4.book Page 47 Friday, September 5, 2003 1:52 PM battery 4 You can use your notebook on either battery or AC power. Your choice of power source depends on your preference and the availability of AC power. When choosing your power source, consider the length of time you plan to use your notebook and the amount of charge in your battery. The life of your battery charge will vary, depending on its age and type, your notebook power settings, and the applications you are using.
AACR53700001K4.book Page 48 Friday, September 5, 2003 1:52 PM getting started charging your battery An installed battery will automatically recharge whenever the notebook is connected to an AC power source. To ensure that you always have plenty of battery power, recharge your battery frequently. initial charge As mentioned in chapter 1, “getting started,” to properly charge your battery the first time, you must leave the AC adapter connected to the notebook until the yellow battery status light goes off.
AACR53700001K4.book Page 49 Friday, September 5, 2003 1:52 PM battery managing your battery consumption Battery operating time depends on the software applications you are using and your Windows power-related system settings.
AACR53700001K4.book Page 50 Friday, September 5, 2003 1:52 PM getting started battery charge icon Whenever your notebook is using battery power, a battery icon is displayed in the system tray. Pay close attention to this battery charge icon and its charge message. Use this icon as your primary battery-charge monitoring tool. When you place your cursor over this icon, a message (illustrated below) is displayed, showing you how much charge your battery has left.
AACR53700001K4.book Page 51 Friday, September 5, 2003 1:52 PM battery warning messages and alarms If you are running on battery power and the charge gets low, your notebook will display warning messages and sound alarms, based on your power-related settings in the Windows Control Panel. See the next section for more information about these settings. When you receive these notices, take action right away to prevent data loss. Either connect to an AC power source or save and close your work session.
AACR53700001K4.book Page 52 Friday, September 5, 2003 1:52 PM getting started The following tabs are available in the Power Options Properties window. power schemes A power scheme is a group of basic power-use settings. Select a power scheme from a list, including: ❂ Home/Office Desk ❂ Portable/Laptop (default) ❂ Presentation ❂ Always On ❂ Minimal Power Management ❂ Max Battery alarms Low-battery warning messages can be visual messages or audible sounds.
AACR53700001K4.book Page 53 Friday, September 5, 2003 1:52 PM battery recalibrating your battery We recommend recalibrating your battery several times a year, or more often if you frequently use your battery. If your battery charge icon or the power meter becomes inaccurate, you need to recalibrate your battery. To recalibrate your battery: 1. Close all open files and programs. 2. Connect your notebook to AC power and allow the battery to completely charge. 3.
AACR53700001K4.book Page 54 Friday, September 5, 2003 1:52 PM getting started 5. After the battery is completely drained, reconnect your notebook to AC power. 6. Charge the battery completely, until the yellow battery status light goes off. 7. When you’re ready to use your notebook again, do the following to go to the Windows Control Panel and reset your power-related settings: a. From your desktop, click Start > Control Panel > Performance and Maintenance > Power Options. b.
AACR53700001K4.book Page 55 Friday, September 5, 2003 1:52 PM upgrades and replacements 5 Read this chapter when you need to upgrade or replace your: ❂ battery ❂ memory ❂ hard drive assembly The components inside your notebook are sensitive to static electricity, also known as electrostatic discharge.
AACR53700001K4.book Page 56 Friday, September 5, 2003 1:52 PM getting started battery To remove and install a battery: Before performing any of the procedures in this section, follow industry-standard practices for preventing electrostatic discharge. See the Warning note at the beginning of this chapter for more information. There is a danger of explosion if this battery is incorrectly replaced. Replace with the same or equivalent type recommended by eMachines. 1.
AACR53700001K4.book Page 57 Friday, September 5, 2003 1:52 PM upgrades and replacements 4. To insert a new battery pack, hold the battery label side down and at an angle, as shown. The battery pack is keyed so that it can be inserted in only one direction. If the battery does not slide in easily, verify that the connector end of the battery lines up with the connector in the battery compartment.
AACR53700001K4.book Page 58 Friday, September 5, 2003 1:52 PM getting started memory To remove and install a memory module: Before performing any of the procedures in this section, follow industry-standard practices for preventing electrostatic discharge. See the Warning note at the beginning of this chapter for more information. 1. Power off your notebook and close the display. Disconnect all cables, including the AC power adapter, modem, and network cables. 2.
AACR53700001K4.book Page 59 Friday, September 5, 2003 1:52 PM upgrades and replacements 4. To remove an existing memory module, gently press outward on the retaining clips on both sides of the memory module 1 until the memory module is released and tilts upward. Then, pull the module out of the slot 2.
AACR53700001K4.book Page 60 Friday, September 5, 2003 1:52 PM getting started 5. To insert a new memory module, hold the memory module at a 45-degree angle and insert it into the empty memory slot 1. The memory module is keyed so that it can be inserted in only one direction. If the module does not slide in easily, verify that the notch in the module lines up with the tab in the memory slot. Gently press down on the module until the retaining clips click into place 2. 6.
AACR53700001K4.book Page 61 Friday, September 5, 2003 1:52 PM upgrades and replacements hard drive assembly Your notebook includes one high-capacity, industry-standard, 9.5-mm IDE hard disk drive. This hard drive is housed in a bracket, which is inserted into the hard-drive compartment. All eMachines replacement drives are shipped in a bracket. A new hard drive has no data or software preloaded on it.
AACR53700001K4.book Page 62 Friday, September 5, 2003 1:52 PM getting started 3. To remove an existing hard drive assembly, first remove the hard drive retaining screw 1. Then, grasp the hard drive and slide the assembly completely out of the hard drive compartment 2. 4. To install the new hard-drive assembly, position the hard-drive assembly as shown in the previous illustration and slide the assembly completely into the open compartment. 5.
AACR53700001K4.book Page 63 Friday, September 5, 2003 1:52 PM system restore 6 If you ever need to restore your notebook to its original configuration, use the restore CDs that were shipped inside the box with your notebook. The restore CDs contain a copy of all software that was preinstalled on your notebook. The restore process erases all data and files from your notebook’s hard drive. Any programs, files, or data that you have added to your notebook will be lost.
AACR53700001K4.book Page 64 Friday, September 5, 2003 1:52 PM getting started 5. The following message is displayed: Caution: All data in the hard drive will be lost! Back up your files before proceeding. Are you sure you want to proceed? This is your last chance to stop the restore process! To stop the restore process, press N, remove the restore CD from the CD/DVD drive, and restart your notebook. If you are sure you want to proceed, press Y. The restore process begins.
AACR53700001K4.book Page 65 Friday, September 5, 2003 1:52 PM troubleshooting 7 Your notebook and its preinstalled software are designed to be trouble free. However, if you do encounter problems, this chapter may help you solve them. For minor problems, first try the following suggestions: ❂ Make sure that the notebook is powered on. ❂ Make sure that the AC adapter is properly connected to the computer and that the adapter is plugged into a working electrical outlet.
AACR53700001K4.book Page 66 Friday, September 5, 2003 1:52 PM getting started battery and power Q My battery charge icon is not accurate or a battery charge does not last as long as I think it should. What should I do? A Try the following: ❂ Allow the battery to return to room temperature. ❂ Check your power management settings in the Windows Control Panel. See “managing your battery consumption” in chapter 4 for instructions. ❂ Recalibrate the battery.
AACR53700001K4.book Page 67 Friday, September 5, 2003 1:52 PM troubleshooting keyboard and touchpad Q My notebook is not responding to the keyboard or the touchpad. How do I enable tapping on my touchpad? A Your notebook has locked up. Try one of the following to restart it: ❂ Press ctrl + alt + delete. ❂ Press and hold down the Power button for approximately 5 seconds until the notebook turns off. Then, restart your notebook. Q My notebook is not responding when I click or tap on the touchpad.
AACR53700001K4.book Page 68 Friday, September 5, 2003 1:52 PM getting started Q My cursor jumps to a different location on the display or does not respond at all. What’s wrong? A It is probably one of two things: ❂ Your touchpad is dirty. Clean the touchpad with a damp cloth (water only) and wipe it dry. ❂ Your touchpad is set to accept tapping. See “using the touchpad” in chapter 3 for more information about tapping.
AACR53700001K4.book Page 69 Friday, September 5, 2003 1:52 PM troubleshooting display brightness and resolution Q My display is blank. What’s wrong? A It could be several things: ❂ Your notebook may be “Sleeping.” Press any key to “wake” the notebook from Sleep mode. ❂ The brightness setting may be down too low. Press Fn + F8 several times to increase the brightness of the display. ❂ Your notebook may be sending its display to an external monitor or TV.
AACR53700001K4.book Page 70 Friday, September 5, 2003 1:52 PM getting started sound and volume Q There is no sound coming from my notebook. What’s wrong? A The volume is turned down too low or is muted. Do the following: ❂ Press the volume up quick action button to increase the sound level. ❂ Press both the volume up and the volume down buttons at the same time. (This is a quick way to mute and unmute the sound.) ❂ Double-click the Volume icon in the taskbar.
AACR53700001K4.book Page 71 Friday, September 5, 2003 1:52 PM troubleshooting printer Q My notebook is connected to a printer, but it’s not working. What should I do? A Try the following: ❂ Make sure that the printer power cable is plugged into a working electrical outlet and that the printer is powered on. ❂ Check the cable connections between your notebook and the printer. ❂ Verify that you have the correct printer driver installed for your printer model.
AACR53700001K4.book Page 73 Friday, September 5, 2003 1:52 PM notices and specifications a United States Federal Communications Commission Notice This equipment has been tested and found to comply with the limits for a Class B digital device, pursuant to Part 15 of the FCC Rules. These limits are designed to provide reasonable protection against harmful interference in a residential installation.
AACR53700001K4.book Page 74 Friday, September 5, 2003 1:52 PM getting started wireless communications The transmitting antenna must not be operated with any other antenna or transmitter. This equipment complies with FCC RF radiation exposure limits set forth for an uncontrolled environment. The transmitter should be installed and operated with a minimum distance of 20 centimeters between the radiator and your body.
AACR53700001K4.book Page 75 Friday, September 5, 2003 1:52 PM appendix European Notice Products with the CE Marking comply with the EMC Directive (89/336/EEC) and the Low Voltage Directive (73/23/EEC) issued by the Commission of the European Community and if this product has telecommunication functionality, the R&TTE Directive (1999/5/EC).
AACR53700001K4.book Page 76 Friday, September 5, 2003 1:52 PM getting started telephone 0141-9512461 To identify this product, refer to the model number found on the product. Canadian Notice This Class B digital apparatus meets all requirements of the Canadian Interference-Causing Equipment Regulations. Avis Canadien Cet appareil numerique de la classe B respecte toutes les exigences du Reglement sur le materiel broulilleur du Canada.
AACR53700001K4.book Page 77 Friday, September 5, 2003 1:52 PM appendix U.S. Regulations Governing the Use of Modems This equipment complies with Part 68 of the FCC Rules. On this equipment is a label that contains, among other information, the FCC registration number and Ringer Equivalence Number (REN) for this equipment. You must, upon request, provide this information to your telephone company.
AACR53700001K4.book Page 78 Friday, September 5, 2003 1:52 PM getting started U.K. Modem Compliance Information This modem is approved by the secretary of state at the Department of Trade and Industry for connection to a single exchange line of the public switched telephone network run by certain licensed public telecommunication operators or system connected thereto (direct exchange lines only, not shared service or 1-1 carrier systems).
AACR53700001K4.book Page 79 Friday, September 5, 2003 1:52 PM appendix This modem is approved for use in only the following functions: ❂ storage of telephone numbers for retrieval by a predator mined code ❂ initial proceed indication detection ❂ automatic calling / automatic answering ❂ tone detection ❂ loud-speaking facility This modem is not approved for connection to U.K. / private speech-band services. This modem does not support an automatic redial function.
AACR53700001K4.book Page 80 Friday, September 5, 2003 1:52 PM getting started notebook specifications dimensions depth: 10 in (254 mm) width: 13.8 in (352 mm) operating temperature 50°F to 90°F (10°C to 35°C) shipping/storage temperature 4°F to 140°F (-20°C to 60°C) humidity 20% to 80% maximum expandable memory 1 GB video display 15.
AACR53700001K4