Fast Ethernet Combo Print Server User’s Manual Version: 1.
COPYRIGHT Copyright ©2006/2007 by this company. All rights reserved. No part of this publication may be reproduced, transmitted, transcribed, stored in a retrieval system, or translated into any language or computer language, in any form or by any means, electronic, mechanical, magnetic, optical, chemical, manual or otherwise, without the prior written permission of this company.
FCC COMPLIANCE STATEMENT This device complies with Part 15 of the FCC Rules. Operation is subject to the following two conditions: (1) this device may not cause harmful interference, and (2) this device must accept any interference received, including interference that may cause undesired operation. Any changes or modifications not expressly approved by the party responsible for compliance could void the authority to operate equipment.
Contents 1. 2. 3. 4. Introduction ...................................................................... 1 Product Package ............................................................. 2 Combo Print Server ......................................................... 3 Getting Started................................................................. 4 4.1 4.2 Hardware Installation Procedure...................................... 4 Software Installation Procedure ....................................... 5 4.2.
1. Introduction Thank you for purchasing our Combo Print Server. This Print Server allows your GDI/Host-based printer become a sharable device on the network. GDI printer is a printer that has built-in support for Windows Graphical Device Interface (GDI), so it is no need to convert the output from Windows to another format such as PostScript or PCL language. GDI printers are sometimes called host-based printers because they rely on the host computer to rasterize pages.
2.
3. Combo Print Server This Combo Print Server supports GDI Print Server. Users can share GDI printer through the Combo Print Server. GDI printer is a printer that has built-in support for Windows Graphical Device Interface (GDI), so it is no need to convert the output from Windows to another format such as PostScript or PCL language. GDI printer relies on the bi-directional communications between printer and computer frequently, so that the majority of print servers cannot support it.
4. Getting Started Before you start, you should have: One computer with Windows 2000 SP4 above or Windows XP SP1 above One GDI printer or printer with USB port and an installation CD One Category 5 Ethernet Cable One USB Cable 4.1 Hardware Installation Procedure 1. Unpack the Print Server package and verify that all the items listed in the previous section are provided. 2. Plug the USB cable to the Print Server with the GDI printer that you want to share on the network. 3.
4.2 Software Installation Procedure Before you start, you should check your computer’s operating system. This program can be run in Windows 2000 SP4 above or Windows XP SP1 above. Please follow the steps below to start installation. Tip: You have to uninstall all the Print Server drivers and utilities if you have installed the previous version. 1. Insert the CD shipped along with the Combo Print Server into your CD-ROM drive. The Autorun.exe program should be executed automatically. If not, run Autorun.
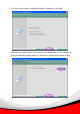
3. The “Print Server Utilities - InstallShield Wizard” is displayed, click "Next". 4. Click “Next” to install the Print Server utilities in the default folder or click “Change” to specify the destination folder where you would like to install the Print Server utilities.
5. The system starts installing the Print Server Utilities. 6. The utilities are all installed. Please click “Finish” to go to next step.
7. The Setup Wizard will be executed, it will guide you to configure the print server and install the printer with the print server to your computer. Please click “Next”. 8. The program will search the Print Server within the network. Select the Print Server you would like to setup and click “Next” to continue.
9.
Please enter the “Password” of the Print Server you have selected to login the Print Server for more settings. The default “User Name” is “admin”; default “Password” is “1234”. If you want to install the drivers of the printer and bind the printer with the Print Server directly, please click “Cancel”. You will be led to Step 13. Following is the completed procedures for configuring the Print Server. 10. Set the “Alias Name” to the Print Server here. Click on “Next”.
11. Please set the network settings for the Print Server manually. By default, the network settings are as follows. IP Address: 192.168.2.2 Subnet Mask: 255.255.255.0 If you have selected “DHCP”, the Print Server will try to determine the network settings automatically. If a DHCP Server is present within the network, the Print Server will automatically obtain and configure the network settings assigned by the DHCP Server. The assigned IP Address will be shown in the IP Address fields.
Note: The Print Server IP Address must be set to have the same network segment within your network environment or connected computer. If the network IP address settings are incorrect, then print server will not be able to communicate throughout the network. For example, if your router/gateway/computer is using IP address 192.168.2.1, then you need to give a unique manual IP to your print server with IP range 192.168.2.
The configurations are finished. Please click “Save” to apply new settings and restart the Print Server. 13. The “Install Printer Driver” page allows you to install the printer drivers and bind your printer with the Print Server to your computer. Please click “Yes” to start the installation. Also you can click “Install Printer” to install the printer.
4.2.1 GDI/Host-based Printer Following is the installation procedures for “GDI/Host-based Printer” installation. (Printer install example: Cannon MP130) 1. The program will start installing the Print Server Drivers automatically. You will see several pop-up screens and some prompt messages in the system tray. When the system stops prompting, the drivers are all installed. Please wait for a moment. 2. When the Print Server Drivers are all installed, the following screen is displayed.
3. The system starts to connect the printer to print server and automatically search and install the GDI printer’s drivers. 4.
You will see some prompt messages in the system tray. If there is driver needed you to manually install. In the “Found New Hardware Wizard”, please select “No, not this time” and click “Next” to continue. 5. Select “Install the software automatically (Recommended)” and click “Next”.
6. Select the correct driver and click “Next”. 7. After the driver is installed, click “Finish”.
8. After the drivers are installed completely (no more prompt message). Your GDI printer has been bound with the Print Server to your computer. Please click “Print Test Page” to confirm that you can print through the network successfully. Tip1: Before you click “Print Test Page” or “Finish”, please make sure the printer drivers and utilities are all installed. Otherwise, the printer may work abnormally because of some drivers for the printer is not installed.
10. Congratulations, the printer is installed successfully. The installed printer will be added to the “Printers & Faxes” in the Windows. If you want to print documents, please select “Printer Model Name(Network)”. 11. The following message will alert you to restart your computer before you start using the network printer. Click “OK” and restart your computer then all installations are completed. 4.2.1.
Using GDI Printer After restarting the computer, you will find there are two printer icons added to “Printers and Faxes” in the Windows. The “Printer Model Name(Network)” will stand for the printer. If you want to print a file or document, please print to “Printer Model Name(Network)”. To set the paper size or other feature of the printer, please right click “Printer Model Name(Network)” and select “Properties”.
21
4.3 Print Server Utilities After the installation is completed, there will be four utilities add to “Start/Programs/Print Server Utilities” folder in the Windows. Setup Wizard – If you don’t install the printer during the software installation in Section 3.2, you can run this setup wizard to install the printer drivers and bind the Print Server to your computer. Server Manager – Allows you to configure the Print Server’s IP Address, network protocols and other advanced features.
5. Setup Wizard The “Setup Wizard” will guide you to install the Normal printer or GDI printer with the Combo Print Server into your computer. If there is a new Combo Print Server installed in the network or the Combo Print Server you have installed doesn’t work, please run the “Setup Wizard” to install again. Please refer to the Section 3.2 for the detailed setup procedures. Note: In Windows 98SE/Me/NT, the “Setup Wizard” will only allow you to install “Normal Printer”.
6. Server Configuration 6.1 Introduction This chapter introduces Combo Print Server’s system configuration utility in Windows environment. This utility provides the most complete management and configuration functions on the Combo Print Server side. This utility only provides configuration functions for Combo Print Server itself; it does not include configuration functions for client side or other file server in the network environment.
6.2 Search for All Available Combo Print Server Every time when you run the “Server Manager” configuration utility, click the “Search” icon on the tool bar. The configuration utility will delay for several seconds because the utility is using system’s available network protocols to search for all Combo Print Servers on the network. All available Combo Print Servers will be listed under “Server Group” on the left side of the window.
6.3 Status of Combo Print Server Click “Status” icon on the tool bar, the status of the currently selected Combo Print Server will be showed on the right side of the window. The information of the Combo Print Server displayed are including MAC ID, Model Type, Firmware Version, status of each server port, IP address, subnet mask, default gateway and supported printing protocols…etc.
6.4 Setup the Combo Print Server Click “Setup” icon on the tool bar, the setup items of the current selected Combo Print Server will be showed on the right side of the window. Double click one of the icons to set up the selected Combo Print Server. A screen will pop up to verify “User Name” and “Password” of the Combo Print Server. The default values are: User Name: admin, Password: 1234. Tip: When you have finished the settings, please click “ Server to let the settings take effect.
6.5 General Configuration Double Click “General” icon and the General configuration window will pop-up. You can see basic Combo Print Server information in this page. You also can configure the “Server Name”, “User Name” and “Password” here. Server Name, the name of the Combo Print Server. You can use this name to identify the Combo Print Server when you are searching for the Combo Print Server by the “Server Manger” utility.
6.6 TCP/IP Configuration Double Click “TCP/IP” icon and the TCP/IP configuration window will pop-up. You can configure the Combo Print Server to automatically get IP from DHCP server or manually specify static IP. The Combo Print Server also has a built-in DHCP server. You can enable this DHCP server and let it manages IP for you.
IP Address Assignment: Click the “IP” button to enter the IP setting page. If you need the Combo Print Server to automatically get an IP from DHCP server, select “Auto IP”. You can also select “Static IP” to manually assign “IP Address”, “Subnet Mask” and “Gateway” for the Combo Print Server. By default, “Static IP” is enabled and the default settings are as follows. IP Address: 192.168.2.2 Subnet Mask: 255.255.255.
6.7 System Configuration Double Click “System” icon and the System configuration window will pop-up. In the System configuration page, you can see all available printing protocols and upgrade the new firmware for this Combo Print Server. Upgrade Firmware: You can use this “Upgrade Firmware” tool to update the newest firmware of the Combo Print Server. Click “ ” button and select the correct firmware in your PC.
7. Web Management 7.1 Introduction Combo Print Server can be configured and managed on the Web. Through Local Area Network, or even Internet, administrator can easily configure and manage Combo Print Server’s various main functions in browsers. Simply enter Combo Print Server’s IP address into your browser’s address field to manage a Combo Print Server by Combo Print Server’s built-in Web Server. The default IP Address, User Name and Password settings of the Combo Print Server are as follows.
7.2 Login You may use any Web Browser to review the status or configure the settings of the Combo Print Server. After entering the IP address of the Combo Print Server, a login page display. You have to enter correct “User Name” and “Password” before going to the Web Management pages. Note: Default User Name is “admin”, default password is “1234”.
7.3 7.3.1 Device Setup System This web page will display the information about the Combo Print Server. Device Name: The device name is not configurable. By default, it is the last 6-digit of the MAC ID of the print server with prefix “PS”. Print Server Name: The print server name is the same as device name by default. You can change this name to identify the print server easily when you are searching for the print server by the supplied utilities. Model Type: Display the type of the print server.
Wireless LAN Status: It will show if the Combo Print Server supports WLAN function. Firmware Version: Display the firmware version of the Combo Print Server. MAC Address: The MAC ID of the Combo Print Server will be displayed here. RAW/IPP/LPR Printing: By default, the RAW/IPP/LPR printing protocols are all enabled.
7.3.2 Printer This page lists the information and the status of the printer connected to the Combo Print Server USB port. The printer information includes manufacturer, model number and the supported printing language. The status of the printer includes ”Ready”, “Off Line” or “Paper Out”. Ready: The printer is ready to use. Off Line: The printer is not connected to Combo Print Server through USB cable or it is turned off. Paper Out: The printer is not ready because of paper out.
7.3.3 TCP/IP This page lists all TCP/IP settings of the Combo Print Server. Use DHCP/BOOTP: If the Combo Print Server enables to obtain IP Address from DCHP Server, it will show “On”. Otherwise, it will show “Off”. IP Address: Display the IP Address of the Combo Print Server. By default, the IP Address is “192.168.2.2”. Subnet Mask: Display the subnet mask setting of the Combo Print Server. By default, the subnet mask is “255.255.255.0”. Gateway: Display the gateway setting of the Combo Print Server.
7.4 Setup Wizard Note: After you have changed the settings from the Setup Wizard, please click “Save Settings” in the menu of the left side to let the settings take effect and reboot the Combo Print Server. 7.4.1 System You can change the server name and password of the Combo Print Server from here. Combo Print Server Name, the name of the Combo Print Server. You can change this name to identify the print server easily when you are searching for the print server by the supplied utilities.
7.4.1.1 Advanced Settings Some advanced feature of the Combo Print Server can be set here. TCP/IP Printing (LPR/IPP/RAW): This Combo Print Server supports TCP/IP network protocol and LPR/IPP/RAW printing protocols. By default these protocols are enabled.
7.4.2 TCP/IP You can configure the Combo Print Server to automatically get IP from DHCP server or manually specify static IP. If you need the Combo Print Server to automatically get an IP from DHCP server, select “Enable Obtain TCP/IP Settings Automatically (Use DHCP/ BOOTP)”. You also can select “Disable Use the following TCP/IP Settings” to manually assign “IP Address”, “Subnet Mask” and “Gateway” for the Combo Print Server.
7.4.3 Save Settings After configuring the Combo Print Server, you have to click the “Save Settings” to save the settings and restart the system.
7.5 7.5.1 System Tools Load Default You can use this page to restore the factory default settings. Click “OK” and after the print server is restarted, the process is completed. Be aware that all of your previous setup will be cleared.
7.5.2 Upgrade Firmware from Browser You can upgrade new firmware for this Combo Print Server in this page. Click “Browse” to select the new firmware in your storage and then click “OK”, the firmware will be updated in several minutes. Be aware that if you have started upgrading firmware, you have to follow all the upgrading steps or the Combo Print Server can’t turn back to normal configuration.
8. Troubleshooting 1. The printer cannot be shared in the network. Check if the printer is a Combo Printer. If it is a Combo printer, please make sure you have run the “Setup Wizard” and follow the instructions in the manual to install the printer. Check if the print server’s IP Address settings are in the same subnet with your computer. For example, if your computer’s IP Address is 192.168.1.3, the print server’s IP Address setting should be 192.168.1.x.
Type ipconfig /all and click enter. z z z Your PC’s IP address is 192.168.2.111. The PC’s Subnet Mask is 255.255.255.0. Your PC’s MAC Address is the one entitled Physical Address (00-00-E2-82-C3-AD). 3. This product is not found even after searching by the “Server Manager”. Check if the power adapter and the network cable are connected to the Combo Print Server properly. Check if the LAN and Ready LEDs are turned on. 4. The ways to change the IP Address of the Combo Print Server.
Note: Set a static IP Address to Combo Print Server is recommended since DHCP assignment may dramatically change the IP Address for Combo Print Server.
Appendix: Combo Print Server Compatibility List The compatibility information is the first released in May 2007. For the latest information, please contact with your dealer. GDI Printers No. Company Type Printer Model Print 1. HP B&W LaserJet Printer LaserJet 1020 OK 2. HP B&W LaserJet Printer LaserJet 1022 OK 3. Canon Color Ink Jet Printer (MFP) MPC 190 OK 4. Canon Color Ink Jet Printer (MFP) PIXMA MP530 OK 5. Canon Fax Machine FAXPHONE L120 OK 6.