
Installation guide
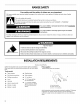


RANGE SAFETY
Your safety and the safety of others are very important.
We have provided many important safety messages in this manual and on your appliance. Always read and obey all safety
messages.
This is the safety alert symbol.
This symbol alerts you to potential hazards that can kill or hurt you and others.
All safety messages will follow the safety alert symbol and either the word "DANGER" or "WARNING."
These words mean:
You can be killed or seriously injured if you don't immediately
follow instructions.
You can be killed or seriously injured if you don't follow
instructions.
All safety messages will tell you what the potential hazard is, tell you how to reduce the chance of injury, and tell you what can
happen if the instructions are not followed.
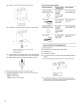
Tip Over Hazard
A child or adult can tip the range and be killed.
Connect anti=tip bracket to rear range foot.
Reconnect the anti=tip bracket, if the range is moved.
Failure to follow these instructions can result in death or serious burns to children and adults.
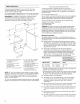
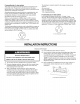
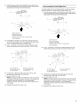
INSTALLATIONREQUIREMENTS
Gather the required tools and parts before starting installation. Parts supplied
Read and follow the instructions provided with any tools listed Check that all parts are included.
here.
Tools needed
• Tape measure • Masking tape
• Flat-blade screwdriver • Wire strippers
• Phillips screwdriver • 3/8"nut driver
• Level • 1/8"(3.2 mm) drill bit
• Hammer (for wood floors)
• Hand or electric drill • 3/16"(4.8 mm) carbide-
tipped masonry drill bit
• Wrench or pliers (for concrete/ceramic
• Marker or pencil floors)
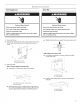
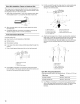
A. Anti-tip bracket
B. Plastic anchors (2)
C. #10 x 1Y2" screws (2)
B
/
f
S
Anti-tip bracket must be securely mounted to subfloor. Thickness
of flooring may require longer screws to anchor bracket to
subfloor. Longer screws are available from your local hardware
store.
2