
Owner's manual


IES PowerModule Operators’ Manual v1.4 Isine 10
6.9 Dimmer curves
Dimmer curves (dimmer laws) are used to adjust the
relationship between control level and light output.
This enables the dimmer to be fine-tuned to
accommodate the preferences of a live audience or
a television camera. There are 8 factory standard
dimmer laws, and a provision for further custom
selectable curves in later software releases.
The factory default law (0) is Linear Law. The list of
dimmer curves is as follows:
LINEAR linear relationship (standard)
LINEAR5 LIN5 (as linear but with a small
offset at 50%)
INV.LIN inverted (when control = zero,
dimmer = full etc.)
110V LIN 110V lamp load, linear law
S-LAW S-Law
BBC BBC specification (modified
square law for TV applications)
FLU-50 Fluorescent (minimum 50%)
FLU-30 Fluorescent (minimum 30%)
FLASH flash effect (light switches on and
off as the control fades up and
down)
NONDIM Non-Dim operation (see note
below)
9-14 for future use
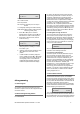
Note: There are two options for setting Non-Dim
(switch) operation – via the CURVE menu
and the NON-DIM menu, both found in
CONF. For Non-Dim operation, either or
both options may be set, but for normal
dimmer operation BOTH must be set to
‘NO’.
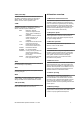
6.9.1 To select a dimmer curve:
1. Press CONF.
2. The screen shows the individual channel
number (or T if the dimmer set-up scheme
copies characteristics to all dimmers in the
rack) and gives access to all configuration
options.
3. Press Ï or Ð to select the channel
number.
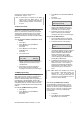
CONFIG: CH:[1]
CURVE: LINEAR
4. Press Î to select the CURVE option
(shown in square brackets) and set the
curve option by pressing Ï and Ð.
5. Press ENT to leave the menu and record
the changes or EXIT (to leave the
previous settings unchanged).
6.10 Non-Dim operation
PowerModules may be set to switch on and off
rather than dim, and in this way are used for many
other functions such as switching power to working
lights, non-dim and auxiliary circuits. There are two
methods of selecting non-dim operation – as
described here, and also as one of the ‘Dimmer
Curves’ as described in the previous section.
Note: When in non-dim mode, the dimmer is
operating in Phase-On mode only.
6.10.1 To select a dimmer to operate as a non-
dim switch:
1. Press CONF.
2. The screen shows the individual channel
number (or T if the dimmer set-up scheme
copies characteristics to all dimmers in the
rack) and gives access to all configuration
options.
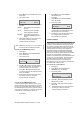
3. Press Ï or Ð to select the channel, and
then press Î to select the NON-DIM
option shown as follows:
CONFIG: CH:1
I/O: [NO]
4. Press Ï or Ð to select I/O operation
(either YES for Non-Dim or NO for normal
dimming operation).
5. Press ENT to leave the menu and record
the changes or EXIT (to leave the
previous settings unchanged).
Note: A special feature is included to prevent
damaging accidental ‘flashing’ to discharge
loads. If T-IN is set to, say, 10 secs. and T-
OUT to 99secs, then the on period is fixed for
10 seconds, and 99 seconds has to elapse
before switching on is possible again.
6.11 Maximum current
Each PowerModule has a facility to measure the
current and to restrict the operation of all dimmers
(or in the case of PM6, the dimmers on each phase)
to ensure the maximum current is not exceeded.
This operates as a ‘maximum demand’ protection
system, and reduces the levels of all dimmers on the
phase which is exceeding the preset current.
However, to eliminate the risk of an important light
automatically dimming during a performance, it is
possible to prioritise the channels which will reduce
in intensity to ensure the maximum demand is not
exceeded. This is achieved by setting the dimmer
channel to “priority”, and it will then ignore any
instruction to reduce level if the maximum demand is
exceeded.