CONTENTS Introduction 2 Accessories 3 Important Safety Instructions 4 Control Functions Primary Control Buttons Lock Electronic Display Secondary Control Panel 8 8 9 10 12 Operating Instructions 13 Usage DishDrawer Accessories Purpose of Each Insert 14 14 14 DishDrawer Loading Loading Pattern for 10 Place Settings 16 18 Detergent & Rinse Agent Dispenser Detergent Compartments Rinse Agent Dispenser 19 19 20 Option Adjustment Mode Rinse Agent Setting Auto Power Water Pressure 21 21 22 22 Was
INTRODUCTION Thank you and congratulations for making the wise decision in purchasing your Fisher & Paykel DishDrawer. Every care has been taken in designing and manufacturing your appliance. We are sure that you will enjoy using your DishDrawer and will soon appreciate its many benefits. We wish you many years of satisfying use. Unique Features of Your DishDrawer By now you will be aware that Fisher & Paykel's DishDrawer is a unique dishwasher, which offers benefits no other dishwasher can.
The Guilt-Free Small Load All DishDrawer models make the small, guilt-free load a reality. The DishDrawer minimizes water and energy consumption with each drawer using less than half the water of a conventional dishwasher. By washing smaller loads more frequently, you need never run out of clean dishes.
IMPORTANT SAFETY INSTRUCTIONS Warning - When using your DishDrawer, follow basic precautions, including the following: For your safety the information in this manual must be followed to minimize the risk of fire or explosion or to prevent property damage, personal injury or loss of life. Please read all instructions before operating the DishDrawer. Use the DishDrawer only for its intended function as described in this Use and Care manual.
IMPORTANT SAFETY INSTRUCTIONS To reduce the risk of injury, do not allow children to play in or on the DishDrawer. Under certain conditions hydrogen gas may be produced in a hot water heater system that has not been used for two weeks or more. HYDROGEN GAS IS EXPLOSIVE. If the hot water system has not been used for such a period, before using the dishwasher, turn on all hot water faucets and let the water flow from each for several minutes. This will release any accumulated hydrogen gas.
IMPORTANT SAFETY INSTRUCTIONS Do not operate this appliance if it is damaged, malfunctioning, partially disassembled or has missing or broken parts, including a damaged cord or plug. Do not store or use gasoline, or other flammable vapors and liquids in the vicinity of the DishDrawer. Connect to a properly rated, protected and sized power supply circuit to avoid electrical overload.
IMPORTANT SAFETY INSTRUCTIONS The DishDrawer must be used with the motor assembly, filter plate, drain filter and spray arm correctly in place. When disconnecting the appliance pull the plug rather than the cord or junction of cord to avoid damage. Household appliances are not intended to be played with by children. Children or persons with a disability that may limit their ability to use the appliance, should have a competent person instruct them in its use.
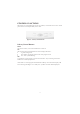
CONTROL FUNCTIONS Where there are two DishDrawers in the one cabinet, each drawer has its own control panel and can run independently of the other. Figure 1 - Primary Control Panel Primary Control Buttons Power The Power button, it turns the DishDrawer on and off. On After pressing the Power button the Electronic Display will show: · A green background. · The number of minutes from the last wash program used. · The min symbol flashing. Off To terminate a wash program, press the Power button.
Start / Pause This button has a number of functions. It serves to: · Start the DishDrawer, once the desired wash program has been selected. · Interrupt the wash program while in operation. When pausing the DishDrawer, wait until you have heard two additional beeps before you open the drawer, allowing the lid seal to deflate. While in the pause mode, the electronic display will be green, the min symbol will flash and the "smiley face" symbol will disappear. · Restart the DishDrawer after being paused.
Electronic Display The Electronic Display has a number of functions. It shows: · The time for each wash program selected. Each time you change the wash program, the number in the Electronic Display will change to indicate the approximate duration of each wash program. The min symbol will flash until a wash program has started. · Time remaining in the wash program. This is shown with the background in green.
Delay Start This feature allows you to delay the start of the wash program from one to twelve hours. It is useful if you want to take advantage of off peak power rates, (Check with your local Electrical Utility if this is available), or if you wish to start the DishDrawer at a later time. To Activate Delay Start 1. Ensure the drawer is closed. 2. Press and hold the Start / Pause button until the background color of the Electronic Display turns orange. 3.
Secondary Control Panel Wash Programs One advantage of two independent DishDrawers is that you can divide the dish loads according to need. For example, you can wash pots or heavily soiled items on a Heavy Plus program in one drawer while washing china or glassware on a Delicate Eco Save program in the other drawer. When selecting a wash program ensure the control panel inside the drawer is clean and dry. If not, wipe with a clean dry cloth.
OPERATING INSTRUCTIONS 1. Ensure the filter plate and drain filter is clean and free of food debris. Check the drain filter is flush with the filter plate and the spray arm is correctly on the impeller. 2. Check there is rinse agent in the dispenser. 3. Remove all food scraps from the dishes. 4. Load the dishes. Overcrowding the DishDrawer may lead to poor wash performance. Ensure there are no items blocking the spray arm path. 5.
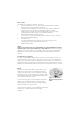
USAGE DishDrawerTM Accessories The basket is the basic insert DishDrawer requires to wash dishes. The inserts and racks can be added or removed to suit your individual needs. If you have two DishDrawers, some of the parts are interchangable between the two drawers. For example you can combine the two Mega Racks into one drawer and wash all cups and glasses, leaving the other drawer for plates and larger items.
Plate Insert The plate insert can be installed to the left or the right side of the basket. This insert is capable of supporting plates and bowls. 1 Mega Rack The Mega Rack can be installed to the left or the right side of the basket. If you want to wash wine glasses, this rack should be installed on the left side. This rack is designed to hold a combination of glasses, cups and small plates.
DISHDRAWERTM LOADING Baskets · · · · · · · · Scrape off all food scraps and remove any bones, crusts, toothpicks and any similar items. Overloading can lead to poorly washed dishes. Small light items should be placed soiled side down on the basket. Plates, bowls and saucers can be slotted into spaces provided. Long kitchen utensils can be laid flat on the cup racks. If there are no inserts in the basket, large bowls and pots can be placed flat in the DishDrawer.
Cup Racks Cups, glasses and kitchen utensils can be placed on both sides of the cups inserts. For best wash performance ensure there are no large items blocking the wash water from reaching the cup racks. See Figures 11 and 12 for the recommended method of loading the DishDrawer. Wine glasses can be supported on the left hand cup racks if used in conjunction with the Mega Rack. See Figure 15. Cutlery Baskets · · · For best wash performance mix spoons, knives and forks within each section of the basket.
Recommended Loading Pattern for 10 Place Settings Top Basket Figure 17 Bottom Basket Figure 18 Cutlery Basket Figure 19 Detergent Quantities We recommend the use of 5g of detergent in the pre-rinse compartment and 10g in the main wash compartment.
DETERGENT AND RINSE AGENT DISPENSER The detergent and rinse agent dispenser is located on the inside of the DishDrawer. 1 Detergent Compartments There are two compartments - one for pre-wash detergent and the other for the main wash detergent. The pre-wash compartment is the smaller. The size of the compartments are a guide to detergent usage. The main wash compartment has steps on the side, these can be used as a guide for how much detergent to use.
Rinse Agent Dispenser Rinse agent gives a streak free sparkling clean look to glass and chinaware. It speeds up drying and helps prevent metal from tarnishing. We highly recommend that you regularly use liquid rinse agent to give the best drying results. For best drying results, periodically check the rinse agent dispenser to see if it needs filling and fill when empty. The rinse agent dispenser is on the inside of the drawer, located underneath the detergent dispenser. The dispenser holds approximately 1.
OPTION ADJUSTMENT MODE After using the DishDrawer, you may want to change some of the preset options to suit your needs. The following settings can be changed: Rinse Agent Auto Power Water Pressure To make these changes it is necessary to enter into the Option Adjustment Mode. To Enter Option Adjustment Mode Press Power to turn the DishDrawer on. The electronic display will be green. Press and hold the Program and Eco Save buttons simultaneously for five seconds.
Auto Power When the Auto Power feature is on it turns the DishDrawer automatically to the Normal Operating Mode whenever the drawer is opened. Auto Power lights up the Electronic Display and a series of beeps are emitted when the DishDrawer is opened. When the DishDrawer leaves the factory, Auto Power is programmed to occur, however this can be turned on or off as desired. Enter into the Option Adjustment Mode as explained previously. Pressing the Lock button will turn the Auto Power on or off.
Plus Program (Red) Eco Save Program (Green) 23 Heavily soiled tableware and cookware with dried on food residues Dishes with normal soils for optimum wash and dry performance Slightly soiled, recently used dishes and cutlery Slightly soiled tableware, fragile glassware and crockey Heavily soiled everyday dishes including cookware that have been used recently Normally soiled dishes for optimum energy use Very lightly soiled and non greasy dishes For non greasy, lightly soiled delicate and heat sens
Notes:· The detergent quantities are for individual DishDrawers. However, if you live in a soft water area, you may need less detergent. · If you live in a hard water area, a water softener is recommended to improve water quality, detergent effectiveness, prevent the build up of calcium deposits on dishes and cutlery and in the DishDrawer. · Wash times are only approximate on the electronic display. Wash times can be longer if water and/or room temperatures are cold.
CARE GUIDE The combination of high temperatures and dishwasher detergent may cause damage to some items if they are washed in the DishDrawer. Remember, if in any doubt about any aspect concerning items washed in the DishDrawer, follow the instructions from the manufacturer of the items, or wash the item by hand. Glassware Most everyday glassware is dishwasher safe. Crystal, very fine and antique glassware may etch i.e. become opaque. You may prefer to wash these items by hand.
USER MAINTENANCE INSTRUCTION Cleaning the DishDrawerTM The secondary control panel and the front of the DishDrawer may need wiping down from time to time. This can be done with a clean damp cloth. We do not recommend the use of the following cleaning agents on or in your DishDrawer as they may damage it. · Plastic or stainless steel scouring pads. · Abrasive, solvent, household cleaners, acid or alkaline cleaners. · Handwashing liquids, soap, laundry detergents or disinfectants.
To Clean the Filter Plate · Ensure the DishDrawer is cool before you start cleaning. · Follow the above instructions for removing the drain filter and spray arm. · In the center of the filter plate, there are two rings. Hold the center ring still and turn the outer ring counter clockwise, about a 1/8 turn. This will release the filter plate. · When cleaning the underside of the filter plate, care must be taken on the sharp outer edge to avoid the risk of cut type injuries.
PROBLEM SOLVER If the DishDrawer does not appear to be working properly, check the chart below and correct where possible. You are reminded that User faults are not covered by Warranty. If you need any assistance please call our Customer Care Center on 1 888 9 367 872. PROBLEM DishDrawer will not start POSSIBLE CAUSE Power supply not connected WHAT TO DO Connect the power supply. The drawer not closed properly Ensure the drawer is firmly closed.
PROBLEM SOLVER PROBLEM Dishes do not come out clean POSSIBLE CAUSE Overloading the DishDrawer WHAT TO DO Ensure that dishes are not nesting together. Unsuitable detergent Use recommended brands of dishwasher detergent. Not enough detergent Follow our wash program guide or the detergent manufacturers instruction. Spray arm unable to rotate Ensure there are no items blocking the path of the spray arm. Spray arm holes are blocked Clean the spray arm.
PROBLEM SOLVER PROBLEM Foaming POSSIBLE CAUSE Incorrect amount of detergent WHAT TO DO See Wash Program chart or consult the manufacturers instruction. Too much egg yolk in wash load Add detergent into the pre-rinse compartment. Rinse agent setting too high Decrease rinse agent setting. Dishes not dry Incorrect loading Ensure the dishes are not nesting together. Rinse agent depleted Refill the rinse agent dispenser. Rinse agent setting too low Increase rinse agent setting.
PROBLEM SOLVER PROBLEM DishDrawer Interior Stained POSSIBLE CAUSE Some foods, like tomato based products, may stain the interior of the DishDrawer.. WHAT TO DO Pre-rinse dishes before placing in DishDrawer or use the rinse program after adding the dishes, which may minimize the level of staining.
FAULT CODE DISPLAYS The Electronic Display shows when there is a fault. The DishDrawer will continuously beep every second until the Power button is pressed. The fault codes are as follows and we recommend that you check the chart below to correct the fault where possible. If the fault code cannot be removed by pressing the Power button, turn the power off at the mains supply, wait 10 seconds and turn the DishDrawer on again.
FAULT CODE DISPLAYS FAULT CODE POSSIBLE CAUSE WHAT CAN BE DONE U2 Drawer Opened during wash Press the Power button to clear the fault. Always press the Start / Pause button before opening the drawer if the wash is in progress. U3 Drain pump blocked Ensure the motor assembly is free of foreign matter. Refer to Section on User Maintenance Instruction. Incorrect Installation Check the installation to ensure the drain hose(s) are not kinked. Incorrect water pressure setting.
FAULT CODE DISPLAYS FAULT CODE POSSIBLE CAUSE WHAT CAN BE DONE F4 Faulty temperature sensor or element Call your Fisher & Paykel Authorized Service Agent. F6, F7, F8 Electronics malfunction Call your Fisher & Paykel Authorized Service Agent.
Smart Care certificate DishDrawer Warranty what is covered by the Warranty FULL TWO YEAR SMART CARE WARRANTY For two years from the date of original purchase, we will provide, free of charge, parts and service labor in your home to repair or replace any part of the DishDrawer that fails because of a manufacturing defect. .............................................
DishDrawer Warranty (continued) what is not covered by the Warranty (continued) WARRANTOR IS NOT RESPONSIBLE FOR CONSEQUENTIAL DAMAGES Some states do not allow the exclusion or limitation of incidental or consequential damages, so the above limitation or exclusion may not apply to you. This warranty gives you specific legal rights, and you may also have other rights which vary from state to state.