
Owner Manual
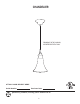


ASSEMBLY INSTRUCTIONS
7
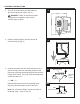
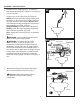
Carefully arrange excess wiring and wire
connectors within canopy.
Align holes in edge of fixture canopy with
screw holes at ends of mounting strap.
Secure fixture with mounting strap screws
that were removed in Step 3A on page 4.
(Fig. 8A)
----- OR ------
Align holes in fixture canopy with fixture
screws on mounting strap and push up.
Secure fixture to ceiling with the two
decorative nuts that were removed in
Step 3B on page 4. (Fig. 8B)
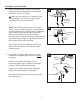
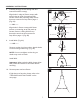
Restore power and test fixture.
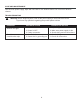
If light does not function, please refer to the
"TROUBLESHOOTING GUIDE" on the
next page.
Install bulb. (Fig. 9A)
----- OR ------
9A
8.
9.
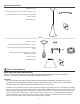
Outlet Box
A
8A
C
8B
Outlet Box
Canopy
Canopy
Mounting
Strap
Screw
Mounting Strap
Mounting Strap
Decorative Nut
Remove socket ring from socket. Attach shade
to socket using socket ring. (Fig. 9B)
NOTE: Do not overtighten socket ring as
shade may crack or break.
Install bulb.
Important: When replacing bulb, please allow
bulb, shade and fixture to cool down before
touching.
10
9B
10.
Bulb
Socket Ring