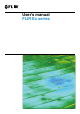
User’s manual FLIR Ex series
User’s manual FLIR Ex series #T559828; r.
Table of contents 1 Disclaimers ......................................................................................1 1.1 Legal disclaimer ....................................................................... 1 1.2 Usage statistics ........................................................................ 1 1.3 Changes to registry ................................................................... 1 1.4 U.S. Government Regulations...................................................... 1 1.5 Copyright ...
Table of contents 7.6 7.7 7.8 7.9 7.10 7.11 7.12 7.13 7.14 7.15 7.16 7.17 7.18 7.19 7.5.1 General...................................................................... 12 7.5.2 Procedure .................................................................. 12 Deleting all images.................................................................. 13 7.6.1 General...................................................................... 13 7.6.2 Procedure .................................................
Table of contents 11 Application examples....................................................................... 22 11.1 Moisture & water damage ......................................................... 22 11.1.1 General...................................................................... 22 11.1.2 Figure ........................................................................ 22 11.2 Faulty contact in socket ............................................................ 22 11.2.1 General..................
1 Disclaimers 1.1 Legal disclaimer 1.7 Patents All products manufactured by FLIR Systems are warranted against defective materials and workmanship for a period of one (1) year from the delivery date of the original purchase, provided such products have been under normal storage, use and service, and in accordance with FLIR Systems instruction. One or several of the following patents and/or design patents may apply to the products and/or features.
2 Safety information WARNING Applicability: Cameras with one or more batteries. Do not disassemble or do a modification to the battery. The battery contains safety and protection devices which, if damage occurs, can cause the battery to become hot, or cause an explosion or an ignition. WARNING Applicability: Cameras with one or more batteries. If there is a leak from the battery and you get the fluid in your eyes, do not rub your eyes. Flush well with water and immediately get medical care.
2 Safety information CAUTION Applicability: Cameras with one or more batteries. Do not get water or salt water on the battery, or permit the battery to become wet. Damage to the batteries can occur. CAUTION Applicability: Cameras with one or more batteries. Do not make holes in the battery with objects. Damage to the battery can occur. CAUTION Applicability: Cameras with one or more batteries. Do not hit the battery with a hammer. Damage to the battery can occur.
2 Safety information CAUTION Applicability: Cameras with one or more batteries. The temperature range through which you can charge the battery is ±0°C to +45°C (+32°F to +113°F), unless other information is specified in the user documentation or technical data. If you charge the battery at temperatures out of this range, it can cause the battery to become hot or to break. It can also decrease the performance or the life cycle of the battery. CAUTION Applicability: Cameras with one or more batteries.
3 Notice to user 3.1 User-to-user forums Exchange ideas, problems, and infrared solutions with fellow thermographers around the world in our user-to-user forums. To go to the forums, visit: http://www.infraredtraining.com/community/boards/ 3.2 Calibration We recommend that you send in the camera for calibration once a year. Contact your local sales office for instructions on where to send the camera. 3.
4 Customer help 4.1 General For customer help, visit: http://support.flir.com 4.2 Submitting a question To submit a question to the customer help team, you must be a registered user. It only takes a few minutes to register online. If you only want to search the knowledgebase for existing questions and answers, you do not need to be a registered user.
5 Quick Start Guide 5.1 Procedure Follow this procedure: 1. Charge the battery. You can do this in three different ways: • Charge the battery using the FLIR stand-alone battery charger. • Charge the battery using the FLIR power supply. • Charge the battery using a USB cable connected to a computer. Note Charging the camera using a USB cable connected to a computer takes considerably longer than using the FLIR power supply or the FLIR stand-alone battery charger. 2. 3. 4. 5.
6 Description 6.1 Camera parts 6.1.1 Figure 6.1.2 Explanation 1. 2. 3. 4. 5. Digital camera lens. Infrared lens. Lever to open and close the lens cap. Trigger to save images. Battery. 6.2 Keypad 6.2.1 Figure 6.2.2 Explanation 1. Camera screen. #T559828; r.
6 Description 2. Archive button Function: . • Push to open the image archive. 3. Navigation pad. Function: • Push left/right or up/down to navigate in menus, submenus, and dialog boxes. • Push the center to confirm. 4. Cancel button Function: . • Push to cancel a choice. • Push to go back into the menu system. 5. On/off button Function: • Push the button to turn on the camera. • Push and hold the button for less than 5 seconds to put the camera in standby mode.
6 Description 6.4 Screen elements 6.4.1 Figure 6.4.2 Explanation 1. 2. 3. 4. 5. 6. Main menu toolbar. Submenu toolbar. Spotmeter. Result table. Status icons. Temperature scale. #T559828; r.
7 Operation 7.1 Charging the battery 7.1.1 Charging the battery using the FLIR power supply Follow this procedure: 1. Connect the power supply to a wall outlet. 2. Connect the power supply cable to the USB connector on the camera. Note The charging time for a fully depleted battery is 2 hours. 7.1.2 Charging the battery using the FLIR stand-alone battery charger. Follow this procedure: 1. Connect the stand-alone battery charger to a wall outlet. 2. Remove the battery from the camera. 3.
7 Operation 7.3.2 Image capacity Approximately 500 images can be saved to the internal camera memory. 7.3.3 Naming convention The naming convention for images is FLIRxxxx.jpg, where xxxx is a unique counter. 7.3.4 Procedure Follow this procedure: 1. To save an image, pull the trigger. 7.4 Recalling an image 7.4.1 General When you save an image, it is stored in the internal camera memory. To display the image again, you can recall it from the internal camera memory. 7.4.
7 Operation 7.6 Deleting all images 7.6.1 General You can delete all images from the internal camera memory. 7.6.2 Procedure Follow this procedure: 1. Push the center of the navigation pad. This displays a toolbar. 2. 3. 4. 5. On the toolbar, select Settings . This displays a dialog box. In the dialog box, select Device settings. This displays a dialog box. In the dialog box, select Reset options. This displays a dialog box. In the dialog box, select Delete all saved images. 7.
7 Operation 7.10 Hiding measurement tools 7.10.1 Procedure Follow this procedure: 1. Push the center of the navigation pad. This displays a toolbar. 2. On the toolbar, select Measurement . This displays a toolbar. 3. On the toolbar, select No measurements . 7.11 Changing the color palette 7.11.1 General You can change the color palette that the camera uses to display different temperatures. A different palette can make it easier to analyze an image. 7.11.2 Procedure Follow this procedure: 1.
7 Operation • Digital camera: The camera displays a digital camera image. 7.12.2 Procedure Follow this procedure: 1. Push the center of the navigation pad. This displays a toolbar. 2. On the toolbar, select Image mode . This displays a toolbar. 3. On the toolbar, select one of the following: • MSX . • Thermal . • Picture-in-picture (large) . • Picture-in-picture (small) . • Digital camera . 7.13 Changing the temperature scale mode 7.13.
7 Operation 2. On the toolbar, select Temperature scale . This displays a toolbar. 3. On the toolbar, select one of the following: • Auto • Lock . . 7.14 Setting the emissivity as a surface property 7.14.1 General To measure temperatures accurately, the camera must know what kind of surface you are measuring. You can choose between the following surface properties: • Matt. • Semi-matt. • Semi-glossy. For more information about emissivity, see section 14 Thermographic measurement techniques, page 32.
7 Operation Emissivity is a property that indicates how much radiation originates from an object as opposed to being reflected by it. A lower value indicates that a larger proportion is being reflected, while a high value indicates that a lower proportion is being reflected. Polished stainless steel, for example, has an emissivity of 0.14, while a structured PVC floor typically has an emissivity of 0.93. For more information about emissivity, see section 14 Thermographic measurement techniques, page 32.
7 Operation • Photo as separate JPEG: When this menu command is selected, the digital photo from the visual camera is saved at its full field of view as a separate JPEG image. • Demonstration mode: This menu command provides a camera mode that displays various images without any user interventions. The camera mode is intended for demonstration purposes or when displaying the camera in a store. • Off. • Electrical applications. • Building applications.
8 Technical data For technical data on this product, refer to the product catalog and/or technical datasheets on the User Documentation CD-ROM that comes with the product. The product catalog and the datasheets are also available at http://support.flir.com. #T559828; r.
9 Declaration of conformity #T559828; r.
10 Cleaning the camera 10.1 Camera housing, cables, and other items 10.1.1 Liquids Use one of these liquids: • Warm water • A weak detergent solution 10.1.2 Equipment A soft cloth 10.1.3 Procedure Follow this procedure: 1. Soak the cloth in the liquid. 2. Twist the cloth to remove excess liquid. 3. Clean the part with the cloth. CAUTION Do not apply solvents or similar liquids to the camera, the cables, or other items. This can cause damage. 10.2 Infrared lens 10.2.
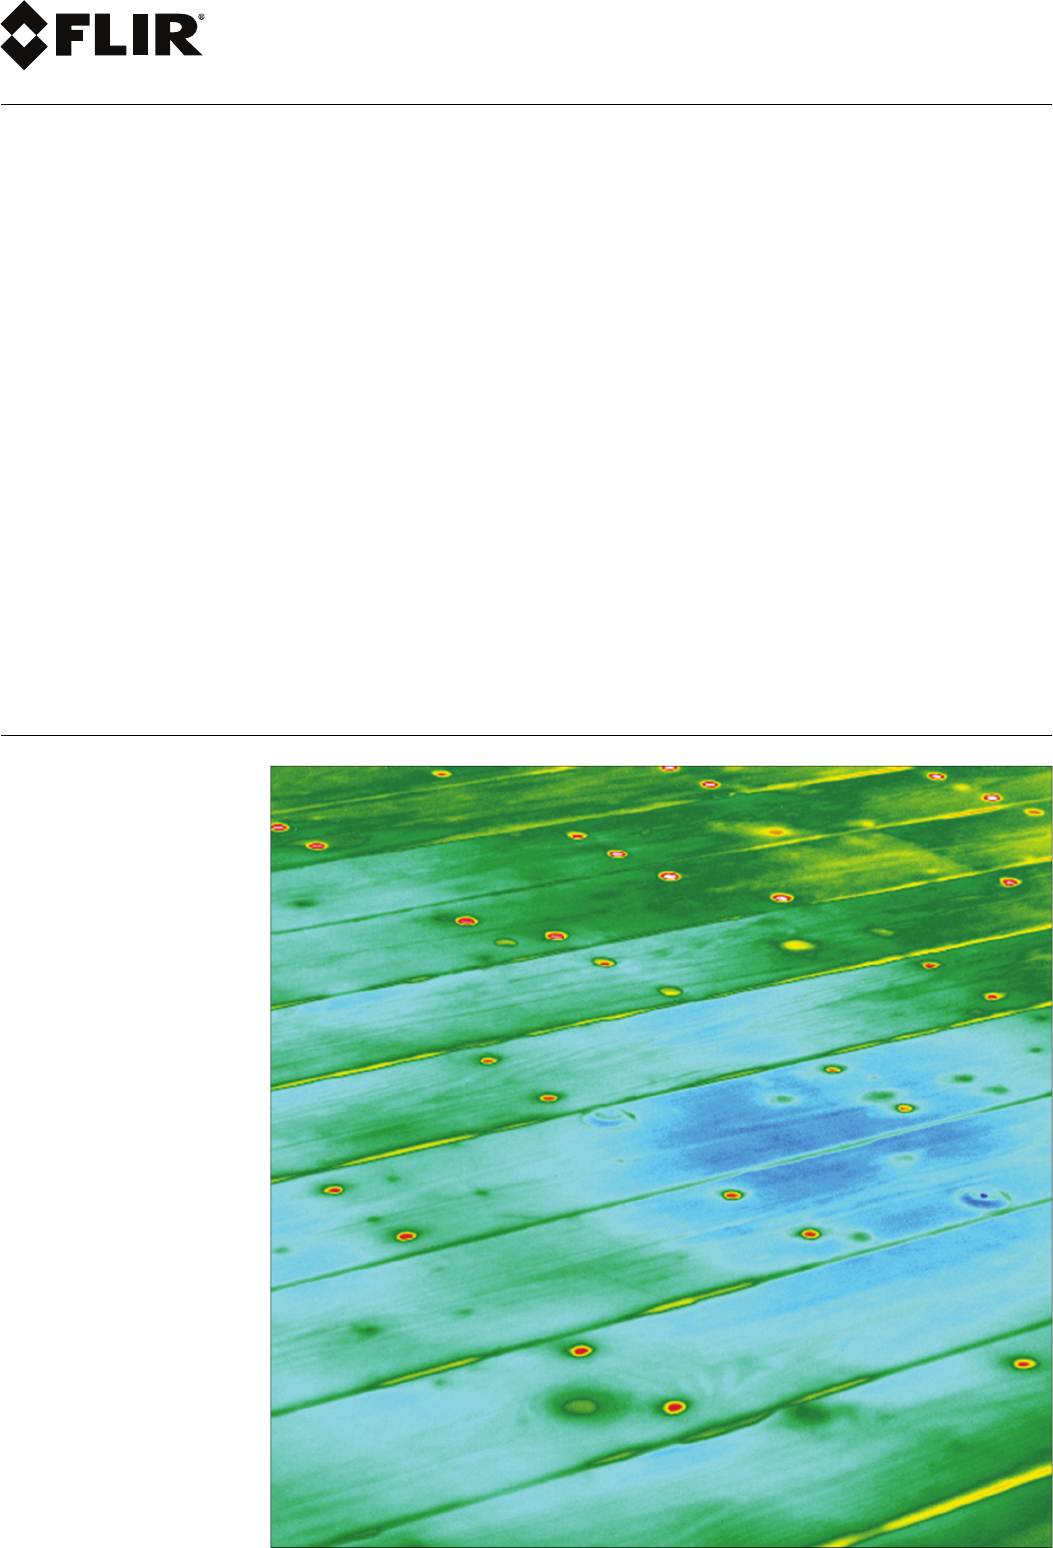
11 Application examples 11.1 Moisture & water damage 11.1.1 General It is often possible to detect moisture and water damage in a house by using an infrared camera. This is partly because the damaged area has a different heat conduction property and partly because it has a different thermal capacity to store heat than the surrounding material. Note Many factors can come into play as to how moisture or water damage will appear in an infrared image.
11 Application examples 11.3 Oxidized socket 11.3.1 General Depending on the type of socket and the environment in which the socket is installed, oxides may occur on the socket's contact surfaces. These oxides can lead to locally increased resistance when the socket is loaded, which can be seen in an infrared image as local temperature increase. Note A socket’s construction may differ dramatically from one manufacturer to another.
11 Application examples 11.4 Insulation deficiencies 11.4.1 General Insulation deficiencies may result from insulation losing volume over the course of time and thereby not entirely filling the cavity in a frame wall. An infrared camera allows you to see these insulation deficiencies because they either have a different heat conduction property than sections with correctly installed insulation, and/or show the area where air is penetrating the frame of the building.
11 Application examples 11.5 Draft 11.5.1 General Draft can be found under baseboards, around door and window casings, and above ceiling trim. This type of draft is often possible to see with an infrared camera, as a cooler airstream cools down the surrounding surface. Note When you are investigating draft in a house, there should be sub-atmospheric pressure in the house. Close all doors, windows, and ventilation ducts, and allow the kitchen fan to run for a while before you take the infrared images.
12 About FLIR Systems FLIR Systems was established in 1978 to pioneer the development of high-performance infrared imaging systems, and is the world leader in the design, manufacture, and marketing of thermal imaging systems for a wide variety of commercial, industrial, and government applications.
12 About FLIR Systems Figure 12.2 LEFT: Thermovision Model 661 from 1969. The camera weighed approximately 25 kg (55 lb.), the oscilloscope 20 kg (44 lb.), and the tripod 15 kg (33 lb.). The operator also needed a 220 VAC generator set, and a 10 L (2.6 US gallon) jar with liquid nitrogen. To the left of the oscilloscope the Polaroid attachment (6 kg/13 lb.) can be seen. RIGHT: FLIR i7 from 2012. Weight: 0.34 kg (0.75 lb.), including the battery.
12 About FLIR Systems 12.4 A few images from our facilities Figure 12.3 LEFT: Development of system electronics; RIGHT: Testing of an FPA detector Figure 12.4 LEFT: Diamond turning machine; RIGHT: Lens polishing Figure 12.5 LEFT: Testing of infrared cameras in the climatic chamber; RIGHT: Robot used for camera testing and calibration #T559828; r.
13 Glossary absorption (absorption factor) The amount of radiation absorbed by an object relative to the received radiation. A number between 0 and 1. atmosphere The gases between the object being measured and the camera, normally air. autoadjust A function making a camera perform an internal image correction. autopalette The IR image is shown with an uneven spread of colors, displaying cold objects as well as hot ones at the same time. blackbody Totally non-reflective object.
13 Glossary image correction (internal or external) A way of compensating for sensitivity differences in various parts of live images and also of stabilizing the camera. infrared Non-visible radiation, having a wavelength from about 2–13 μm. IR infrared isotherm A function highlighting those parts of an image that fall above, below or between one or more temperature intervals. isothermal cavity A bottle-shaped radiator with a uniform temperature viewed through the bottleneck.
13 Glossary span The interval of the temperature scale, usually expressed as a signal value. spectral (radiant) emittance Amount of energy emitted from an object per unit of time, area and wavelength (W/m2/μm) temperature difference, or difference of temperature. A value which is the result of a subtraction between two temperature values. temperature range The current overall temperature measurement limitation of an IR camera. Cameras can have several ranges.
14 Thermographic measurement techniques 14.1 Introduction An infrared camera measures and images the emitted infrared radiation from an object. The fact that radiation is a function of object surface temperature makes it possible for the camera to calculate and display this temperature. However, the radiation measured by the camera does not only depend on the temperature of the object but is also a function of the emissivity. Radiation also originates from the surroundings and is reflected in the object.
14 Thermographic measurement techniques 14.2.1.1.1 Method 1: Direct method Follow this procedure: 1. Look for possible reflection sources, considering that the incident angle = reflection angle (a = b). Figure 14.1 1 = Reflection source 2. If the reflection source is a spot source, modify the source by obstructing it using a piece if cardboard. Figure 14.2 1 = Reflection source #T559828; r.
14 Thermographic measurement techniques 3. Measure the radiation intensity (= apparent temperature) from the reflecting source using the following settings: • Emissivity: 1.0 • Dobj: 0 You can measure the radiation intensity using one of the following two methods: Figure 14.
14 Thermographic measurement techniques 14.2.1.2 Step 2: Determining the emissivity Follow this procedure: 1. Select a place to put the sample. 2. Determine and set reflected apparent temperature according to the previous procedure. 3. Put a piece of electrical tape with known high emissivity on the sample. 4. Heat the sample at least 20 K above room temperature. Heating must be reasonably even. 5. Focus and auto-adjust the camera, and freeze the image. 6.
14 Thermographic measurement techniques • External optics transmittance – i.e. the transmission of any external lenses or windows used in front of the camera #T559828; r.
15 History of infrared technology Before the year 1800, the existence of the infrared portion of the electromagnetic spectrum wasn't even suspected. The original significance of the infrared spectrum, or simply ‘the infrared’ as it is often called, as a form of heat radiation is perhaps less obvious today than it was at the time of its discovery by Herschel in 1800. Figure 15.1 Sir William Herschel (1738–1822) The discovery was made accidentally during the search for a new optical material.
15 History of infrared technology When Herschel revealed his discovery, he referred to this new portion of the electromagnetic spectrum as the ‘thermometrical spectrum’. The radiation itself he sometimes referred to as ‘dark heat’, or simply ‘the invisible rays’. Ironically, and contrary to popular opinion, it wasn't Herschel who originated the term ‘infrared’. The word only began to appear in print around 75 years later, and it is still unclear who should receive credit as the originator.
15 History of infrared technology Figure 15.4 Samuel P. Langley (1834–1906) The improvement of infrared-detector sensitivity progressed slowly. Another major breakthrough, made by Langley in 1880, was the invention of the bolometer. This consisted of a thin blackened strip of platinum connected in one arm of a Wheatstone bridge circuit upon which the infrared radiation was focused and to which a sensitive galvanometer responded.
16 Theory of thermography 16.1 Introduction The subjects of infrared radiation and the related technique of thermography are still new to many who will use an infrared camera. In this section the theory behind thermography will be given. 16.2 The electromagnetic spectrum The electromagnetic spectrum is divided arbitrarily into a number of wavelength regions, called bands, distinguished by the methods used to produce and detect the radiation.
16 Theory of thermography Figure 16.2 Gustav Robert Kirchhoff (1824–1887) The construction of a blackbody source is, in principle, very simple. The radiation characteristics of an aperture in an isotherm cavity made of an opaque absorbing material represents almost exactly the properties of a blackbody. A practical application of the principle to the construction of a perfect absorber of radiation consists of a box that is light tight except for an aperture in one of the sides.
16 Theory of thermography Wλb Blackbody spectral radiant emittance at wavelength λ. c Velocity of light = 3 × 10⁸ m/s h Planck’s constant = 6.6 × 10⁻³⁴ Joule sec. k Boltzmann’s constant = 1.4 × 10⁻²³ Joule/K. T Absolute temperature (K) of a blackbody. λ Wavelength (μm). Note The factor 10-6 is used since spectral emittance in the curves is expressed in Watt/m2, μm. Planck’s formula, when plotted graphically for various temperatures, produces a family of curves.
16 Theory of thermography Figure 16.5 Wilhelm Wien (1864–1928) The sun (approx. 6 000 K) emits yellow light, peaking at about 0.5 μm in the middle of the visible light spectrum. At room temperature (300 K) the peak of radiant emittance lies at 9.7 μm, in the far infrared, while at the temperature of liquid nitrogen (77 K) the maximum of the almost insignificant amount of radiant emittance occurs at 38 μm, in the extreme infrared wavelengths. Figure 16.
16 Theory of thermography Figure 16.7 Josef Stefan (1835–1893), and Ludwig Boltzmann (1844–1906) Using the Stefan-Boltzmann formula to calculate the power radiated by the human body, at a temperature of 300 K and an external surface area of approx. 2 m2, we obtain 1 kW.
16 Theory of thermography • A selective radiator, for which ε varies with wavelength According to Kirchhoff’s law, for any material the spectral emissivity and spectral absorptance of a body are equal at any specified temperature and wavelength. That is: From this we obtain, for an opaque material (since αλ + ρλ = 1): For highly polished materials ελ approaches zero, so that for a perfectly reflecting material (i.e.
16 Theory of thermography Figure 16.9 Spectral emissivity of three types of radiators. 1: Spectral emissivity; 2: Wavelength; 3: Blackbody; 4: Graybody; 5: Selective radiator. 16.4 Infrared semi-transparent materials Consider now a non-metallic, semi-transparent body – let us say, in the form of a thick flat plate of plastic material. When the plate is heated, radiation generated within its volume must work its way toward the surfaces through the material in which it is partially absorbed.
17 The measurement formula As already mentioned, when viewing an object, the camera receives radiation not only from the object itself. It also collects radiation from the surroundings reflected via the object surface. Both these radiation contributions become attenuated to some extent by the atmosphere in the measurement path. To this comes a third radiation contribution from the atmosphere itself.
17 The measurement formula 2. Reflected emission from ambient sources = (1 – ε)τWrefl, where (1 – ε) is the reflectance of the object. The ambient sources have the temperature Trefl. It has here been assumed that the temperature Trefl is the same for all emitting surfaces within the halfsphere seen from a point on the object surface. This is of course sometimes a simplification of the true situation.
17 The measurement formula magnitudes of the three radiation terms. This will give indications about when it is important to use correct values of which parameters. The figures below illustrates the relative magnitudes of the three radiation contributions for three different object temperatures, two emittances, and two spectral ranges: SW and LW. Remaining parameters have the following fixed values: • τ = 0.
17 The measurement formula Figure 17.3 Relative magnitudes of radiation sources under varying measurement conditions (LW camera). 1: Object temperature; 2: Emittance; Obj: Object radiation; Refl: Reflected radiation; Atm: atmosphere radiation. Fixed parameters: τ = 0.88; Trefl = 20°C (+68°F); Tatm = 20°C (+68°F). #T559828; r.
18 Emissivity tables This section presents a compilation of emissivity data from the infrared literature and measurements made by FLIR Systems. 18.1 References 1. Mikaél A. Bramson: Infrared Radiation, A Handbook for Applications, Plenum press, N.Y. 2. William L. Wolfe, George J. Zissis: The Infrared Handbook, Office of Naval Research, Department of Navy, Washington, D.C. 3. Madding, R. P.: Thermographic Instruments and systems.
18 Emissivity tables Table 18.1 T: Total spectrum; SW: 2–5 µm; LW: 8–14 µm, LLW: 6.5–20 µm; 1: Material; 2: Specification; 3:Temperature in °C; 4: Spectrum; 5: Emissivity: 6:Reference (continued) 1 2 3 4 5 6 Aluminum as received, plate 100 T 0.09 4 Aluminum as received, sheet 100 T 0.09 2 Aluminum cast, blast cleaned 70 SW 0.47 9 Aluminum cast, blast cleaned 70 LW 0.46 9 Aluminum dipped in HNO3, plate 100 T 0.05 4 Aluminum foil 27 10 µm 0.
18 Emissivity tables Table 18.1 T: Total spectrum; SW: 2–5 µm; LW: 8–14 µm, LLW: 6.5–20 µm; 1: Material; 2: Specification; 3:Temperature in °C; 4: Spectrum; 5: Emissivity: 6:Reference (continued) 1 2 3 4 5 6 Brass polished, highly 100 T 0.03 2 Brass rubbed with 80grit emery 20 T 0.20 2 Brass sheet, rolled 20 T 0.06 1 Brass sheet, worked with emery 20 T 0.2 1 Brick alumina 17 SW 0.68 5 Brick common 17 SW 0.86–0.81 5 Brick Dinas silica, glazed, rough 1100 T 0.
18 Emissivity tables Table 18.1 T: Total spectrum; SW: 2–5 µm; LW: 8–14 µm, LLW: 6.5–20 µm; 1: Material; 2: Specification; 3:Temperature in °C; 4: Spectrum; 5: Emissivity: 6:Reference (continued) 1 2 3 4 5 6 Chromium polished 50 T 0.10 1 Chromium polished 500–1000 T 0.28–0.38 1 Clay fired 70 T 0.91 1 Cloth black 20 T 0.98 1 20 T 0.92 2 Concrete Concrete dry 36 SW 0.95 7 Concrete rough 17 SW 0.97 5 Concrete walkway 5 LLW 0.
18 Emissivity tables Table 18.1 T: Total spectrum; SW: 2–5 µm; LW: 8–14 µm, LLW: 6.5–20 µm; 1: Material; 2: Specification; 3:Temperature in °C; 4: Spectrum; 5: Emissivity: 6:Reference (continued) 1 2 3 4 5 6 Granite rough 21 LLW 0.879 8 Granite rough, 4 different samples 70 SW 0.95–0.97 9 Granite rough, 4 different samples 70 LW 0.77–0.87 9 20 T 0.8–0.9 1 Gypsum Ice: See Water Iron and steel cold rolled 70 SW 0.20 9 Iron and steel cold rolled 70 LW 0.
18 Emissivity tables Table 18.1 T: Total spectrum; SW: 2–5 µm; LW: 8–14 µm, LLW: 6.5–20 µm; 1: Material; 2: Specification; 3:Temperature in °C; 4: Spectrum; 5: Emissivity: 6:Reference (continued) 1 2 3 4 5 6 Iron galvanized heavily oxidized 70 SW 0.64 9 Iron galvanized heavily oxidized 70 LW 0.85 9 Iron galvanized sheet 92 T 0.07 4 Iron galvanized sheet, burnished 30 T 0.23 1 Iron galvanized sheet, oxidized 20 T 0.28 1 Iron tinned sheet 24 T 0.
18 Emissivity tables Table 18.1 T: Total spectrum; SW: 2–5 µm; LW: 8–14 µm, LLW: 6.5–20 µm; 1: Material; 2: Specification; 3:Temperature in °C; 4: Spectrum; 5: Emissivity: 6:Reference (continued) 1 2 Leather tanned 3 Lime 4 5 6 T 0.75–0.80 1 T 0.3–0.4 1 Magnesium 22 T 0.07 4 Magnesium 260 T 0.13 4 Magnesium 538 T 0.18 4 20 T 0.07 2 T 0.86 1 Magnesium polished Magnesium powder Molybdenum 1500–2200 T 0.19–0.26 1 Molybdenum 600–1000 T 0.08–0.
18 Emissivity tables Table 18.1 T: Total spectrum; SW: 2–5 µm; LW: 8–14 µm, LLW: 6.5–20 µm; 1: Material; 2: Specification; 3:Temperature in °C; 4: Spectrum; 5: Emissivity: 6:Reference (continued) 1 2 3 4 5 6 Oil, lubricating 0.050 mm film 20 T 0.46 2 Oil, lubricating 0.125 mm film 20 T 0.72 2 Oil, lubricating film on Ni base: Ni base only 20 T 0.05 2 Oil, lubricating thick coating 20 T 0.82 2 Paint 8 different colors and qualities 70 SW 0.88–0.
18 Emissivity tables Table 18.1 T: Total spectrum; SW: 2–5 µm; LW: 8–14 µm, LLW: 6.5–20 µm; 1: Material; 2: Specification; 3:Temperature in °C; 4: Spectrum; 5: Emissivity: 6:Reference (continued) 1 2 3 4 5 6 Plaster rough coat 20 T 0.91 2 Plastic glass fibre laminate (printed circ. board) 70 SW 0.94 9 Plastic glass fibre laminate (printed circ. board) 70 LW 0.91 9 Plastic polyurethane isolation board 70 LW 0.55 9 Plastic polyurethane isolation board 70 SW 0.
18 Emissivity tables Table 18.1 T: Total spectrum; SW: 2–5 µm; LW: 8–14 µm, LLW: 6.5–20 µm; 1: Material; 2: Specification; 3:Temperature in °C; 4: Spectrum; 5: Emissivity: 6:Reference (continued) 1 2 3 4 5 6 Stainless steel alloy, 8% Ni, 18% Cr 500 T 0.35 1 Stainless steel rolled 700 T 0.45 1 Stainless steel sandblasted 700 T 0.70 1 Stainless steel sheet, polished 70 SW 0.18 9 Stainless steel sheet, polished 70 LW 0.
18 Emissivity tables Table 18.1 T: Total spectrum; SW: 2–5 µm; LW: 8–14 µm, LLW: 6.5–20 µm; 1: Material; 2: Specification; 3:Temperature in °C; 4: Spectrum; 5: Emissivity: 6:Reference (continued) 1 2 3 4 5 6 Water layer >0.1 mm thick 0–100 T 0.95–0.98 1 Water snow T 0.8 1 Water snow –10 T 0.85 2 17 SW 0.98 5 19 LLW 0.962 8 T 0.5–0.7 1 Wood Wood Wood ground Wood pine, 4 different samples 70 SW 0.67–0.75 9 Wood pine, 4 different samples 70 LW 0.81–0.
A note on the technical production of this publication This publication was produced using XML — the eXtensible Markup Language. For more information about XML, please visit http://www.w3.org/XML/ A note on the typeface used in this publication This publication was typeset using Linotype Helvetica™ World. Helvetica™ was designed by Max Miedinger (1910–1980) LOEF (List Of Effective Files) T501027.xml; en-US; AC; 9610; 2013-11-05 T505552.xml; en-US; 9599; 2013-11-05 T505551.
Corporate last page Headquarters FLIR Systems, Inc. 27700 SW Parkway Ave. Wilsonville, OR 97070 USA Telephone: +1-503-498-3547 Website http://www.flir.com Customer support http://support.flir.com Publ. No.