
User's Manual

Fluke 125
Getting Started
4
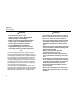
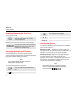
Powering/Resetting the Test Tool
Turning power on/off:
The Test Tool powers up in its last
setup configuration.
Resetting the Test Tool to the factory (default) settings:
+
Turn power off, then press and hold the
Backlight key and turn on again. You
should hear a double beep.
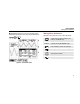
Changing Backlight and Contrast
To save battery power, the screen can be set to an
economic brightness display when operated on the battery
pack (with no power adapter connected).
Note
Using dimmed display lengthens maximum
battery power operation time.
To change the brightness and contrast:
Open the LIGHT/CONTRAST button
bar.
Press LIGHT.
Dim / Brighten the backlight.
Press CONTRAST.
Adjust the Contrast of the display.
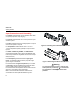
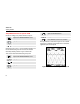
Reading the Screen
The screen is divided into three areas that are indicated in
Figure 2. The areas are:
Reading area
(A): Displays the numeric readings. If
only input A is on, you will see the input A readings only. If
input B is on you will also see the input B readings.
Waveform area (B): Displays the Input A(B) waveform.
The trace identifier (A) is visible on the left of the
waveform. The zero icon (-) identifies the ground level of
the waveform. The bottom line displays the ranges / div
and the power indicator (line or battery).
Note:
When battery powered, the battery indicator
informs you about the condition of the battery
from full to empty: