
Installation guide


6
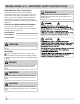
)LJ
chart 3)
Chart 3
)LJ
Bushing
Stop
bracket
Install the wine cooler in the
coolest part of a dry and ventilated
room, out of direct sunlight and
away from heating ducts or
registers. Do not place the wine
cooler next to heat-producing
appliances such as a range, oven
or dishwasher.
Level the wine cooler so the door close tightly.
Do not over crowd the wine cooler or block cold air
vents. Doing so causes the wine cooler to run longer
and use more energy. Shelves should not be lined
with aluminum foil, wax paper or paper toweling.
Liners interfere with cold air circulation, making the
ZLQHFRROHUOHVVHI¿FLHQW
Wipe containers dry before placing them in the wine
cooler. This cuts down on moisture build-up inside
the unit.
Organize the wine cooler to reduce door openings.
Remove as many items as needed at one time and
close the door as soon as possible.
(1(5*<6$9,1*7,36
INSTALLATION
&RRO'RZQ3HULRG
For best performance, allow 4 hours for the wine cooler to cool down completely. The wine cooler will run continuously
IRUWKH¿UVWVHYHUDOKRXUV
7HPSHUDWXUH&RQWUROIRU6LQJOH=RQH0RGHO
: Temperature display.
7HPSHUDWXUHGLVSOD\
/LJKW This button turns the light ON and OFF.
3RZHU This buttons turns the power ON and OFF.
Press both /LJKW and 3RZHU button’s at the same time
to change between Fahrenheit and Celsius temperatures.
: Press this button once and t
: Press this button once and t
Press this button once to increase temperature 1° F/C.
Press this button once to decrease temperature 1° F/C.
The wine cooler can be operated by adjusting the temperature control buttons (up arrow and down arrow) until
the desired temperature is reached.
7KHGLVSOD\ZLOOÀDVKIRUDIHZVHFRQGVEHIRUHVHWSRLQWLVORFNHGLQ
The temperature range MIN and MAX is 41° - 64°F (5° - 18° C).
TEMPERATURE CONTROLS