All about the Use & Care of your Beverage Cooler TA B L E O F CO N T EN T S I mportant Safety I nstructions.................................2 Temperature Controls ............................................7 I nstallation ...........................................................4 Care and Cleaning .................................................8 Door Reversal I nstructions .....................................5 Before you Call.....................................................
SERI AL/ MODEL # ’S - I MPORTANT SAFETY I NSTRUCTI ONS Read and Save These I nstructions This Owner’s Guide provides specifi c operating instructions for your model. Use your Beverage Cooler only as instructed in this guide. These instructions are not meant to cover every possible condition and situation that may occur. Common sense and caution must be practiced when installing, operating, and maintaining any appliance.
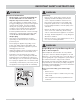
I MPORTANT SAFETY I NSTRUCTI ONS WARNI NG Electrical I nformation • The beverage cooler must be plugged into its ow n dedicated 115 Volt, 60 Hz., 15 Amp, AC only electrical outlet. The power cord of the appliance is equipped with a threeprong grounding plug for your protection against electrical shock hazards. I t must be plugged directly into a properly grounded three prong receptacle. The receptacle must be installed in accordance with local codes and ordinances. Consult a qualifi ed electrician.
I NSTALLATI ON This Use & Care Guide provides general operating instructions for your model. Use the appliance only as instructed in this Use & Care Guide. Before starting the Cleaning • Wash any removable parts of the beverage cooler interior, and exterior with mild detergent and warm water. Wipe dry. Do not use harsh cleaners on these surfaces. • Do not use razor blades or other sharp instruments, which can scratch the appliance surface when removing adhesive labels.
I NSTALLATI ON Reversing the door sw ing The glass door can be opened from left to right and vice versa. Should you desire to change the opening direction, please follow these instructions. Í NOTE All parts removed must be saved to do the reinstallation of the door. 1. Remove top cap. Remove the three screws that hold the upper hinge (right side) to the top of the cabinet. See Fig. 1. Fig. 2 2. Carefully remove top hinge (See Fig. 1.
I NSTALLATI ON ) ENERGY SAVI NG TI PS Stop bracket Bushing • Fig. 6 Fig. 7 6 I nstall the beverage cooler in the coolest part of a dry and ventilated room, out of direct sunlight and away from heating ducts or registers. Do not place the beverage cooler next to heatproducing appliances such as a range, oven or dishwasher. • Level the beverage cooler so the door close tightly. • Do not over crowd the beverage cooler or block cold air vents.
TEMPERATURE CONTROLS Cool Dow n Period For best performance, allow 4 hours for the wine/ beverage cooler to cool down completely. The wine/ beverage cooler will run continuously for the fi rst several hours. Temperature Control Press this button once to increase temperature 1° F/ C. Press this button once to decrease temperature 1° F/ C. 1. The beverage cooler can be operated by adjusting the temperature control buttons (up arrow and down arrow) to the various settings. 2.
CARE AND CLEANI NG 1 2 3 4 Vacation and Moving Tips Vacations: I f the beverage cooler will not be used for several months: • Remove all wine bottles and unplug the power cord. • Clean and dry the interior thoroughly. • Leave the wine cooler door open slightly, blocking it open if necessary, to prevent odor and mold growth. 5 6 Beverage Cooler Handle • Disconnect the power cord plug from the wall outlet. 2 Control panel • Remove wine bottles and clean the beverage cooler.
BEFORE YOU CALL 1-800-944-9044 (United States) Visit our web site at www.frigidaire.com. 1-800-265-8352 (Canada) PROBLEM CAUSE CORRECTI ON WI NE COOLER OPERATI ON Beverage Cooler does not run. • • • • • Beverage Cooler runs too much or too long. • Appliance is plugged into a circuit that has a ground fault interrupt. Temperature control is in the OFF position. Appliance may not be plugged in, or plug may be loose. House fuse blown or tripped circuit breaker. Power outage. • Use another circuit.
BEFORE YOU CALL PROBLEM CAUSE CORRECTI ON SOUND AND NOI SE ( continued) Longer sound levels w hen compressor comes on. • Appliance operates at higher pressures during the start of the ON cycle. • This is normal. Sound will level off or disappear as refrigerator continues to run. Fan runs w hen room temperature is below 45° . • Exterior thermostat has activated the heater or fan. • This is normal. Popping or cracking sound w hen compressor comes on.
MAJOR APPLI ANCE WARRANTY Your appliance is covered by a one year limited warranty. For one year from your original date of purchase, Electrolux will pay all costs for repairing or replacing any parts of this appliance that prove to be defective in materials or workmanship when such appliance is installed, used and maintained in accordance with the provided instructions. Exclusions This w arranty does not cover the follow ing: 1.