All about the Use & Care of your Wall Oven Product Record and Registration . . . . . . . . . . . . . . Important Safety Instructions . . . . . . . . . . . . . . . . . Before Setting Oven Controls . . . . . . . . . . . . . . . . . Oven Controls . . . . . . . . . . . . . . . . . . . . . . . . . . . . . Care and Cleaning . . . . . . . . . . . . . . . . . . . . . . . . 17 Before You Call . . . . . . . . . . . . . . . . . . . . . . . . . . . 20 Warranty . . . . . . . . . . . . . . . . . . . . . . . . . . . .
PRODUCT RECORD AND REGISTRATION Need Help? . . . . . . . . . . . . . . . . . . . . . . . . . . . . . . . . .2 Product Registration . . . . . . . . . . . . . . . . . . . . . . . . . .2 Product Record and Registration . . . . . . . . . . . . . . . . . 2 Important Safety Instructions . . . . . . . . . . . . . . . . . . . . 3 Before Setting Oven Controls . . . . . . . . . . . . . . . . . . . 7 Oven Controls. . . . . . . . . . . . . . . . . . . . . . . . . . . . . . . . . 8 Care and Cleaning . . . . . . . . . .
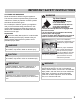
IMPORTANT SAFETY INSTRUCTIONS CAUTIONS AND WARNINGS Read all instructions before using this appliance. This manual contains important safety symbols and instructions. Please pay attention to these symbols and follow all instructions given. Do not attempt to install or operate your appliance until you have read the safety precautions in this manual. Safety items throughout this manual are labeled with a WARNING or CAUTION statement based on the risk type. DEFINITIONS This is the safety alert symbol.
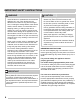
IMPORTANT SAFETY INSTRUCTIONS WARNING • • Do Not Leave Children Alone - Children should not be left alone or unattended in the area where appliance is in use. They should never be allowed to sit or stand on any part of the appliance, including the storage drawer, lower broiler drawer, warmer drawer, or lower double oven. Stepping, leaning, or sitting on the door or drawers of a oven can result in serious injuries and also cause damage to the appliance.
IMPORTANT SAFETY INSTRUCTIONS IMPORTANT INSTRUCTIONS FOR USING OVEN • Never use your appliance for warming or heating the room. • Use care when opening oven door, lower oven door, or warmer drawer (some models). Stand to the side of the oven when opening the door of a hot oven. Let hot air or steam escape before you remove or replace food in the oven. • Keep oven vent ducts clear. Touching surfaces in this area when the oven is on may cause severe burns.
IMPORTANT SAFETY INSTRUCTIONS IMPORTANT INSTRUCTIONS FOR CLEANING YOUR OVEN CAUTION Before manually cleaning any part of the oven, be sure all controls are turned off and the oven is cool. Cleaning a hot oven can cause burns. • Clean the oven regularly to keep all parts free of grease that could catch fire. Do not allow grease to accumulate. • Always follow the manufacturer’s recommended directions for use of kitchen cleaners and aerosols.
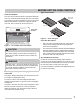
BEFORE SETTING OVEN CONTROLS Type of oven racks Oven vent location The oven vent is located under the control panel. When the oven is on, warm air passes through this vent. This venting is necessary for proper air circulation in the oven and good baking results. Steam or moisture may appear near the oven vent, this is normal. Do not block oven vent.
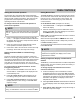
OVEN CONTROLS Take time to become familiar with the various features and functions of your oven model. Detailed instructions on using each oven feature and function of the controls can be found in this section of the owner’s manual. 1. Bake — Use to set normal baking mode temperature. Setting the Clock 2. Broil — Use to set the variable broil function. The Clock key is used to set the clock. The clock may be set for 12 or 24 hour time of day operation.
OVEN CONTROLS Setting Silent Control Operation Setting Minute Timer The start time key controls the Silent Control Operation feature. This feature allows the oven control to be operated without sounds or beeps if necessary. The control can be programmed for silent operation and later returned to operating with all the normal tones. The timer on-off key controls the minute timer and serves as an extra timer in the kitchen that will beep when the set time has run out. It does not start or stop cooking.
OVEN CONTROLS Setting the Oven Lockout feature Setting Bake The clear off key controls the Oven Lockout feature. The Oven Lockout feature automatically locks the oven doors and prevents the oven from being turned on. It does not disable the clock, timer or the interior oven lights. The ovens can be locked individually. Baking Tips: To activate the oven lockout feature: 1. Press and hold clear off for 3 seconds. 2.
OVEN CONTROLS Setting the Timed Bake Feature Setting Delayed Time Bake The bake and bake time keys control the Timed Bake feature. The automatic timer of the Timed Bake feature will turn the oven off after cooking for the desired amount of time you selected. The bake, bake time and start time keys control the Delayed Time Bake feature. The automatic timer will turn the oven on and off at the time you select in advance.
OVEN CONTROLS Setting Broil This mode is best for meats, fish and poultry up to 1” thick. Broiling is a method of cooking tender cuts of meat by direct heat under the broil element of the oven. WARNING Should an oven fire occur, leave the oven door closed and turn off the oven. If the fire continues, throw baking soda on the fire or use a fire extinguisher. Do not put water or flour on the fire. Flour may be explosive and water can cause a grease fire to spread and cause personal injury.
OVEN CONTROLS Setting the Keep Warm Feature Adjusting The Oven Temperature The keep warm key turns on the Keep Warm feature and will maintain an oven temperature of 170°F (77°C). The Keep Warm feature will keep oven baked foods warm for serving up to 3 hours after cooking has finished. After 3 hours Keep Warm will shut the oven off. Keep Warm may be used without any other cooking operations or can be used after cooking has finished using Bake. The temperature in the oven is pre-set at the factory.
OVEN CONTROLS Setting Sabbath Feature (for use on the Jewish Sabbath and Holidays) The bake time and start time keys are used to set the Sabbath feature. The Sabbath feature may only be used with BAKE The oven temperature may be set higher or lower after setting the Sabbath feature (the oven temperature adjustment feature should be used only during Jewish Holidays), however the display will not visibly show or provide any audible tones indicating whether the change occurred correctly.
OVEN CONTROLS Self Cleaning Operation A self cleaning oven cleans with high temperatures (well above normal cooking temperatures) which eliminate soils completely or reduces them to a fine powdered ash you can wipe away with a damp cloth. What to expect during cleaning While the oven is in operation sounds of metal expansion and contraction are normal. Odor is also normal as the food soil is being removed. Smoke may appear through the oven vent.
OVEN CONTROLS Setting Self Clean Cycle Duration Stopping or interrupting a Self Clean Cycle The clean key controls the self cleaning feature. If you are planning to use the oven directly after a self clean cycle remember to allow time for the oven to cool down and the oven door to unlock. This normally takes about one hour. A 3 hour self clean cycle will actually take about 4 hours to complete.
CARE AND CLEANING Cleaning Various Parts of Your Wall Oven Before cleaning any part of the oven, be sure all controls are turned off and the oven is cool. Remove spills and any heavy soiling as soon as possible. Regular cleaning will reduce the difficulty of major cleaning later. Surface Type Recommendation Aluminum and Vinyl Use hot, soapy water and a cloth. Dry with a clean cloth.
CARE AND CLEANING Removing and Replacing the Oven Door Oven door hinge locations CAUTION The door is heavy. For safe, temporary storage, lay the door flat with the inside of the door facing down. To remove oven door: 1. Open oven door completely, horizontal with floor (See Figure 6). 2. Pull the door hinge locks on both left and right door hinges down from the oven frame completely towards the oven door (See Figure 7). A tool such as a small flat-blade screwdriver may be required.
CARE AND CLEANING Replacing the oven light CAUTION Be sure the oven is unplugged and all parts are cool before replacing oven light. If the oven is hard wired into a junction box, make sure the breaker that powers the oven is turned off. The interior oven lights are located at the rear of the oven cavity and are covered with a glass shield. The glass shield must be in place whenever the oven is in use (See Figure 10). Replacing the oven interior light bulb: 1. Turn electrical power off at the main source.
BEFORE YOU CALL Solutions to Common Baking Problems For best cooking results, heat the oven before baking cookies, breads, cakes, pies or pastries, etc. There is no need to preheat the oven for roasting meat or baking casseroles. The cooking times and temperatures needed to bake a product may vary slightly from your previously owned appliance. Baking Problems and Solutions Chart Baking Problems Causes Corrections Cookies and biscuits burn on the bottom.
BEFORE YOU CALL Solutions to Common Problems Before you call for service, review the following list. It may save you time and expense. Possible solutions are provided with the problem listed: Problem Solution Poor baking results Many factors effect baking results. Use proper oven rack position. Center food in the oven and space pans to allow air to circulate. Preheat oven to the set temperature before placing food in the oven. Try adjusting the recipe's recommended temperature or baking time.
BEFORE YOU CALL Oven smokes excessively when broiling. Incorrect setting. Follow broiling instructions in Setting Oven Controls section. Meat too close to the broil element. Reposition broil rack to provide proper clearance between the meat and broil element. Remove excess fat from meat. Cut remaining fatty edges to prevent curling, but do not cut into lean. Grease build up on oven surfaces. Regular cleaning is necessary when broiling frequently. Grease or food splatters will cause excessive smoking.
WARRANTY Your appliance is covered by a one year limited warranty. For one year from your original date of purchase, Electrolux will pay all costs for repairing or replacing any parts of this appliance that prove to be defective in materials or workmanship when such appliance is installed, used and maintained in accordance with the provided instructions. Exclusions This warranty does not cover the following: 1. 2. 3. 4. 5. 6. 7. 8. 9. 10. 11. 12. 13.