
Quick Start Guide

here
FOR YOU
WE ARE
Want help?
Have a question?
Take the first step to becoming a part of the Frigidaire family by registering your side-by-
side refrigerator.
Look for the Photoregister
SM
icon on your registration card.
LET’S MAKE IT OFFICIAL!
PHOTOREGISTER
SM
Need service?
frigidaire.com/1 (800) 374-4432
frigidaire.ca/1 (800) 265-8352
owner support
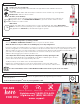
QUICK CARE
A little love goes a long way
Keeping your refrigerator clean maintains its appearance and maintains freshness.
Be gentle
Clean with warm water and mild soap. For stainless steel models only, use Frigidaire
ReadyClean™ Stainless Steel Cleaner.
Air filter (some models)
Our PureAir Ultra® II air filter’s active carbon technology optimizes the reduction of
refrigerator odors. See FILTER REPLACEMENT in your Use & Care Guide for more
information on how to order.
Water filter
Change your water filter every 6 months to ensure great-tasting, safe water. Water Filter
Status on the front control prompts you to replace the filter after a standard amount of water
(125 gal/453 L for PurePour™) has flowed through the system.
FAQs
What are normal refrigeration operating sounds?
See the NORMAL OPERATING SOUNDS section of your Use & Care Guide.
What should I do if my ice maker is not making any ice in my refrigerator?
If your ice maker is not making any ice, check to see if the ice maker has been inadvertently turned o. Make
sure the refrigerator is connected to the water line and/or the water valve is open. If your dispenser will not
dispense water, check to see if the water filter is seated properly. Remove and reinstall the water filter until
you hear it lock solidly into position. Remember: the freezer needs up to 24 hours to
stabilize after plugging it in before it produces ice.
Can I adjust the shelves in my Side-by-Side refrigerator to fit my spacing needs?
Shelves are easily adjusted to suit individual needs. Before adjusting the shelves,
remove all food. Shelves are supported by side rails.
To adjust, lift up on the back of the shelf and pull forward.
Replace the shelf by sliding it on top of the formed rails on the side walls of the
cabinet until the rear plastic hooks of the shelf lock into the rear of the cabinet liner.
For more information refer to TROUBLESHOOTING in the back of your Use & Care Guide.