ServerView Resource Orchestrator Cloud Edition V3.0.
Preface Purpose This document explains how to operate the ROR Console provided by ServerView Resource Orchestrator (hereafter referred to as "this product"). Target Readers This document is intended for users who use the resources of a tenant that they own.
Manual Name Abbreviated Form Purpose Please read this first. ServerView Resource Orchestrator Cloud Edition V3.0.0 Setup Guide Setup Guide CE ServerView Resource Orchestrator Cloud Edition V3.0.0 Installation Guide Installation Guide CE Read this when you want information about how to install Resource Orchestrator. ServerView Resource Orchestrator Cloud Edition V3.0.0 Operation Guide Operation Guide CE Read this when you want information about how to operate systems that you have configured.
Manual Name ServerView Resource Orchestrator Virtual Edition V3.0.0 Messages Abbreviated Form Messages VE Purpose Read this when you want detailed information about the corrective actions for displayed messages.
Abbreviation Products Red Hat(R) Enterprise Linux(R) 6.2 (for x86) Virtual Machine Function Red Hat(R) Enterprise Linux(R) 6.2 (for Intel64) Virtual Machine Function RHEL-KVM Export Administration Regulation Declaration Documents produced by FUJITSU may contain technology controlled under the Foreign Exchange and Foreign Trade Control Law of Japan.
Additions and changes Section The configuration for sections and sub-sections was modified. Chapter 3 A table for description of CI list item was added. 3.2 An article relating to usage fee (the estimated price) was added. 4.2.1, 4.2.2, 4.3.9, 4.3.11 An article relating to batch power supply operations was added. 4.3.2, 4.3.9, 4.3.11 An article relating to overcommit (Hyper-V) was added or modified. 4.3.
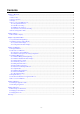
Contents Chapter 1 Overview..................................................................................................................................................................1 1.1 Users....................................................................................................................................................................................................1 1.2 Function List.................................................................................................
Chapter 1 Overview This chapter explains the ROR Console. 1.1 Users The ROR Console has the following users: - Infrastructure Administrator - Tenant Administrator - Tenant user Refer to "Glossary" for details on these roles. 1.2 Function List This section explains the functions provided by ROR Console. ROR Console has two parts: "operation windows for tenant administrators and tenant users" and "operation windows for infrastructure administrators".
Function Overview Infrastructure Administrator Tenant Administrator Tenant user System Condition Displays L-Server performance information and configuration information Yes Yes Yes Resource A window for managing the resource pool and the relationship of resources to L-Server Yes No No Template A window for managing L-Platform Templates Yes Yes No L-Platform A window for managing L-Platform Yes Yes Yes Request A window for assessing and approving L-Platform usage applications and ot
Construction 1. Subscribing to L-Platform Subscribe to L-Platform usage. Refer to "4.2 Subscribe to an L-Platform" for details. 2. Confirming L-Platform subscription status Check the L-Platform subscription status. Refer to "4.3 L-Platform Management" for details. Operation [Operating L-Platform and L-Server] 1. Power operation L-Platform and L-Server Perform L-Platform and L-Server power and other operations. Refer to "4.3.
3. The login window is displayed. Enter your user ID and password to log in. Figure 1.2 Login Window 4. The ROR Console is displayed. Logout Follow the steps below to logout. 1. Click the Logout link at the upper-right of the ROR Console to log out. A window is displayed, confirming log out from ROR Console. Click the OK button to log out. Figure 1.
2. The logout window is displayed, close the browser. Figure 1.4 Logout Window 1.5 Notes on Use of the ROR Console This section explains the notes on the use of the ROR Console. 1.5.1 Surrogate Pair Characters Surrogate pair characters cannot be used on the ROR Console. 1.5.2 Web Browser Settings The following settings must be specified for the Web browser before using the ROR Console: - Enable cookies. - Enable JavaScript - Use SSL 3.0 and TLS 1.
Windows Server 2003 + Internet Explorer 8 Windows Server 2008 + Internet Explorer 8 Corrective Action Take one of the following corrective actions. - Connect using a combination of OS and web browser not listed above - When this problem occurs, reload the page on your web browser - Specify the IP address, not an FQDN, in the URL used for connection 1.5.
1. Click the URL in the user registration mail. The Register User page will be displayed. Description Item Temporary password Specify the temporary password given in the tenant user registration mail. 2. Enter in the Temporary password field the temporary password given in the user registration mail. Review and agree with the license agreement, and click the Advance to registration procedure button.
The input window for the user information will be displayed. The window below is the sample of using OpenDS for the directory service. Item Description E-Mail address User's E-mail address registered at a temporary account is displayed. It is not possible to change. User ID [When using OpenDS for the directory service] Specify a registration user ID.
Password (confirm) Re-enter a user password for confirmation. This field cannot be omitted. Personal information Name Specify the first name and last name separately for the user. Use up to 15 characters for each name. Be sure to specify this item. Company name or organization name Specify the company name or organization name, using up to 30 characters. Emergency contact details E-mail address Specify an email address for receiving emergency contact notifications, using up to 64 characters.
4. Confirm the registration information, and click the Register button. The registration completion window will be displayed. 5. Click the Close button, processing is ended. When user registration is completed, the registration content is sent to the registered user, the Tenant Administrator, and the tenant Email address.
Chapter 2 Home This chapter explains the ROR Console Home window. 2.1 Home Window Display This section explains the ROR Console Home window display. When the ROR Console is started, the Home window is displayed. Refer to section "1.4 Display" for information on how to start the ROR Console. The elements of the Home window are explained below. - Functions list The functions list displays the items that can be operated using ROR Console tabs. Click the icon or the icon to toggle Display/Hide.
Chapter 3 System Condition This chapter explains how to monitor system condition. Note The following message may be displayed during monitoring of system condition: The authority error occurred. Closing the browser. This error occurs if, for example, the same user ID is used to log in from a different client. In this case, log in again correctly. 3.
2. In the System Condition window, select the Tree Display tab. The configuration of L-Platforms used by tenant users is displayed in the tree at the left. At View, the "L-Platform" showing a tree configuration is displayed as fixed. At Record, "Observed" - indicating the record type - is displayed as fixed. 3. From the tree at the left, select the L-Platform for which to display the system condition. The selected L-Platform is displayed in the CI list on the right.
Item Explanation - For the L-Server CI type: The L-Server name set during L-Platform subscription or L-Platform reconfiguration ("server name (host name)") Record Displays the type of records held by the configuration item. [0], indicating the actual information, is displayed. Note Clicking the CI list column headers to sort the columns is effective only for the range displayed in that page. The sorting specification is reset when the next or previous page is displayed.
- The system condition data is not reflected in the display until collection at the fixed intervals shown below is completed. Check the display after the fixed intervals shown below. Note that, if the contents are empty after a fixed interval, the connection destination L-Platform may be stopped. Contact the Tenant Administrator.
- All tab At each tab, the following icons displayed in the title bar can be used: Icon Tool tip Explanation Update Updates the displayed contents Download CSV file Downloads the graph data in CSV format Minimize Minimizes the specified window Maximize Maximizes the specified window Restore Restores the maximized window The table below shows the CSV file items if data is downloaded from each graph. Note that the CSV file encoding is Shift-JIS.
Graph type Column name Explanation Unit Description - HV_VCPU - XEN_CPU - KVM_CPU - in case of interval time is 10 minutes: 600 consintl Interval time second - in case of 1 hour: 3600 - in case of 24 hour: 86400 Disk R/W Usage coverage Data coverage (0 to 1) cpupcent CPU utilization % Output only in case of physical servers and Windows/Linux Processer utilization % Output only for VMware Physical CPU utilization consumed per resource pool or a virtual machine vmgcused CPU utilization ph
Graph type Column name Explanation Unit Description - in case of interval time is 10 minutes: 600 consintl Interval time second - in case of 1 hour: 3600 - in case of 24 hour: 86400 Disk R/W count coverage Data coverage (0 to 1) preadbyt Disk read usage bytes Output only for Windows pwritbyt Disk write usage bytes Output only for Windows iokreads Disk read usage Kbytes Output only for Linux iokwrite Disk write usage Kbytes Output only for Linux vmdmbread Disk read usage Mbytes
Graph type Memory usage Column name Explanation Unit Description vmdreads Disk read count Output only for VMware Disk read count for virtual machine and storage device units vmdwrites Disk write count Output only for VMware Disk write count for virtual machine and storage device units vbdrd Disk read count Output only for RHEL5-Xen Virtual block device read count vbdwr Disk write count Output only for RHEL5-Xen Virtual block device write count Nickname VM name Output only for VMware/Hype
Graph type Network utilization Column name Explanation Unit Description Output for VMware/Hyper-V/ RHEL5-Xen Nickname VM name kvmmemused Memory usage sdattim Collection start time (*1) yyyy/MM/dd HH:mm:ss resrcid Resource ID Output only for Windows Network device name Mbytes Output only for RHEL-KVM Memory capacity allocated to domain Output any of the following - WIN_NET_INTERFACE recid - VMW_NET Record ID - XEN_NET - KVM-NET - in case of interval time is 10 minutes: 600 consintl Int
- Information for a certain point of time is not output If there is a large difference in the time and date in the VM host where the live migration was performed, the above phenomena will be more likely to occur. 3.2.2 Configuration Information Display The tenant, L-Platforms and L-Servers displayed in the CI list of the system condition window are managed as configuration items (CIs).
Item Record Explanation Detailed Tree This is a tree of the elements comprising the configuration item. The following elements are displayed in accordance with the CI type: - For the tenant CI type: Tenants - For the L-Platform CI type: Instances - For the L-Server CI type: L-Server node information When an element is selected, the element attribute values are displayed in the basic information.
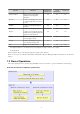
Chapter 4 L-Platform This chapter explains how to use the L-Platform. 4.1 Display L-Platform This section explains how to display the L-Platform and describes the top page. How to display the L-Platform To display the L-Platform: - On the ROR Console after login, select the L-Platform tab. L-Platform Top Page An example of the L-Platform home page is shown below.
Point The Startup page is displayed as the home page of L-Platform. To prevent the Startup page from being displayed as the home page, select the Do not show this window again at startup check box. - Close link When Close link is clicked, the confirmation window for closing the window will be displayed. Click Yes on the confirmation window to close the L-Platform window. Note - If it becomes impossible to connect by the management server stop and etc.
2. Confirm the procedures on the Subscription page, and click the Subscribe a new L-Platform button.
3. Confirm the contents of the L-Platform template on the Select Template page, and select L-Platform template to be used. All the L-Platform templates that are registered in the L-Platform and enabled are displayed on the Select Template page. For each L-Platform template, the corresponding estimated fees will also be displayed. L-Platform templates are displayed by the L-Platform template name in ascending order.
4. Select the L-Platform template to be used and click the Next button. The Set Basic Info page will be displayed. The L-Platform Name displays the L-Platform template name. To change to an arbitrary name, the new name must be no more than 85 characters long, be unique within the organization and not include the following characters: < > & ' " and control characters However, the strings and the number of characters that can be specified may vary depending on the L-Platform settings.
5. Enter a name to L-Platform Name, and click the Next button. The Confirm page will be displayed. Point CSV output When the Save as CSV button is clicked, the Select the destination to save window is displayed where the L-Platform Template configuration can be saved as a CSV file. The CSV file name is in the following format: SystemConfiguration (+ +)_ + .
6. Check the displayed contents of the L-Platform template, and click the Next button. When the Next button is clicked, the Agreement page will be displayed. 7. Check the license agreement displayed. Select the Agree the license check box, then, click the Subscribe button. Point When the application process is enabled, clicking of the Subscribe button on the Agreement page displays the Forward screen window. Refer to "4.5 Select Forward Destination of Application Process" for details.
- When the application process is disabled The following message will be displayed: "A request to subscribe the L-Platform has been completed. The deployment may take some time to complete." - When the application process is enabled The following message will be displayed: "The request to subscribe the L-Platform has been completed. The L-Platform will be deployed after approval and/or judgement procedures." 8. Click the Close button. The display returns to the Subscription page.
L-Platform Template Reconfiguration Possible Follow the steps below to subscribe to a new L-Platform: 1. Select Subscription on the operation menu of the Subscription page. The Subscription page will be displayed. 2. Confirm the procedures on the Subscription page, and click the Subscribe a new L-Platform button. 3. Confirm the contents of the L-Platform templates on the Select Template page, and select the L-Platform template to be used.
Specify a character string in Keyword that is the keyword for the L-Platform template the user wants to use. When a keyword is specified, a search takes place based on the keywords that the infra administrator set in the specifications. The keyword search function cannot be used if the infra administrator did not set keywords. For example, to search an L-Platform template where Red Hat Linux 5.1 is installed as the operating system, specify "Linux 5.1".
5. Enter a name to L-Platform Name, and click the Next button. The Reconfigure page will be displayed. 6. This will display the configuration of the L-Platform template selected on the Reconfigure page. Change the configuration as required. For the items that can be changed on the Reconfigure page, refer to "4.3.11 Reconfiguration Page". 7. When modification of the L-Platform template has completed, click the Next button. The Confirm page will be displayed.
Point CSV output When the Save as CSV button is clicked, the Select the destination to save window is displayed where the L-Platform Template configuration can be saved as a CSV file. The CSV file name is in the following format: SystemConfiguration (+ +)_ + .csv Save configuration By clicking the Save Configuration button, the L-Platform template is saved, and the display returns to the Subscription page.
- When the application process is disabled The following message will be displayed: "A request to subscribe the L-Platform has been completed. The deployment may take some time to complete." - When the application process is enabled The following message will be displayed: "The request to subscribe the L-Platform has been completed. The L-Platform will be deployed after approval and/or judgement procedures." 10. Click the Close button. The display returns to the Subscription page.
4.2.2 L-Platform Subscription after Saving Configuration An L-Platform subscription can be submitted on the basis of an L-Platform Template for which the configuration is currently being saved. Perform the following steps to submit an L-Platform subscription from this type of L-Platform Template: 1. Select Subscription on the operation menu of the Subscription page. This will display the procedures required to subscribe to an L-Platform. 2. After confirming the procedure, select Subscribe from saved data.
- SAVED: Specification being saved The Next button will become available after selecting this item. - UNAPPROVAL: Not approved The Next button will not become available even after selecting this item. - REJECTION: Subscription rejected The Next button will not become available even after selecting this item. Note In the application process, the L-Platform templates waiting to approve or to assess become the UNAPPROVAL state.
Point CSV output When the Save as CSV button is clicked, the Select the destination to save window is displayed where the L-Platform template can be saved as a CSV file. The CSV file name is in the following format: SystemConfiguration (+ +)_ + .csv 4. Check the displayed contents of the L-Platform template, and click the Next button. When the Next button is clicked, the Agreement page will be displayed. 5. Review and agree with the license agreement displayed.
- When the application process is disabled The following message will be displayed. "A request to subscribe the L-Platform has been completed. The deployment may take some time to complete." - When the application process is enabled The following message will be displayed. "The request to subscribe the L-Platform has been completed. The L-Platform will be deployed after approval and/or judgement procedures." 6. Click the Close button. The display returns to the Subscription page.
If deployment of the subscribed L-Platform fails, a subscription failure notification email is sent to the subscriber and the Infrastructure Administrator. In this case, check with the Infrastructure Administrator, and then subscribe again. 4.3 L-Platform Management This section explains how to use the Management page to manage L-Platforms that are in use. The L-Platforms targeted by L-Platform management vary in accordance with the user, as follows: - Infrastructure Administrator All L-Platforms.
- L-Platform Management Click the Management button on the top left hand side of the page and then click the button ( ) on the top right hand side of the page to display an L-Platform list in a configuration image.
- L-Platform Management (list) Click the Management button on the top left hand side of the page and then click the button ( ) on the top right hand side of the page to display a list of information on the L-Platforms. The following information can be checked on the L-Platform Management (list) page.
- Server List Click the Server List button on the top left hand side of the page to display a list of information on servers included in an L-Platform. The following shows an example of all servers being displayed. To display inactive servers, click the Stopped tab. The following information can be checked on the Server List page. - Status: Server status (Running, Stopped) - Type: Server type - Server name: Server name - Host name: The server host name.
- Backup button: Backup and restore. This button is displayed for physical servers. Refer to "4.3.7 Physical Server Backup and Restore" for information on backup and restore. Note The Running icon for a server indicates that the power has been turned on. Even if the Running icon is displayed, login to the L-Platform may fail if logged in immediately after deployment or starting the virtual server. In this case, allow a few minutes before trying to log in again. 4.3.
- Server List By clicking the button ( ) located on the top right hand side of the page, a list of all virtual servers included in the L- Platform is displayed. The server List also displays the extended disks included in the virtual servers. Point The following buttons can be used on the L-Platform Details page: - start all button: Turns the power on for all servers in the L-Platform as a group. - stop all button: Turns the power off for all servers in the L-Platform as a group.
- Initial PWD button: Confirm the initial password Depending on the L-Platform settings, the "Initial password" is " ". Sometimes it is displayed as ". The initial password is set after L-Platform deployment. - Add Patch Information button: Register the patch information Refer to "4.3.5 Manage Patch Information" for information on registering patch information. - Delete Patch Information button: Delete the patch information Refer to "4.3.
Point The following buttons can be used on the L-Platform Details page displaying the details of the disk. - Reconfigure button: Modify an L-Platform template Refer to "4.3.9 L-Platform Reconfiguration" for information on modifying an L-Platform template. - Unsubscribe button: Cancel an L-Platform Refer to "4.3.10 Cancel an L-Platform" for information on canceling an L-Platform. 4.3.4 Start and Stop the Server Follow the steps below to start or stop a server: 1. Display the Server List page.
2. After selecting the required server, select the Others tab. The following page will be displayed if the patch information has not been registered. 3. Click the Add Patch Information button. The Add Patch Information page will be displayed. Item Description Patch ID Specify the patch ID that has been applied. The patch ID must be no more than 32 bytes of alpha-numeric one-byte characters. Component name Specify the name of the component where the patch is to be applied.
Item Description Description Specify the description related to the patch information that has been applied. The description must be no more than 85 characters long and not include the following characters: <, >, &, ', " and control characters 4. Enter the required fields and click the OK button. Delete Patch Information Follow the steps below to delete patch information that has been registered: 1. After selecting the required server on the L-Platform Details page, select the Others tab.
- The server will enter an error state if an error occurs while taking or restoring snapshots. When this occurs, a character string "Error" and x button will be displayed on the Snapshot column of the relevant row on the Server List page. To clear the error state, click the X button.
4. A pop-up window will be displayed. Enter a comment of less than 128 characters. This will display the comment entered on the snapshot list. 5. Click the Take Snapshot button to start taking the snapshot. Restore Snapshots Follow the steps below to restore the taken snapshots: 1. Select the required snapshot from the snapshot list on the Snapshot page. 2. When the Restore button is clicked, the restore processing of the snapshot will start.
1. Display the Server List page. Refer to "4.3.1 L-Platform Management Display Page" for information on how to display the page. Alternatively, display the L-Platform Details page. Refer to "4.3.2 L-Platform Detailed Information Display" for information on how to display the page. 2. After selecting a required server, click the Backup button, The Backup page will be displayed. 3. Click the Take Backup button. 4. A pop-up window will be displayed. Enter a comment of less than 128 characters.
1. In the backup list in the Backup page, select the target backup. 2. Click the Restore button to start the restore. 4.3.8 Setup Firewall Change the firewall settings. The firewall rule set parameter values can be changed in the firewall settings. Perform the following steps to change the firewall settings: 1. Display the L-Platform Details page Refer to "4.3.2 L-Platform Detailed Information Display" for the display method. 2. Select the firewall, and then click the Setting button. 3.
After an L-Platform is deployed, check the IP addresses of the servers included in the L-Platform and the port numbers used by the installed middleware. Then, set the allowed IP addresses and port numbers in the relevant rule set parameters in the firewall settings. 4.3.9 L-Platform Reconfiguration The system configuration that configures the L-Platform in use can be modified on the Reconfigure page.
The following items cannot be modified when a system that has been deployed. - VM pool - System disk - Subnet - NIC extension and reduction (virtual servers only) Refer to "4.3.11 Reconfiguration Page " for information on the other items. Note For both system disks and extended disks that have been deployed, neither the size nor the pool can be modified. Extended disks that have been deployed can be deleted.
Point CSV output When the Save as CSV button is clicked, the Select the destination to save window is displayed where the L-Platform template can be saved as a CSV file. The CSV file name is in the following format: SystemConfiguration (+ +)_ + .csv Save specification Click the Save Configuration button to save the L-Platform template, and the display returns to the Management page.
- When the application process is disabled The following message will be displayed: "The request to reconfigure the L-Platform has been completed. The reconfiguration take some time to complete." - When the application process is enabled The following message will be displayed: "The request to reconfigure the L-Platform has been completed. The L-Platform will be reconfigured after approval and/or judgement procedures.
1. Display the L-Platform Details page. Refer to "4.3.2 L-Platform Detailed Information Display" for information on how to display the page. 2. Stop all the servers of the system that configures the L-Platform to be canceled. Refer to "4.3.4 Start and Stop the Server" on information on how to stop a server. 3. Click the Unsubscribe button. The Confirm page will be displayed. 4. Confirm that the correct L-Platform is being canceled, and click the Next button. The Agreement page will be displayed. 5.
The Complete page will be displayed when the L-Platform is canceled. - When the application process is disabled The following message will be displayed. "The L-Platform has been unsubscribed." - When the application process is enabled The following message will be displayed. "The L-Platform to unsubscribe the L-Platform has been completed. The L-Platform will undeployed after approval and/or judgement procedures." Note When the following events occur, cancellation application may become impossible.
- An error message is displayed on the 'Forward screen' window. Point When an L-Platform is cancelled, a cancellation completion notification email is sent to the subscriber. If an L-Platform cancellation fails, a cancellation failure notification email is sent to the subscriber and the Infrastructure Administrator. In this case, check with the Infrastructure Administrator about the action required. 4.3.11 Reconfiguration Page The following configuration can be defined on the Reconfigure page.
The configuration of the Reconfigure page is shown below: Part Description L-Platform configuration Located on the top of the page, this area expresses the L-Platform in terms of the elements of firewall, segment, virtual server, physical server and disk. When an element is selected, the element is displayed in the Details of configuration element.
The types of disks that can be added are new disks and existing disks. New disks can be added to virtual servers and physical servers. Existing disks are displayed if an Infrastructure Administrator has registered them to a storage pool that can reference already created disk resources, and can be added to physical servers. Firewall When the firewall is selected, its rule set can be checked. The firewall cannot be deleted. The Reconfigure page example below shows the page when the firewall is clicked.
Note - The firewall for a server added by a new L-Platform subscription or L-Platform reconfiguration is set after the L-Platform is deployed. Refer to "4.3.8 Setup Firewall" for details. Edit a Segment A segment can be edited by selecting the segment to be edited. It is possible to select whether a subnet allocated to the segment can be set automatically or manually in the segment editing. Note, however, that subnets cannot be modified in the L-Platform configuration after the system has been deployed.
Details of configuration element Segment tab Part Category Description Specify the category if segments are selected automatically when additions are made by network extension. The default is "Business segment".
- Since at least one segment is required, it is not possible to delete all segments. - When a segment is deleted, the connected NIC is also deleted. Since at least one NIC is also required, it is not possible to delete all NICs. - Reduction is not possible while a server is operating. Edit a Virtual Server By clicking a virtual server, the virtual server can be edited by selecting the tabs displayed. Details tab The virtual server type can be selected using the Details tab.
Part VM pool Description From the drop-down menu, select the resource name of the VM pool that is the server deployment destination. Contact the infra administrator in the event that an error message is displayed indicating that no existing pool can be selected as the server deployment destination. Number of CPUs Set the number of CPUs of the virtual server.
Part Description - Standard (1,000) - High (2,000) This is not displayed and cannot be specified if the virtualization software is RHEL-KVM. System Disk Storage pool From the drop-down menu, select the storage pool to be used. Size The disk capacity of the virtual server is displayed in GB. The capacity of the system disk cannot be modified. Boot priority Sets the priority order when performing batched power supply operations in either the LPlatform or the tenant.
There are two ways of specifying an IP address as follows: - Automatic Sets an IP address automatically from a subnet. - Manual Enters an IP address directly. When there is a conflict between the specified IP address and network resources, an error message will be displayed. An MNG icon is displayed for the control NIC. The following window displays an example of an L-Platform where multiple NICs exist. The following window shows the Reconfigure page used to subscribe to an L-Platform.
NIC Extension and Reduction This section explains NIC extension and reduction. Click the Add NIC button to add a business NIC to the same segment as the control NIC. Click the Delete NIC button deletes an NIC. Note - This is possible only during L-Platform subscription. NIC extension and reduction are not possible after deployment. - NICs cannot be added if they would exceed the maximum number of connections for the segment. - Control NICs cannot be deleted.
Editing a Physical Server When a physical server is selected, the allowed physical server depends on the displayed tab. Details tab The Details tab can be used to select a virtual server type. A display example of the Details tab is shown below.
Part Description Host name Sets the name of a physical server that is in the L-Platform Template. This setting cannot be changed. Type From the drop-down menu, select the type (specifications) of the registered server. The CPU, memory size, and System Disk are set according to the selected server type. Server pool From the drop-down menu, select the resource name of the server pool that is the server deployment destination.
Part Description Memory Size Specify the memory size of the physical server in GB units. (*) If the upper limit value recorded in the image information differs from the VM pool upper limit value (the free size of the VM host with the largest free memory size), a value up to the smaller value can be set. Values outside that range cannot be set. System Disk Storage pool From the drop-down menu, select the storage pool to be used. Size The disk capacity of the physical server is displayed in GB.
The following two methods are available for specifying an IP address: - Automatic The IP address is set automatically from the subnet. - Manual Enter the IP address directly. An error message is displayed if the specified IP address is inconsistent with the network resources. The MNG icon is displayed for the control NIC. The window below is an example of the display when there are multiple NICs. Note that the window shown below is the L-Platform subscription Reconfigure page.
NIC1 is represented by one physical server. When a server is selected, the selected state occurs for all the same servers. A numeric icon is displayed to the bottom left of selected servers. It indicates the NIC number. Dark-colored servers indicate management NICs, and light-colored servers indicate business NICs. If a segment is dragged and dropped from the addition option, the number of servers displayed matches the number of NICs specified in the image information of the segment.
- Making a group Select multiple checkboxes, and then click the Form NIC Group button. However, Multidata input NIC cannot be grouped. (Control NICs are okay.) - Cancelling a grouping Select multiple checkboxes, and then click the Delete NIC Group button. Note - This is possible only during L-Platform subscription. NIC groups cannot be made or cancelled after deployment. - Two NICs can be grouped. Three or more NICs cannot be grouped.
Edit a Disk (for a Virtual Server) A virtual server to which a disk has been added can be selected. By clicking the button ( ) located to the right of the virtual server name, a selection list of virtual servers and disks is displayed. Select a disk on the list. Only extended disks can be modified when editing a disk. System disks cannot be edited. The following example displays the Reconfigure page when a disk is selected.
Part Disk name Description "disk + serial number" is set automatically as the disk name. The serial number is allocated according to the following rules. - Allocation of serial number starts from 0 for the disks registered in the L-Platform template. - "Number of disks + 1" is allocated to a disk added using Add options.
Part Disk name Description "disk + serial number" is set automatically as the disk name. The serial number is allocated according to the following rules. - Allocation of serial number starts from 0 for the disks registered in the L-Platform template. - "Number of disks + 1" is allocated to a disk added using Add options.
Follow the steps below to display event logs: 1. Select Event Log from the operation menu of the L-Platform page. A list of event logs will be displayed. Up to 100 logs are displayed on the Event log page for duration of up to 14 days starting from the most recent log. Refer to "Message Stating with VSYS" in "Messages CE" for information on the messages displayed in the event log. 4.
1. A Forward screen window like the one below is displayed when L-Platform subscription, L-Platform reconfiguration, or L-Platform cancellation is performed. Item Description Forward destination Select an approver who is the forward destination of the application process. If the process has been set to require no approval, the field will be displayed in grey and cannot be selected. Reason for application Specify the reason for application using 100 or less characters. 2.
4.6 How to Use the L-Platform This section explains how to use the L-Platform after it is deployed. Based on the information below, a deployed L-Platform can be accessed using the remote desktop function. Item IP address Value 1. The IP address can be confirmed using the following procedures. 2. Select Server List on the Management page of L-Platform Management. 3. Check IP address of the target server from the list displayed.
Chapter 5 Request This chapter explains how to operate the application list. Note - Application processes are determined by the Infrastructure Administrator and set by the System Administrator. The application list can be used only if an application process is set. - If Internet Explorer enhanced security (IE ESC) is enabled, the X button on popup windows does not operate correctly. Refer to the following website for information on how to disable Internet Explorer enhanced security: http://www.microsoft.
- To check past application results Select My Completed Tasks from the Task Filters drop-down list on the My Task window. A list of tasks with the status Completed will be displayed. The priority level of a task can be specified on the Summary tab under My Tasks using numerals from 0 to 2147483647. The default value is 8. The higher the number of a task, the higher its priority level. Setting the priority level of tasks also enables them to be sorted in order of priority in task lists. 3.
Item Description Assess One of the following responses will be displayed: - Approval waiting - Accepted - Accepted (Error) - Dismissed - _ (*1) - Blank (*2) Pending One of the following responses will be displayed: - Pending - Cancel - _ (*1) - Blank (*2) Cancel One of the following responses will be displayed: - Cancel - _ (*1) - Blank (*2) Date The date and time of execution will be output in the following format: YYYY-MM-DD HH:MM:SS Responsible Displays the executor.
- When the application process is set to 'JudgeOnly' Indicates that an error has occurred with the application during acceptance of the assessment and the task has been reserved. 5.2 Cancelling an Application Subscribers can cancel an application that they have issued. A subscriber is a user who issued any of the following applications: - Subscribe use L-Platform - L-Platform reconfiguration - Cancel L-Platform Perform the following steps to cancel an application process: 1.
4. Select the Application tab on the Form panel. Check the content of the application. 5. Click the 0: Cancel button on the Make Choice panel. The selected application process is cancelled. Note - If the 0: Cancel button on the Make Choice panel is clicked without the Details tab being selected or without the Status tab on the Details tab being selected, the following message is displayed: All the forms are not accessed in Details Tab.
- If the error below is issued when cancelling an application, provide the Tenant Administrator with the name of the process instance that issued the error and the error details, and ask for the error to be investigated and fixed. When the Details button is clicked on the window shown below, error details are displayed.
Chapter 6 Account This chapter explains account operations. 6.1 Referencing User Information The Account window can be used to display the user information of logged in users. Perform the following operations to view user information. 1. Select the Account link on the ROR Console. The Account window is displayed in a new window.
Note With some directory services operation settings, the Modify account and Change password buttons may not be displayed. Directory services operation settings are set by the System Administrator. 2. Click the Close button to close the Account window. 6.2 Changing User Information The Modify account window can be used to change the user information of a logged in user. Perform the following operations to change the user information: 1. Click the Modify account button on the Account window.
Item Explanation Emergency Contact Information E-mail address Specify the email address that receives emergency notifications, using up to 64 characters. Telephone number Specify the phone number to be used for emergency contact. 3. Click the Confirm button. 4. The window for confirming changed content is displayed. Check the values, and then click the Modify button. To change the values again, click the Back button to return to the Modify account window. 5.
Glossary admin client A terminal (PC) connected to an admin server, which is used to operate the GUI. admin LAN A LAN used to manage resources from admin servers. It connects managed servers, storage, and network devices. admin server A server used to operate the manager software of Resource Orchestrator. agent The section (program) of Resource Orchestrator that operates on managed servers. cloning Creation of a copy of a system disk.
Provides a virtualized infrastructure on PC servers, enabling flexible management of operations. image file A system image or a cloning image. Also a collective term for them both. infrastructure administrator A user who manages the resources comprising a data center. infra_admin is the role that corresponds to the users who manage resources.
manager The section (program) of Resource Orchestrator that operates on admin servers. It manages and controls resources registered with Resource Orchestrator. migration The migration of a VM guest to a different VM host. The following two types of migration are available: - Cold migration Migration of an inactive (powered-off) VM guest. - Live migration Migration of an active (powered-on) VM guest. network device The unit used for registration of network devices.
resource pool A unit for management of groups of similar resources, such as servers, storage, and network devices. role A collection of operations that can be performed. ROR console The GUI that enables operation of all functions of Resource Orchestrator. rule set A collection of script lists for performing configuration of network devices, configured as combinations of rules based on the network device, the purpose, and the application. server A computer (operated with one operating system).
tenant user A user who uses the resources of a tenant, or creates and manages L-Platforms, or a role with the same purpose. URL (Uniform Resource Locator) The notational method used for indicating the location of information on the Internet. virtual server A virtual server that is operated on a VM host using a virtual machine. VM (Virtual Machine) A virtual computer that operates on a VM host. VMware Virtualization software from VMware Inc.