OPERATOR'S MANUAL INMARSAT MINI-C MOBILE EARTH STATION MODEL FELCOM 16 www.furuno.co.
The paper used in this manual is elemental chlorine free. ・FURUNO Authorized Distributor/Dealer 9-52 Ashihara-cho, Nishinomiya, 662-8580, JAPAN Telephone : +81-(0)798-65-2111 Fax : +81-(0)798-65-4200 All rights reserved. Printed in Japan A : MAY 2003 F1 : OCT . 15, 2008 Pub. No.
IMPORTANT NOTICES General • Do not copy any part of this manual without written permission. • If this manual is lost or worn, contact your dealer about replacement. • The contents of this manual and equipment specifications can change without notice. • The example screens (or illustrations) shown in this manual can be different from the screens you see on your display. The screen you see depends on your system configuration and equipment settings. • Save this manual for future reference.
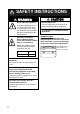
SAFETY INSTRUCTIONS WARNING Do not open the equipment. Use the proper fuse. Hazardous voltage which can cause electrical shock, burn or serious injury exists inside the equipment. Only qualified personnel should work inside the equipment. Use of a wrong fuse can result in fire or permanent damage to the equipment. Hazardous microwave. Do not approach within 60 cm of the antenna radome when it is transmitting. Microwave radiation can be harmful to the human body, particularey the eyes.
TABLE OF CONTENTS FOREWORD ....................................................................................................... vii SYSTEM CONFIGURATION ................................................................................ ix INMARSAT C SYSTEM OVERVIEW .................................................................... x LRIT COMPLIANCE.......................................................................................... xvii 1. OPERATIONAL OVERVIEW .......................................
TABLE OF CONTENTS 2.10 E-mail Service/SMS Station List.................................................................................2-34 2.11 E-mail Setup...............................................................................................................2-37 2.12 Saving, Loading System Settings ..............................................................................2-38 2.12.1 Saving system settings to a floppy disk...........................................................2-38 2.12.
TABLE OF CONTENTS 4.4 EGC Messages........................................................................................................ 4-33 4.4.1 Displaying and reprinting EGC messages. .................................................... 4-33 4.4.2 Displaying EGC closed network ID (ENID) .................................................... 4-34 4.4.3 Displaying the EGC message log .................................................................. 4-35 5. DATA REPORTING AND POLLING....................
TABLE OF CONTENTS APPENDIX ...................................................................................................... AP-1 Menu Tree .......................................................................................................................AP-1 International Telex/Telephone Country Code List.............................................................AP-8 LES List.........................................................................................................................
FOREWORD Introduction FURUNO Electric Company thanks you for considering and purchasing the FELCOM 16 Inmarsat Mini-C Mobile Earth Station. We are confident you will discover why the FURUNO name has become synonymous with quality and reliability. The FELCOM 16 mainly consists of a communication unit and an antenna unit.
FOREWORD Features • E-mail facility. (To transmit E-mail, register with an LES provider which provides e-mail services. E-mail charges are calculated separately.) • Built-in Enhanced Group Call (EGC) receiver. May be set to operate as EGC-only receiver. • Store-and-forward telex communication (public telex network) • Data reporting and Polling • Diagnostic programs for maintenance • Menu driven operation • VMS (Vessel Monitoring System) applicable Program Number PC Board viii Program No.
SYSTEM CONFIGURATION ANTENNA UNIT IC-116 AC-DC Power Supply PR-240 O POWER ER RO R I COMMUNICATION UNIT IC-216 (with internal GPS receiver) * JUNCTION BOX IC-315 CATEGORY OF UNITS Antenna Unit: Exposed to Weather Communication Unit: Protected from Weather Other Units: Protected from Weather PERSONAL COMPUTER (PC/AT compatible) INMARSAT MINI-C MOBILE EARTH STATION ER LO G IN FURUNO TX SHIP'S MAINS 12-24 VDC PRINTER PO W SHIP'S MAINS 100-115/200-230 VAC 1φ, 50/60 Hz SSAS ALERT UNIT IC-307 :
INMARSAT C SYSTEM OVERVIEW Introduction The Inmarsat C system provides worldwide telex and data transmission and reception of written information to owners of an Inmarsat C transceiver or a terrestrial telex network via satellite. Further, e-mail may be sent via the internet. Communication mode is store-and-forward telex, which means all information sent are first stored at an LES and then delivered to designated party.
INMARSAT C SYSTEM Inmarsat C System Configuration OCC SCC NCS LES LES LES Same as left Same as left Same as left AOR-East IOR POR Satellite MES 0.0 m -/+: To set option 0.0 m -/+: To set option 0.
INMARSAT C SYSTEM The Inmarsat C system consists of the Operation Control Center (OCC), Satellite Control Centers (SCC), Network Coordination Stations (NCS), Land Earth Stations (LES) and Mobile Earth Stations (MES). The OCC, located at Inmarsat’s London headquarters, coordinates a wide range of activities in the Inmarsat system, including commissioning of mobile earth stations. The Inmarsat C system divides the world into four regions and each region is covered by its own satellite.
Coverage area of Inmarsat satellites AREA POR IOR AOR-EAST AOR-WEST SATELLITE NAME INMARSAT-3, F3 INMARSAT-3, F1 INMARSAT-3, F2 INMARSAT-3, F4 POSITION 178°E 64.0°E 15.5°W 54.
INMARSAT C SYSTEM Communications Network The illustration below shows the Inmarsat C communications network.
INMARSAT C SYSTEM Types of MES There are three types of MES: class 1, class 2 and class 3. This FELCOM 16 is a class 2 MES. Class 1: Class 2: Class 3: 1) Transmits messages to LES 2) Receives messages from LES 1) The functions of class 1 plus operation as an EGC receiver when not transmitting or receiving. 2) EGC-only receiver The function of class 1 plus simultaneous operation as an EGC-only receiver.
INMARSAT C SYSTEM This page is intentionally left blank.
LRIT COMPLIANCE This equipment can function as a marine communications terminal for the LRIT (Long-Range Identification and Tracking) system, as prescribed by the IMO regulation MSC.202(81). The LRIT uses the FELCOM's Data Report/Polling feature for LRIT position reporting. The LRIT system is fully automatic, thus no operation is required of the user. However, follow the guidelines shown below to use this equipment as an LRIT device.
LRIT COMPLIANCE Notes on the LRIT system • Power the equipment and keep it logged in at all times except for special occasions such as when the ship is dry-docked for repairs. Position information is automatically sent at fixed intervals, thus no operation is required. However, keep the equipment in a ready state to received commands from the LRIT data center. Combined use for routine messages, distress messages and SSAS (Ship Security Alert System) is possible.
1. OPERATIONAL OVERVIEW 1.1 Communication Unit The communication unit is the heart of the FELCOM 16 system, transmitting and receiving messages via the Inmarsat system. INMARSAT MINI-C MOBILE EARTH STATION POWER Switch P OW ER IN G LO TX R ER OR POWER Status LEDs POWER: Lights (in green) when power is on. LOGIN: Lights (in green) when logged in; flashes (in green) in green in other instances. TX: Lights (in green) when transmitting. ERROR: Flashes (in red) for equipment error.
1. OPERATIONAL OVERVIEW 1.2 Terminal Unit (PC) Operation All operations are carried out from the terminal unit (local supply), through an easy-to-follow menu system. In this manual the PC is referred to as “Terminal Unit.” Note that it is necessary to supply a printer.
1. OPERATIONAL OVERVIEW 1.2.2 Controls description The FELCOM 16 is almost 100% keyboard controlled. Operation is carried out with the function keys, numbered F1-F10 at the top of the terminal unit’s keyboard. Controls Esc F1-F10 Backspace Insert Cancels key input and returns to previous display screen. These are the function keys. They choose menus. Deletes the character to the left of the cursor. Works the same as “paste.” See “Copying and pasting text” in paragraph 3.2.4.
1. OPERATIONAL OVERVIEW Ctrl Num Lock Works in combination with alphabet keys as follows: Ctrl + [M]: Same as Enter. Ctrl + [H]: Same As Back Space. Ctrl + [I]: Same as Insert. Ctrl + [V]: Same as Overwrite+Insert. Turns numeric input on or off. Note that you cannot enter alphabet when the Num LED is lit. Note: In telex, lower case, #, &, *, $, @, %, etc. are not used. A full list of characters useable in telex appears in the Appendix. For e-mail any character or symbol may be used. 1.2.
1. OPERATIONAL OVERVIEW 1.2.4 Function keys The function menus, which you access by pressing the function keys (F1-F10) at the top of the keyboard, control most operations of this unit.
1. OPERATIONAL OVERVIEW 1.3 Standby Display After the equipment is turned on and the diagnostic test has been conducted, the standby display appears, showing the system status monitor. The system status monitor provides various operating information. For a detailed description, see paragraph 7.4. File Edit Transmit EGC Reports Date Time 02-02-25 01:32 (UTC) Position LAT 34:30.00N LON 135:00.00E LAT LON 345 DEG 10.
1. OPERATIONAL OVERVIEW 1.3.1 Display indications The display is divided in three sections: 1) The function menu area 2) The working area 3) The operating status area File Edit Transmit EGC Reports Logs Options (1) Setup Position StopAlarm (1) 1) Function Menu 2) WORKING AREA 3) Operating Status (2) (3a) (3b) (4) (5) (7) (8) (6) (9) (9) Location of display indications Below are the indications and meanings of the items in parentheses in the illustration above.
1. OPERATIONAL OVERVIEW (2) Communication unit status IDLE IDLE (PENDING) SENDING RECEIVING LOGIN LOGOUT Data Report TESTING TEST SETUP SCANNING EGC RECEIVER (Reverse video) Delivery Status Req.
1. OPERATIONAL OVERVIEW TEST-DISTRESS ALERT WAITING FOR ACTIVATION WAITING FOR TEST RESULT CLEARING PV TEST is Completed. PV TEST Failure. Sending test distress alert to LES Waiting start of PV test Waiting for results of PV test Clearing PV test PV test is completed. PV test failed. (3b) RF CON board program version number DCE F16 Ver. XX (XX = Version Number) (4) Frame synchronization Blank SYNC (NCS) SYNC (LES) MES Sig. Ch MES Msg.
1. OPERATIONAL OVERVIEW (7) Other information No display No receive message in memory, or printer is operating. REC. MESSAGE EXISTS Displayed when a routine message has (Reverse video) not been printed, or a confidential message is received. Data Report When data reporting is activated. (Reverse video) Message Report Message report setting is activated. (Reverse video) (8) Date and time Date and time, received from the GPS navigator, are displayed. Manually input date and time are also displayed.
1. OPERATIONAL OVERVIEW 1.4 Menu Overview Operation of the FELCOM 16 is carried out through a menu system which you access with the function keys at the top of the screen. The example below shows how to choose menu options from the Editor Setup menu. 1. Press the [F8] key to display the Setup menu. File Edit Transmit EGC Reports Logs Options Setup Position StopAlarm Setup 1. System Setup 2. Editor Setup 3. Terminal Setup 4. EGC Setup 5. Auto Mode Setup 6. E-Mail Setup 7. Directories 8.
1. OPERATIONAL OVERVIEW 3. Press the [↑] or [↓] key to choose option desired and press the [Enter] key. 4. Press the [Esc] key. Note 1: On some menus the update window appears after you press the [Esc] key. This is done to ask you to confirm settings. Yes is selected in the Update window; press the [Enter] key to register settings, or press [→] to choose No and press the [Enter] key to escape. Update Yes No Note 2: The following functions are not available: Keying Sequence F3-1 F8-1 F8-4 1.
1. OPERATIONAL OVERVIEW 1.6 Choosing a Printer Choose the printer to use as follows: 1. Press the [F1] key to display the File menu. File Edit Transmit EGC Reports Logs Options Setup Position StopAlarm File 1. New 2. Open 3. Close 4. Save ALT-N ALT-O ALT-Q ALT-S 5. Delete ALT-D 6. Rename 7. Print ALT-P 8. Print Setting 9. MIME (Decode) File menu 2. Press the [8] key to choose 8. Print Setting. Print Setting Please select Printer and press Enter key. No Printer Windows Printer PP-510 3.
1. OPERATIONAL OVERVIEW (This page intentionally left blank.
2. SYSTEM INITIALIZATION This chapter provides the information necessary for initializing the FELCOM 16. Once the equipment is initialized, you need do no more than press a few keys to transmit and receive. Inmarsat assigns an MES an Inmarsat Mobile Number (IMN) when it applies for Inmarsat registration and it is entered during the installation of the MES. The IMN is necessary to communicate in the Inmarsat system. 2.
2. SYSTEM INITIALIZATION 3. Press the [↓] key twice to choose MES Operation Mode. 4. Press the [Enter] key to open the MES operation mode options window. Setup System Setup System Date & Time IMN MES Operation Mode Nav Port Active Port Message Output Port EGC Output Port 9.Network Configuration Setup Command Window 01:53 02-02-25 (YY-MM-DD) IOR INMARSAT-C INMARSAT-C EGC OFF INT EXT EXT System setup menu, MES operation mode options window 5.
2. SYSTEM INITIALIZATION 2.2 PC Window Setup The Terminal Setup menu provides for set up of the PC window. Set up includes selection of date display format, currency unit and window colors. 1. Press the [F8] key to choose the Setup menu. 2. Press the [3] key to display the Terminal Setup screen. Terminal Setup Date Disp. Form Currency Unit Screen Saver Window Color YY-MM-DD US$ ON Terminal Setup menu 3. Date Disp. Form is selected; press the [Enter] key to open its options window.
2. SYSTEM INITIALIZATION 10. You may change the background and foreground colors for the various display screens on the PC window as follows: a) Choose Window Color Setup. Window Color Setup Window : Base Window Fore Color : L_WHITE Back Color : BLUE To Change: ENTER To Change Value: L<=>R Window color setup menu b) Window is selected; press the [→] or [←] key to choose the item to adjust.
2. SYSTEM INITIALIZATION 2.3 Login and Logout Each time the terminal unit is turned on, register your vessel with the Inmarsat C system to enable communications between your vessel and an LES. This is called login. Note that you can transmit or receive EGC messages even if you are not logged in. If you will not be using the FELCOM 16 for a prolonged period, you should logout from the Inmarsat C system, before turning off the terminal unit.
2. SYSTEM INITIALIZATION Note: The terminal unit must be “idle” to login. (“Current State: IDLE” appears at the bottom of the screen.) When it is not idle, “Ignored: MES is not idle.” appears. Press the [Esc] key to return to the standby display. Wait until the terminal unit becomes idle. 4. Yes is selected; press the [Enter] key to start login. 5. Login begins and the screen should now look something like the illustration below, with “LOGIN” flashing.
2. SYSTEM INITIALIZATION 2.3.2 Logout 1. Press the [F7] key to display the Options menu. 2. Press the [2] key to display the logout screen. Note: The terminal unit must be “idle” to logout. When it is not idle, “Ignored: MES is not idle.” appears. Press the [Esc] key to return to the standby display. Wait until the terminal unit becomes idle. File Edit Transmit EGC Reports Logs Options Setup Position StopAlarm Options Logout Start Yes Current State: IDLE Successful Login. DCE F16 Ver.
2. SYSTEM INITIALIZATION 2.4 EGC Settings 2.4.1 What is the EGC (Enhanced Group Call) service? The EGC service enables EGC information providers to send SafetyNETTM, FleetNETTM and System messages via an LES to a specific groups of ships, or to all ships within a defined geographical area. Each type of EGC service is sent as follows: 1) The information provider prepares the message, and then accesses the appropriate Country of the international telex network to send the message to an LES.
2. SYSTEM INITIALIZATION 2) FleetNETTM This service allows authorized information providers such as commercial subscription services, shipping companies and governments, which have registered with a LES that supports FleetNETTM, to broadcast messages to selected group of MESs.
2. SYSTEM INITIALIZATION 2.4.2 EGC setup The FELCOM 16 receives EGC messages directed to its present position and Navarea without further programming. The EGC Setup screen lets you choose additional areas for which to receive messages and also the Navtex station and type of message for Coastal Warning (NAVTEX Re-broadcast). 1. Press the [F8] key to display the Setup menu. File Edit Transmit EGC Reports Logs Options Setup Position StopAlarm Setup 1. System Setup 2. Editor Setup 3.
2. SYSTEM INITIALIZATION 7. Press the [Enter] key to open the navarea entry window. Setup EGC Setup Receive EGC Area Additional Position Navarea Fixed Area Waypoint (from NAV Equipment) : : OFF NAVTEX Station Code Type of Message (Can't reject other report) Ice reports OFF OMEGA messages Meteo. forecasts OFF SATNAV messages Pilot service OFF Other navaid msg DECCA messages OFF QRU (no message) LORAN messages OFF OFF OFF OFF OFF EGC setup menu, Navarea entry window 8.
2. SYSTEM INITIALIZATION 10. Press the [↓] key to choose Station Code. 11. Press the [Enter] key to open the station code entry window. Setup EGC Setup Receive EGC Area Additional Position Navarea Fixed Area Waypoint (from NAV Equipment) : : OFF NAVTEX Station Code Type of Message (Can't reject other report) Ice reports OFF OMEGA messages Meteo.
2. SYSTEM INITIALIZATION 2.4.3 Adding EGC channels The EGC Channel List stores EGC channels. There are currently four EGC channels, one for each satellite. These four channels are pre-programmed into the unit and marked in the EGC Channel List with asterisks. When more EGC channels become available you can add them to the list as below. 1. Press the [F8] key to display the Setup menu. 2. Press the [8] key to display the Configuration menu. 3. Press the [3] key to display the EGC Channel List.
2. SYSTEM INITIALIZATION 5. Press the [Enter] key to open the EGC channel list entry screen. Setup Configuration EGC Channel List ENTER: Set ESC: Quit 11080* 11080* 12580* 10840* 11088* EGC channel list entry screen 6. Enter EGC channel frequency code. The EGC channel frequency code range is 6000-14000. 7. Press the [Enter] key to close the text window. 8. Press the [Esc] key to open the update window.
2. SYSTEM INITIALIZATION 2.4.4 Saving, printing EGC messages automatically You may choose the EGC messages to save and print as follows: Automatically saving EGC messages 1. Press the [F8] key to display the Setup menu. 2. Press the [5] key to display the Auto Mode Setup menu. Auto Mode Setup Auto Log Print Receive Alarm Auto Receive Message Save Auto Receive Message Print Data Report & Polling Print Auto EGC Message Save Auto EGC Message Print OFF OFF OFF OFF OFF Auto EGC message save menu 3.
2. SYSTEM INITIALIZATION Automatically printing EGC messages 1. Press the [F8] key to display the Setup menu. 2. Press the [5] key to display the Auto mode setup menu. 3. Press the [↓] key to choose Auto EGC Message Print and then press the [Enter] key. Auto Mode Setup Auto EGC Message Print System FleetNET SafetyNET (Routine) SafetyNET (Safety) SafetyNET (Urgent & Distress) OFF OFF OFF OFF OFF Auto EGC message print menu 4. Press the [↓] or [↑] key to choose message type and then press the [Enter] key.
2. SYSTEM INITIALIZATION 2.5 Adding NCS Channels This section shows you how to add NCS channels to the NCS Channel List. 19 channels can be listed per each ocean region. Currently, there are four NCS channels, and they are marked with asterisks in the list. Add NCS channels to the list as below when they become operational. 1. Press the [F8] key to display the Setup menu. 2. Press the [8] key to display the Configuration menu. 3. Press the [4] key to display the NCS Channel List.
2. SYSTEM INITIALIZATION 13. Yes is selected; press the [Enter] key to register input. Note: If the ID or frequency entered is invalid the message "Input Error: NCS ID" (for invalid ID) or "Input Error: Channel No." (for invalid frequency) appears. Clear the error message by pressing the [Esc] key. Place the cursor at the invalid ID or frequency code. Then, press the [Enter] key and enter correct ID or frequency. 14. Press the [Esc] key twice to return to the standby display.
2. SYSTEM INITIALIZATION 2.6 LES List The LES List provides for storage of 44 LES names per ocean region. By entering approximate toll charges in the LES list, you can see that information on the Transmit message menu. 2.6.1 Setting toll charges Main LES (LES name and ID) are already registered in the FELCOM 16; but, toll charges are not set. To set communication toll charges do the following: 1.
2. SYSTEM INITIALIZATION 3. Press the [2] key to display the LES List. LES List Ctrl+P: Print ENTER: List Entry ESC: Quit No AOR (WEST) Name AOR (EAST) Name 01 02 03 04 05 06 07 08 Telenor S.S.Inc Stratos M.N. KDDI Telenor S.S.AS Telenor S.S.Inc Stratos M.N. KDDI Telenor S.S.AS Telecom Italia POR Name Telenor S.S.Inc Stratos M.N. KDDI Telenor S.S.AS Korea Telecom IOR Name Stratos M.N. KDDI Telenor S.S.AS OTE VSNL Korea Telecom LES list 4.
2. SYSTEM INITIALIZATION 2.6.2 Registering LES to LES list Follow the procedure below to register newly constructed LESs. 1. Press the [F8], [8] and [2] keys to show the LES list. 2. Use the arrow keys to place the cursor where desired. For example, choose 005 in the AOR(WEST) column. Setup Configuration LES List Ctrl+P: Print ENTER: List Entry ESC: Quit No 01 02 03 04 05 06 07 08 AOR (WEST) Name Telenor S.S.Inc Stratos M.N. KDDI Telenor S.S.AS AOR (EAST) Name Telenor S.S.Inc Stratos M.N.
2. SYSTEM INITIALIZATION Name : ID : Remarks : Charge (US$/256bit) TELEX *****.** FAX *****.** E-Mail *****.** SMS *****.** PSDN *****.** X400 *****.** DNID *****.** SPEC *****.** Erase the Name to delete this LES. LES list, text entry window 5. Enter LES name (maximum 15 characters). 6. Press the [Enter] key. 7. Press the [↓] key twice to choose Remarks. 8. Press the [Enter] key. 9. Enter remarks (up to 20 characters). 10. Press the [Enter] key. 11.
2. SYSTEM INITIALIZATION 2.6.4 Printing the LES list 1. Press [F8], [8] and [2] to display the LES list. 2. To print the LES list, press the [P] key while pressing the [Ctrl] key. LES List ( Printed at 02-02-25 02:33 ) +++++ AOR (WEST) ++++ No. Name 01 Telenor S.S.Inc 02 Stratos M.N. 03 KDDI 04 Telenor S.S.AS 12 Xantic (NED) 21 France Telecom 22 Xantic (AUS) LES ID 001 002 003 004 012 021 022 +++++ AOR (EAST) +++++ LES ID No. Name 101 01 Telenor S.S.
2. SYSTEM INITIALIZATION 2.7 Station List 2.7.1 Adding stations to the station list The FELCOM 16 provides an “address book” for storing 64 station IDs. Enter station IDs as below. 1. Press the [F8] key to display the Setup menu. 2. Press the [8] key to display the Configuration menu. 3. Press the [1] key to display the Station List.
2. SYSTEM INITIALIZATION TELEX FAX E-Mail SMS PSDN X400 DNID SPEC TELEX (Prefixed) FAX (Prefixed) PSDN (Prefixed) X400 (Prefixed) DNID (Prefixed) SPEC (Prefixed) Destination (communication) type options TELEX: Telex communication FAX: Facsimile service E-Mail: E-mail (electronic mail) Service SMS: Short Message Service PSDN: Packet Switched Data Network - to an office computer via a data network using X.25 standard. X400: For future use DNID: Data Network ID. See page 5-12.
2. SYSTEM INITIALIZATION 12. Press the [Enter] key to close the window. 13. Press the [Esc] key to return to the station list. 14. To enter another “Telex” station repeat the procedure from step 4 on page 2-24. 15. Press the [Esc] key three times to return to the standby display. Procedure for FAX 1. Press the [↓] key to choose Country Code. 2. Press the [Enter] key to open the country code entry window. 3. Enter international telephone code of subscriber. See the Appendix for list of telephone codes. 4.
2. SYSTEM INITIALIZATION Procedure for E-mail 1. Press the [↓] key to choose Address. 2. Press the [Enter] key to open the e-mail address entry window. 3. Enter recipient’s e-mail address. 4. Press the [Enter] key to close the window. 5. Press the [↓] to choose Remarks. 6. Press the [Enter] key. 7. Enter remarks, using up to 20 characters. 8. Press the [Enter] key to close the window. 9. Press the [Esc] key to return to the station list. 10.
2. SYSTEM INITIALIZATION 2.7.2 Editing the station list 1. Press [F8], [8] and [1] to display the Station List. File Edit Transmit EGC Reports Logs Options Setup Position StopAlarm Setup Configuration Station List Group Station Name 01 02 03 04 05 06 07 08 abc xyz Seagull Type Code ID / Address E-Mail abc@ furuno.co.jp E-Mail xyz@ furuno.co.
2. SYSTEM INITIALIZATION 2.7.3 Printing the station list 1. Press [F8], [8] and [1] to display the Station List. 2. press the [P] key while pressing the [Ctrl] key. No. 01 02 03 Station List ( Printed at 02-02-25 02:38 ) Group Name Type Dest, ID, Modem / Address x1 abc E-Mail abc@ furuno.co.jp x2 xyz E-Mail xyz@ furuno.co.jp x3 Seagull TELEX 584 463609999 Station Name Group Name Remarks Subscriber's Number Country Code Sample station list printout 3.
2. SYSTEM INITIALIZATION 2.8 Entering Own Ship’s Position When the internal GPS navigator is abnormal, manually enter position as below. 1. Press the [F9] key to display the Position menu. File Edit LAT LON Transmit EGC Reports Logs Options Setup Position StopAlarm Ship Position 34:30.00N 135:30.00E Ship position window 2. Press the [Enter] key to open the latitude entry window. LAT LON 3. 4. 5. 6. Ship Position 00:00.00N 34:30.00N 000:00.
2. SYSTEM INITIALIZATION 2.9 Creating A Directory Incoming and outgoing messages may be saved to the hard disk. If no directory is specified, all messages are saved to the My Documents folder (in Windows Vista, messages are saved to the Felcom16 folder in Documents). 2.9.1 Creating a directory where to store messages The procedure below shows how to create a directory on the root directory in the hard disk. 1. Press the [F8] key to display the Setup menu. 2.
2. SYSTEM INITIALIZATION 5. Enter directory name and press the [Enter] key. Entered name appears. Message Directory (Windows XP) Note 1: To create a directory within a directory at step 5, repeat steps 4 and 5. Note 2: To return to the above stage, place the cursor on [●●] and then press the [Enter] key. 6. Press the [Esc] key to show the Update window. 7. Yes is selected; press the [Enter] key. 8. Press the [Esc] key twice to return to the standby display.
2. SYSTEM INITIALIZATION 2.9.2 Specifying directory where to store messages You may specify the directory where to store messages on the hard disk as follows: 1. Press the [F8] and [7] keys to show the Directories menu. 2. Press the [↑] key to choose Message Directory and press the [Enter] key. 3. 4. 5. 6. 7. 8. 9. Message directory Press the [↓] key to place the cursor on [●●]. Press the [Enter] key. Root directory is displayed. Press the [↓] or [↑] key to choose a directory. Press the [Enter] key.
2. SYSTEM INITIALIZATION 2.10 E-mail Service/SMS Station List E-mail service providers and SMS stations are already registered in the FELCOM 16. To add new e-mail service providers or SMS stations, follow the procedure below. 1. Press the [F8] key to display the Setup menu. 2. Press the [8] key to display the Configuration menu. Setup Configuration 1. Station List 2. LES List 3. EGC Channel List 4. NCS Channel List 5. E-Mail/SMS Service List 6. Save/Load 8. Directories 9.
2. SYSTEM INITIALIZATION 4. Press the [↓] to choose a blank line in the Station Name column and then press the [Enter] key. Service LES Name Service ID (E-Mail) (SMS) LES ID(AORW) (AORE) (POR) (IOR) To: Cc: Subject: Separator: SMS: Attach File(MIME) OFF Enter data for LES which offers e-mail services. For details contact LES directly.
2. SYSTEM INITIALIZATION 16. Press the [↓] key to choose LES ID. 17. Press the [Enter] key to open the LES ID entry window. 18. Enter ID of AOR-W. 19. Press the [Enter] key to close the window. 20. Repeat steps 17-19 to enter AOR-East, POR and IOR. 21. Press the [↓] key to choose “To:.” 22. Press the [Enter] key to open the “to” header entry window. 23. Type appropriate “To” header (for example, TO:, to+, etc.). 24. Press the [Enter] key to close the “to” header entry window. 25.
2. SYSTEM INITIALIZATION 2.11 E-mail Setup Choose the LES where to forward e-mail. Also, you may need to register with an LES which provides e-mail services. 1. Press the [F8] key to display the Setup menu. 2. Press the [6] key to choose E-mail Setup. Setup E-Mail Setup LES Name 01 AOR.W AOR.E POR 001 201 321 AOR.W AOR.E POR IOR Telnor ComsatS.S.Inc 101 IOR 6. Auto Mode Setup 7. E-Mail Setup 8. Directories 9. Configuration E-mail setup 3. Press the [Enter] key to open the e-mail station list.
2. SYSTEM INITIALIZATION 2.12 Saving, Loading System Settings System settings (as well as messages) may be saved to a selected folder and loaded onto the terminal unit. This is useful for having backup copies of system settings. 2.12.1 Saving system settings 1. Press the [F8] key to show the Setup menu, then press the [8] key to open the Configuration menu. 2. Press the [6] key to choose Save/Load. Save/Load Window 3. Press the [↑] to select [Save], then press the [Enter] key. 1. ALL 2. Station List 3.
2. SYSTEM INITIALIZATION 2.12.2 Loading system settings to the terminal unit 1. Press the [F8] key to show the Setup menu, then press the [8] key to open the Configuration menu. 3. Press the [6] key to choose Save/Load. 4. Press the [↓] key to choose Load, and press the [Enter] key. 1. ALL 2. Station List 3. LES List 4. E-Mail/SMS Service List 5. Other Load Window 6. Press appropriate numeric key to choose the item to load. 7. Select a destination folder and press the [OK] button.
This page is intentionally left blank.
3. FILE OPERATIONS This chapter describes how to prepare, edit, save and print files (messages). 3.1 Files and Working Areas To create a new message it is necessary to open a new file. After a new file is opened, one of two working areas in the internal memory is secured to create the message. The term “open a file” also refers to the loading of a prepared file into a working area. When you remove a file from a working area this is called “closing a file.
3. FILE OPERATIONS 3.2 Preparing Files There are two types of files: routine and confidential. Files can be assigned a file name and saved to the hard disk for later use. A message may contain maximum 32 Kbytes of characters. 3.2.1 Preparing a routine file 1. Press the [F1] key to display the File menu. File Edit Transmit EGC Reports Logs Options Setup Position StopAlarm File 1. New 2. Open 3. Close 4. Save ALT-N ALT-O ALT-Q ALT-S 5. Delete ALT-D 6. Rename 7. Print ALT-P 8. Print Setting 9.
3. FILE OPERATIONS 3.2.2 Preparing a confidential file If communicating with another FURUNO FELCOM, you can prepare a confidential message by entering “S???-addressee code(-password):” in the first line of the message text. You can also receive confidential messages containing this header from a land subscriber or any MES. There are two types of confidential messages: message with addressee code and message with both addressee code and password.
3. FILE OPERATIONS 3.2.3 Editor menu setup The Editor menu sets the parameters of the text editor. 1. Press the [F8] key to display the Setup menu. 2. Press the [2] key to display the Editor Setup menu. File Edit Transmit EGC Reports Logs Options Setup Position StopAlarm Setup Editor Setup Mode 2. Text System Setup Ascii Insert Mode 3. Edit Editor Setup Wrap 4. Word Terminal Setup ON ON 5. Line EGCNo. Setup 6. Tab AutoWidth Mode Setup4 Char Width 69 7. Column E-Mail Setup Block Type 8.
3. FILE OPERATIONS File Edit Transmit EGC Reports Logs Options Setup Posirion StopAlarm <[1] UNTITLED1> 0001| Cursor can be a square or an underline. Line Number Displayed if Line No. is turned on in Editor Setup menu. ----*---------+---------+---------+---------+---------+---------+---------< TELEX 1 Char. [ Line 1/ 1 Col. 1 ] [Insert ] Text editor screen 3.2.4 Working with text Cutting and pasting text 1. Use the arrow keys to place the cursor on the first character of the text to be cut.
3. FILE OPERATIONS 5. To move text to a new location after it has been cut, place the cursor at the exact spot in the message where the cut text is to start. When the text cursor is placed correctly, press the [F2] key and then the [3] (Paste) key. Copying and pasting text 1. Choose the text you want to copy. <[1] UNTITLED1> 0001 THE FURUNO FELCOM INMARSAT STANDARD C MOBILE EARTH STATION, A 0002 SATELLITE COMMUNICATIONS UNIT PACKAGE FOR VIRTUALLY EVERY VESSEL.
3. FILE OPERATIONS Insert (with Citation) When you reply to a received message, you can insert the received message. “>” is placed at the head of the received message to distinguish it from your message. Select All Chooses the entire current file for cut and copy. Search and Replace Searching text The Search feature lets you search for text in a forward or backward direction. 1. At the Edit menu, press the [6] key to choose “6 Search or Replace.” Search or Replace 1. Search Alt-F 2.
3. FILE OPERATIONS 8. Yes is selected; press the [Enter] key. When the unit finds the word, the cursor stops at the first character of the word. If the string could not be found, the message “Not Found (To Quit: ESC)” appears. Press the [Esc] key to quit. 9. To continue the search, press the [Enter] key. Replacing text The Replace feature helps you replace every occurrence of a word or phase with another word or phase in a file. 1. At the Edit menu, press the [6] key to choose “6 Search or Replace.
3. FILE OPERATIONS 10. Press the [↓] or [↑] key to choose Query or All. Query: Stop at each occurrence of word to answer yes or no to replacement. All: Replace every occurrence of word without stopping to confirm. 11. Press the [Esc] key. The following display appears. Replace Start? Yes No Replace start window 12. Yes is selected; press the [Enter] key to start the replacement. If you selected “All” at step 10 all occurrences of the search word are replaced with the replace word.
3. FILE OPERATIONS 3.3 Saving Files After you have created a message you may wish to save it to the hard disk, for future use. You can save a message two ways: Save it without losing your place on the screen (called “save”), or save it before clearing the screen (called “close”). 3.3.1 Save file, retain place on screen 1. Press the [F1] key to display the File menu. 2. Press the [4] key. The screen should look something like the one below. Save screen (Windows XP) 3.
3. FILE OPERATIONS 3.3.2 Save file, clear screen 1. Press the [F1] key to display the File menu. 2. Press the [3] key. The message “Save this message?” appears on the screen. File Edit Transmit EGC Reports File 1. New 2. Open 3. Close 4. Save Logs Options Setup Position StopAlarm <[1] C:\SEIZOUSE> ALT-N NT THAT YOU WILL ENJOY MANY YEARS OF OPERATION WITH ALT-O STANDARD C MOBILE EARTH STATION FELCOM ALT-Q S ON YOUR CHOICE OF FURUNO FELCOM. ALT-S 5. Delete ALT-D 6. Rename Save this message? 7.
3. FILE OPERATIONS 3.4 Opening Files 3.4.1 Opening files 1. Press the [F1] key to display the File menu. 2. Press the [2] key. The screen shows a list of the files stored on the hard disk. 3. Press the [↓] or [↑] key to choose a file. To view a portion of a file, press the space bar. After confirming, press the [Esc] key. File Open 1. New ALT-N SEIZOU 2. Open ALT-O 3. Close ALT-Q THE FURUNO FELCOM INMARSAT STANDARD C MOBILE EARTH STATION, A 4.
3. FILE OPERATIONS 3.4.3 Opening a file when both working areas are occupied If both working areas in the memory are occupied when you attempt to open a file, you are asked if you want to save the file currently chosen before clearing it to open another file. Save this message? Yes No Prompt for closing a file 1. To save the file, press the [Enter] key. (Choose “No” and press the [Enter] key if you do not need to save the file. Go to step 4.) Save screen 2.
3. FILE OPERATIONS 3.5 Saving a File Under a New Name 1. 2. 3. 4. Open a file referring to paragraph 3.4.1. Edit the file. Press the [F1] key. Press the [3] (Close) or [4] (Save) key depending on your objective. [3] saves the file and closes the screen; [4] saves file and keeps position on the screen. File Edit Transmit EGC Reports File 1. New 2. Open 3. Close 4.
3. FILE OPERATIONS 7. Press the [Enter] key. Note: Should you decide to save the file under the original name, skip step 6. The screen shown at the top of the next page appears. Overwrite the file by pressing the [Enter] key, or choose “No” and press the [Enter] key to escape Overwrite confirmation screen 3.6 Printing Files You can print out a hard copy of a file stored on the hard disk. 1. Press the [F1] key to display the File menu. 2. Press the [7] key.
3. FILE OPERATIONS 3.7 Combining Files In the procedure below we’ll combine file A and B. 1. Open file A. 2. Open file B. 3. Place the cursor at the beginning of file B. While pressing and holding down the [Shift] key, press the [↓] key to highlight the entire file. (You can also choose a portion of the file.) 4. Press the [C] key while holding down the [Alt] key to place file B on the clipboard. 5. Press the [V] key while holding down the [Alt] key to switch to File A. 6.
3. FILE OPERATIONS 3.8 Deleting Files 1. Press the [F1] key to display the File menu. 2. Press the [5] key. A list of files stored on the hard disk appears. Sample delete screen 3. Press the [↑] or [↓] key to choose the file you want to delete. To verify the contents of that file, tap the space bar. After confirming the contents, press the [Esc] key. 4. Press the [Enter] key. The prompt “OK to delete file?” appears. Prompt for verification of file delete 5.
3. FILE OPERATIONS 3.9 Renaming Files Do the following to rename a file. 1. Press the [F1] key. 2. Press the [6] key. File, rename 3. Press the [↑] or [↓] key to choose the file you want to rename. 4. Press the [Enter] key. Rename Enter new filename Test Rename window 5. Delete old file name and then type new file name. 6. Press the [Enter] key.
3. FILE OPERATIONS 3.10 Decoding E-mail Attachment When you can't read an e-mail attachment because it has been coded by MIME (Multipurpose Internet Mail Extensions), you may decode it as below. 1. Save the MIME-coded file to the hard disk. (See paragraph 4.2.5 for the procedure.) This step is not necessary if Auto Receive Message Save is turned on in the Auto Mode Setup menu. 2. Press the [F1] key to open the File menu. 3. Press the [9] key to choose MIME(Decode). Decode window 4.
3. FILE OPERATIONS 7. To change file name, press the [Backspace] key to erase the file name, new file name and then press the [Enter] key. After decoding the file the screen looks something like the one shown below. MIME Decode Checking 'E0970715.001' . . . Decode 'ABC.ini'? Now decoding. . . Complete. Decoded 1 file (s). Press any key to escape. MIME decode screen 8. Press the [Esc] key twice to return to the standby display. 9. Press the [F1] and [2] keys in that order. 10.
4. INMARSAT C COMMUNICATIONS This chapter explains how to transmit and receive. Before conducting any communications, be sure to login with the NCS in your area, following the instructions in paragraph 2.3.1. To transmit e-mail, you may need to register for e-mail services with an LES which provides such services. Further it is necessary to register with an LES which provides e-mail services in order to send e-mail from a land subscriber to the FELCOM 16. For further details contact an LES. 4.
4. INMARSAT C COMMUNICATIONS Message, subscriber, destination type and code Message English Russian Japanese Data 4.1.2 Subscriber Destination Type Code Inmarsat C MES Telex IA5 Telex Telex ITA2 Fax PSTN IA5 E-mail E-mail IA5 Inmarsat C MES PSDN DATA Fax Not available E-mail E-mail DATA Inmarsat C MES PSDN DATA Telex Not available Fax Not available E-mail E-mail DATA Inmarsat C.
4. INMARSAT C OPERATIONS 3. Press the [1] key to display the Transmit Message menu. Displayed if toll charges have been entered. See para. 2.6.1. File Transmit Edit EGC Transmit Not used. Reports Logs Options Setup Position StopAlarm <[1] UNTITLED1> Transmit Message 1. Transmit Message 2.Priority Cancel Normal 3.Message Request Delivery Status Message now being edited Size 24 File Station Name Cost ********.
4. INMARSAT C OPERATIONS 6. Press the [↑] or [↓] key to choose station and then press the [Enter] key. To choose multiple stations* (simultaneous transmission), choose a station and then press the Space bar. Selected stations are marked with an asterisk (in case of Telex or FAX). For e-mail address, press the Space bar to choose “To” “Cc,” Blank, “To”… consecutively. * = Max. 10 telex stations, 7 FAX, 10 e-mail and one SMS.
4. INMARSAT C OPERATIONS (6) Press the [Enter] key to open the attach file window. <[1] UNTITLED1> Transmit Transmit Message 1. Transmit Message 2.Priority Cancel Normal 3.Message Request File Delivery Status Message now being edited Size 24 Station Name Cost ********.**(US$) E-Mail Destination Type Prefix Code Select File Country/Ocean Code Station ID Modem Type Address ----*---------+---------+---------+---------+---------+---------+---------< Subject [Insert ] 25 Char. [ Line 2/ 2 Col.
4. INMARSAT C OPERATIONS 13. Press the [Enter] key to open the confirmation window. 14. To request notification of delivery from the LES, choose ON. If not necessary choose OFF. 15. Press the [Enter] key to close the window. 16. Press the [↓] key to choose Send Delay. 17. Press the [Enter] key to open the send delay entry window. 18. To send a message after a certain delay, enter a time up to 99 hours 59 minutes. (The Send Delay is used to time message arrival to suit recipient’s office hours.) 19.
4. INMARSAT C OPERATIONS Note 3: Messages sent to the message queue may contain up to 32 KB of data. If data is larger than 32 KB, the message “Cannot enter this message to sending Queue. Press any key.” appears. 30. Press the [Esc] key twice to return to the standby display. The message(s) will be transmitted according to the Send Delay setting. “Current State: SENDING” appears at the bottom of the screen while the message is being transmitted.
4. INMARSAT C OPERATIONS TRANSMIT MESSAGE STATUS The terminal unit displays transmit message status as follows: Message Send failed. This appears if the message could not be transmitted because of technical reasons such as satellite malfunction, signal degradation, or no reply from LES. Try to transmit the message again. Message Send rejected. This appears when the LES rejects the message because of non-technical reasons such as unpaid subscriber's fee. Message Send pending.
4. INMARSAT C OPERATIONS 4. Press the [↓] key twice to choose the Destination Type. 5. Press the [Enter] key to open the destination type options window. Transmit <[1] UNTITLED1> Transmit Message 1. Transmit Message 2.Priority Cancel Normal 3.Message Request File Delivery Status Message now being edited Size 24 Station Name Cost ********.
4. INMARSAT C OPERATIONS Communication type: TELEX 1. Press the [↓] key to choose Country/Ocean Code. 2. Press the [Enter] key to open the country/ocean code entry window. Transmit <[1] UNTITLED1> Transmit Message 1. Transmit Message 2.Priority Cancel Normal 3.Message Request File Delivery Status Message now being edited Size 24 Station Name Cost ********.
4. INMARSAT C OPERATIONS 7. Type either recipient’s telex subscriber number (ship-to-shore) or IMN (ship-to-ship). 8. Press the [Enter] key to close the window. 9. Press the [↓] key to choose LES ID. 10. Press the [Enter] key to open the LES ID entry window. <[1] UNTITLED1> Transmit Transmit Message 1. Transmit Message 2.Priority Cancel Normal 3.Message Request File Delivery Status Message now being edited Size 24 Station Name Cost ********.
4. INMARSAT C OPERATIONS Communication type: FAX 1. Press the [↓] key to choose Country/Ocean Code. 2. Press the [Enter] key to open the country/ocean code entry window. 3. Enter telephone country code of recipient, referring to the list in the Appendix. 4. Press the [Enter] key to close the window. 5. Press the [↓] key to choose to choose Station ID. 6. Press the [Enter] key to open the station ID entry window. 7. Enter recipient’s fax number. 8. Press the [Enter] key to close the window. 9.
4. INMARSAT C OPERATIONS Communication type: E-mail 1. Press the [↓] key to choose Address. 2. Press the [Enter] key to open the address entry window. Transmit <[1] UNTITLED1> Transmit Message 1. Transmit Message 2.Priority Cancel Normal 3.Message Request File Delivery Status Message now being edited Size 24 Station Name Cost ********.
4. INMARSAT C OPERATIONS 10. Press the [Enter] key to open the select file window. Transmit <[1] UNTITLED1> Transmit Message 1. Transmit Message 2.Priority Cancel Normal 3.Message Request File Delivery Status Message now being edited Size 24 Station Name Cost ********.**(US$) E-Mail Destination Type Prefix Code Select File Country/Ocean Code Station ID Modem Type Address ----*---------+---------+---------+---------+---------+---------+---------< Subject [Insert ] 25 Char. [ Line 2/ 2 Col.
4. INMARSAT C OPERATIONS 4.1.3 Transmitting a file stored on the hard disk 1. Close any open files. 2. Press the [F3] key to display the Transmit menu. File Edit Transmit EGC Reports Logs Options Setup Position StopAlarm Position StopAlarm Transmit 1. Transmit Message 2. Cancel 3. Request Delivery Status Transmit menu 3. Press the [1] key to choose Transmit Message. File Edit Transmit EGC Reports Logs Options Setup Transmit Transmit Message 1. Transmit Message Date 97-08-04 BBER 2.
4. INMARSAT C OPERATIONS Note: When an e-mail with attachment is transmitted, the file volume increases by 1.5 times because of MIME coding. In this case, you can do the following to lower toll charges: a) Select file to attach from Message File. b) Choose DATA from Code. 6. To transmit the message to a station registered on the station list, follow from step 12 on page 4-5. To transmit to a station not listed on the station list, follow from step 4 on page 4-9. 4.1.
4. INMARSAT C OPERATIONS 4. Press the [Enter] key to open the cancel window. File Edit Transmit EGC Reports Options Setup Position StopAlarm <[1] UNTITLED1> Transmit 1. Transmit Message No. Message File 01 ABC 02 FELCOM Logs Cancel Station FURUNO FUSA LES Priority Send Status Delivery Telenor S.S.Inc Normal Waiting Telenor S.S.Inc Normal Sending Cancel Yes No ----*---------+---------+---------+---------+---------+---------+---------< 25 Char. [ Line 2/ 2 Col.
4. INMARSAT C OPERATIONS Message status list description No.: Message number Message File: File name. For no file name, “edit msg. 00X” appears (X = number from 001-999). Station: Name of remote party (recipient) LES: The LES which received the message. Priority: Normal only Send Status: The transmission status from the MES (own ship) to the LES; waiting or sending, and data and time of transmission for messages transmitted. Delivery: The delivery status from the LES to the recipient.
4. INMARSAT C OPERATIONS Manually requesting delivery status You can manually request an LES for delivery status of a message you have transmitted within the past 24 hours. 1. Press the [F3] key to display the Transmit menu. 2. Press the [3] key to display the Request Delivery Status list. Request Delivery Status No. Message File 01 ABC 02 edit msg.002 Station FURUNO FURUNO LES KDDI KDDI Priority Send Status Delivery Normal 02-02-25 16:10 Normal Request delivery status display 3.
4. INMARSAT C OPERATIONS 4.1.6 Accessing the code number services A range of special safety and general maritime services, known as the code number services, may be transmitted. The list on the next page shows the code number services available. To access a code number service do the following: 1. Using the text editor, prepare message requesting a code number service. 2. Press the [F3] key to open the Transmit menu. 3. Press the [1] key to display the Transmit Message menu.
4. INMARSAT C OPERATIONS Maritime safety service code number services Code Content Remarks 31 Maritime enquiries Desirable for requesting information including service offerings. 32 Medical advice Used for requesting medical advice. 33 Technical assistance Desirable for addressing technical enquiries to appropriate personnel. 37 Time and charges requested at end of call Desirable for mobile operator when sending traffic for a third party.
4. INMARSAT C OPERATIONS 4.1.7 Displaying the send message log 1. Press the [F6] key to display the Logs menu. Logs 1. Send Message Log 2. Receive Message Log 3. EGC Log 4. Log Logs menu 2. Press the [1] key to show the Send Message Log. The contents are the same as the Request Deliver Status list. (See page 4.17.) Send Message Log No.
4. INMARSAT C OPERATIONS 4.2 Receiving 4.2.1 When a message is received Each time the FELCOM 16 receives a telex or e-mail it displays the message “Successful Receiving message.” If Auto Receive Message Save and Auto Receive Message Print in the Auto Mode Setup are set for ON, the message is automatically saved and printed (except confidential and password affixed messages).
4. INMARSAT C OPERATIONS 4.2.2 Setting the receive alarm An audio alarm may be set to sound when a routine or confidential message is received. The factory setting is OFF. Set alarm volume at the PC. 1. Press the [F8] key to display the Setup menu. 2. Press the [5] key to display the Auto Mode Setup menu. Auto Mode Setup Auto Log Print Receive Alarm Auto Receive Message Save Auto Receive Message Print Data Report & Polling Print Auto EGC Message Save Auto EGC Message Print 3. 4. 5. 6. 7. 4.2.
4. INMARSAT C OPERATIONS 2. Press the [2] key to display the list of received messages. Received Message Log Message No. R0971106.001 R0971105.002 R0971105.001 R0971024.
4. INMARSAT C OPERATIONS For messages with both addressee code and password, the password entry window appears. Enter the password and then press the [Enter] key. If the password is entered incorrectly, the buzzer sounds. Reenter the password. Receive Message Log Message No. R0021106.001 R0021105.002 R0021105.001 R0021101.001 R0021024.
4. INMARSAT C OPERATIONS About attachments The FELCOM 16 receives a file with an attachment over a landline two ways. (The method depends on the LES.) • Mail main text and text mail which includes information about the attachment. • Attachment data Mail and attachment file data Attachment data Receive Message Log Message No. R0021105.002 R0021105.001 R0021104.001 R0021101.001 R0021024.
4. INMARSAT C OPERATIONS 4.2.4 Automatically printing received messages You may automatically print received messages (except confidential or password affixed) as follows: 1. Press the [F8] key to display the Setup menu. 2. Press the [5] key to display the Auto Mode Setup menu. Auto Mode Setup Auto Log Print Receive Alarm Auto Receive Message Save Auto Receive Message Print Data Report & Polling Print Auto EGC Message Save Auto EGC Message Print 3. 4. 5. 6. 7. 4.2.
4. INMARSAT C OPERATIONS 4.2.6 Automatically saving received messages to the hard disk You may automatically save received messages other than confidential or password-affixed messages to the hard disk as follows: 1. Press the [F8] key. 2. Press the [5] key to display the Auto Mode Setup menu. Auto Mode Setup Auto Log Print Receive Alarm Auto Receive Message Save Auto Receive Message Print Data Report & Polling Print Auto EGC Message Save Auto EGC Message Print 3. 4. 5. 6. 7.
4. INMARSAT C OPERATIONS 4.2.7 Deleting received messages 1. Press the [F6] key to display the Logs menu. 2. Press the [2] key to choose Receive Message Log. Message No. R0971106.001 R0971105.002 R0971105.001 R0971101.001 R0971024.
4. INMARSAT C OPERATIONS 4.3 Display Log The Display Log stores the particulars of the latest 50 received and transmitted messages. When the log becomes full, the oldest message is automatically deleted. 4.3.1 Displaying and printing the display log 1. Press the [F6] key to display the Logs menu. 2. Press the [4] key to show the Display Log. 2 1 3 4 5 6 Log 7 8 9 S/R Message No. Type Pri Date Time LES Station 01 S T0971110.001 TELEX Nrm 02-02-25 19:10 302 FURUNO 02 R R0971110.
4. INMARSAT C OPERATIONS 4.3.2 Automatic printing of display log The Display Log can be automatically printed every 24 hours as follows: 1. Press the [F8] key to display the Setup menu. 2. Press the [5] key to display the Auto Mode Setup menu. Auto Mode Setup Auto Log Print Receive Alarm Auto Receive Message Save Auto Receive Message Print Data Report & Polling Print Auto EGC Message Save Auto EGC Message Print 3. 4. 5. 6.
4. INMARSAT C OPERATIONS 4.4 EGC Messages When an EGC message is received, RECEIVING EGC MESSAGE appears at the bottom left corner of the display. If Auto Message Save in the Auto Mode Setup is ON, EGC messages are automatically saved. EGC messages are automatically received, printed and saved to the terminal unit selected with EGC Output Port on the System Setup menu. The memory capacity for EGC message is 32 Kbytes.
4. INMARSAT C OPERATIONS 4.4.2 Displaying EGC closed network ID (ENID) To join a FleetNETTM service, an MES must be registered with an information provider. The information provider adds the MES to the group which is to receive the service, by downloading a Group Call ID (via an LES which supports FleetNETTM broadcasts), uniquely addressed to the MES. The MES stores the ID and can accept broadcasts from the information provider. The MES operator cannot change this stored EGC closed network IDs (ENIDs).
4. INMARSAT C OPERATIONS 4.4.3 Displaying the EGC message log 1. Press the [F6] key to show the Logs menu. 2. Press the [3] key to display the EGC message log. EGC Message Log Priority Size Seq. No. Rec date&Time Type Urgent 428 01641 02-11-18 10:27 MET Safety 1455 02035 02-11-17 05:23 U.M Rct Memory available: 32767 Bytes ________________________________________________ ENTER: Display S: Save D: Delete Message No. LES E0021118.028 KDDI E0021117.002 KDDI EGC message log Scroll: Press the [↑] or [↓] key.
4. INMARSAT C OPERATIONS (This page intentionally left blank.
5. DATA REPORTING AND POLLING This chapter provides the information necessary for data reporting and polling reception. Data reporting provides automatic data transmission at regular intervals from your ship to your home office. When your ship receives a polling command from your home office; that is, a request for navigation data from your ship, it automatically transmits this data to your home office. No operator intervention is required during polling reception.
5. DATA REPORTING AND POLLING 5.1.1 Setting a data report 1. Press the [F5] key to display the Reports menu. Reports 1. Data Report 2. Message Report 3. Data Network ID Reports menu 2. Press the [1] key to choose Data Report. Data Report 1. Data Report 1 2. Data Report 2 3. Data Report 3 4. Data Report 4 Data report menu 3. Press [1], [2], [3] or [4] as appropriate. Data Report Data Report Programming OFF Status Report Length Position and Course/Speed Destination DNID LES ID Member No.
5. DATA REPORTING AND POLLING 13. Choose DNID (Data Network ID) desired and press the [Enter] key. (LES ID and Member No. are automatically selected according to DNID.)14. Press the [↓] key to choose Activation. 14. Press the [Enter] key to open the activation options window. 15. Press the [↓] or [↑] key to choose “Regular Interval” or “Daily” as appropriate. 16. Press the [Enter] key to close the window. 17. Do one of the following depending on the selection you made at step 15.
5. DATA REPORTING AND POLLING 5.1.2 Setting a message report 1. Press the [F5] key to display the Reports menu. Reports 1. Data Report 2. Message Report 3. Data Network ID Reports menu 2. Press the [2] key to display the Message Report menu. Four addresses may be registered. Message Report 1. Message Report 1 2. Message Report 2 3. Message Report 3 4. Message Report 4 Message report menu 3.
5. DATA REPORTING AND POLLING 10. Press the [↓] or [↑] key to choose a station. Note: You may sort the list by group name, station name or communication type as follows: Group name: Each press of [Ctrl] + [G] sorts the list by group name, ascending or descending order. Station name: Each press of [Ctrl] + [N] sorts the list by station name, in ascending or descending order. Comm. type: Each press of [Ctrl] + [T] sorts the list by communication type, in ascending or descending order. 11.
5. DATA REPORTING AND POLLING “Daily” is selected at step 19 (1) Press the [↓] to choose Start Time 1. (2) Press the [Enter] key to open the start time entry window. (3) Key in the start time. (4) Press the [Enter] key to close the window. (5) If necessary, key in the start time of Start Times 2-4. 22. Press the [↓] key to choose Report Contents. 23. Press the [Enter] key to open the report contents options window. 24.
5. DATA REPORTING AND POLLING 5.1.3 Automatic printing of data report, polling command Data reports and polling commands are automatically printed, in the default state. If you do not require automatic printing of data reports or polling commands do the following: 1. Press the [F8] key to open the Setup menu. 2. Press the [5] key to choose Auto Mode Setup.
5. DATA REPORTING AND POLLING 5.2 Polling When the FELCOM 16 receives a polling command from your home office it automatically transmits data to your home office. The data are position, speed, bearing and other data sent from a navigator or an interface unit. A polling command from your home office can also activate a data report or message report if the corresponding setting is completed on the FELCOM 16.
5. DATA REPORTING AND POLLING ♦ PIN Code The PIN (Personal ID Number) code is an eight-digit code number agreed upon by communicating parties, and there is no rule for determining PIN code. It is a password used in message reporting. When a ship receives a polling command w/PIN code from a shore subscriber and the code matches that of the ship, the ship sends a message report. To register PIN code number do the following: 1. Press [F5] to show the Report menu. 2.
5. DATA REPORTING AND POLLING 5.2.2 Other polling commands Telex P???/PIN Code/TELEX/LES number/Country number/Subscriber’s number/File name: E-mail P???/PIN Code/EMAIL/LES number/ E-mail address/File name: Public Switched Telephone Network P???/PIN Code/PSTN/Modem type/LES number/Country number/Subscriber’s number/File name: Modem type is selected from T30, V21, V22B, V22, V23, V26B, V26T, V27T or V32.
5. DATA REPORTING AND POLLING 5.2.3 Polling reception No operator intervention is required during polling reception. The printer prints the status of polling reception and transmits data in response to polling request as shown below. TX start frame (time) Data reporting POLLING Message - - - Program Unreserved Data Reporting - - DNID : 0004 LES ID : 101 (Telnor S.S.
5. DATA REPORTING AND POLLING 5.3 DNID (Data Network Identification) Group data exchange (polling, data reporting) is available by registering with an LES which provides such services. When you make a contract with an information provider, DNIDs are downloaded from the information provider to your FELCOM 16, via the appropriate LES. Up to 64 DNIDs can be downloaded to the FELCOM 16. You can see which DNIDs are stored as below. 5.3.
5. DATA REPORTING AND POLLING 5.3.2 Enabling/Disabling DNID DNID can be enabled or disabled as follows: 1. Press the [F5] key followed by the [3] key to show the Data Network ID list. 2. Press the [↓] or [↑] key to choose desired DNID from the data network ID list. 3. Press the [Enter] key to enable or disable the DNID as appropriate. An asterisk appears next to the DNID when it is enabled.
5. DATA REPORTING AND POLLING (This page intentionally left blank.
6. OTHER FUNCTIONS This chapter describes how to abort operation, scan NCS, choose EGC and NCS channels and display LES information. 6.1 Aborting an Operation You can abort transmission, receiving or scanning (on the NCS common channel) as follows: 1. Press the [F7] key to display the Options menu. Options 1. Login 2. Logout 3. Abort 4. Select NCS 5. Ocean Region 6. LES Information 7. Test Options menu (when FELCOM 16 functions as Inmarsat MES) 2. Press the [3] key to choose Abort. Options 1. Login 2.
6. OTHER FUNCTIONS 6.2 Scanning NCS Common Channel When “unsync” condition (UNSYNC displayed at bottom center of the screen) continues for six minutes and error rate in received message is greater than 80% (BBER indication reads more than 80), choose suitable ocean region. Note that the FELCOM 16 must be IDLE and the MES mode must be INMARSAT C in order to scan common channel. If the FELCOM 16 is not idle the message “Ignored: MES is not idle” is displayed.
6. OTHER FUNCTIONS 6.3 Choosing EGC Receiving Channel EGC channel can be selected when the terminal unit is set to operate as an EGC-only receiver. However, this procedure is shown for reference only; currently there is only one EGC channel per NCS. 1. Press the [F7] key to display the Options menu. Options 1. Login 2. Logout 3. Abort 4. Select EGC Ch. 5. LES Information 6. Test Options menu (when FELCOM 16 functions as EGC receiver) 2. Press the [4] key to choose Select EGC Ch.
6. OTHER FUNCTIONS 6.4 Choosing NCS Channel You may select NCS common channel as shown below. Currently, each satellite transmits one global beam. In the future, the satellites will transmit multiple spot beams, namely, the NCS will have multiple channels. The below procedure is provided for reference. 1. Press the [F7] key to display the Options menu. 2. Press the [4] key to display the NCS Channel List. Options 1. Login 2. Logout 3. Abort 4. Select NCS No AOR (WEST) 5. Ocean Region ID FREQ 6.
6. OTHER FUNCTIONS 6.5 LES Information Each time you log in LES data is automatically downloaded through the NCS common channel to the FELCOM 16, and saved to the LES Information display. You may view this display as follows: 1. Press the [F7] key to show the Option menu. Options Options 1. Login 2. Logout 3. Abort 4. Select NCS 5. Ocean Region 6. LES Information 7. Test 1. Login 2. Logout 3. Abort 4. Select EGC Ch. 5. LES Information 6.
6. OTHER FUNCTIONS Services: Alphabet shown only when Flag is “1” for a bit. Bit No.
7. MAINTENANCE, TROUBLESHOOTING This chapter provides the information necessary for the maintenance and checking of the FELCOM 16. Please read the safety information at the beginning of this manual before attempting any maintenance procedure. 7.1 General Checking and Maintenance Turn off the power before conducting any maintenance procedures other than the cleaning of the communication unit. NOTICE Do not apply paint, anti-corrosive sealant or contact spray to coating or plastic parts of the equipment.
7. MAINTENANCE, TROUBLESHOOTING 7.2 Diagnostics The system is equipped with a diagnostic test which check it for proper operation. 7.2.1 Self test at power on The terminal unit performs the ROM sum check and RAM read and write test when turned on. If the test results are normal the equipment goes into standby. If error is found you cannot transmit. Contact your dealer for advice. 7.2.2 Testing the communication unit through the keyboard, displaying program version no.
7. MAINTENANCE, TROUBLESHOOTING Options Test 1. Login 2.1.Logout Diagnostic Test PV Test 3.2.Abort PV Test Result TERMINAL 1650166-** RFCON CPU 4.3.Select NCS Self Test 5.4.Ocean Region Distress Alarm Button Test ROM 6. Test RAM EEPROM GPS Press any key to escape. 1650160-** Program No. ** = Version no. OK OK OK OK Sample communication unit self test results The results are shown as OK or NG (No Good). For any NG, contact your dealer for advice. 5.
7. MAINTENANCE, TROUBLESHOOTING 7.3 Performance Verification (PV) Test After the FELCOM 16 is installed, the installer usually confirms that it is functioning properly, by logging in and conducting the PV test. This test consists of the receiving a test message from an LES, transmitting a message to an LES and a distress alert test. The results of the test appear on the PV test result display. The PV test cannot be conducted from an auxiliary terminal unit.
7. MAINTENANCE, TROUBLESHOOTING 7.3.2 PV test procedure 1. 2. 3. 4. Confirm that the communication unit is in idle condition and logged in. Press the [F7] key to display the Options menu. Press the [7] key to choose Test. Press the [1] key to choose PV Test. Options Test 1. Login 2.1.Logout PV Test PV Test 3.2.Abort PV Test Result 4.3.Select NCS Self Test 5.4.Ocean Region Distress Alarm Button Test 6. Test Start Yes No PV test screen 5.
7. MAINTENANCE, TROUBLESHOOTING 7.3.3 Results of PV test 1. At the standby display, press the [F7] key to display the Options menu. 2. Press the [7] key to display the Test menu. 3. Press the [2] key to display the results of the PV test. Options Test 1. Login 2.1.Logout PV Test Result PV Test 3.2.Abort PV Test Result Ctrl+P: Print ESC: Quit 4.3.Select NCS Self Test Test Date & Time 5.4.Ocean Region Distress Alarm Button Test02-02-25 01:58 (UTC) 6.
7. MAINTENANCE, TROUBLESHOOTING 7.4 System Status Monitor The system status monitor, which is always displayed, provides date, time, equipment status and navigation data. File Edit Transmit EGC Reports Date Time 02-02-25 01:32 (UTC) Position Course Speed Current NCS Current Channel Current TDM MES Status GPS Status LAT 34:30.00N LON 135:00.00E LAT LON 345.5 DEG 10.
7. MAINTENANCE, TROUBLESHOOTING DCE Memory: BBER: C/N: Send Level: RX AGC Level: REF Offset Freq: Synthe Local: VCXO Control: Antenna Power Supply: Temperature*: Water Current* Direction: Speed: Depth*: Memory remaining in communication unit Bulletin Board Error Rate (%) Check of circuit status with LES, receiving circuit in antenna unit and RF CON/CPU Board in communication unit. OK appears for figure greater than 31. TX level check. At transmission, OK appears for figure greater than 123.
7. MAINTENANCE, TROUBLESHOOTING 7.6 Error Messages This section describes the more commonly seen error messages and the means to restore normal operation. If normal operation cannot be restored, contact your dealer for advice. 7.6.1 Equipment trouble messages Messages in this category are prefixed with “TROUBLE:”. Equipment trouble messages Error Message Meaning Action ANT power voltage abnormality. Antenna power voltage. Have a licensed radiocommunications technician check the set.
7. MAINTENANCE, TROUBLESHOOTING 7.6.2 Warning messages Messages in this category are prefixed with “WARNING:” Warning messages Error Message 7-10 Meaning Action BBER over 80%. Scanning NCS start manually. BBER (Bulletin Board Error Rate) exceeded 80%. Select NCS manually. Cannot enter new DNID. Memory full for DNIDs. Memory for DNIDs is full. Delete unnecessary DNIDs to enter new ones. Cannot enter new ENID. Memory full for ENIDs. Memory for ENIDs is full.
APPENDIX Menu Tree F1: File 1. New 2. Open 3. Close 4. Save 5. Delete 6. Rename 7. Print 8. Print Setting No Printer Windows Printer PP-510 F2: Edit 1. Cut 2. Copy 3. Paste 4. Insert (With Citation) 5. Select All 6. Search or Replace 1. Search 2. Replace 7. Goto Line 8. Time or Pos. Ins Search Word Direction Search Word Replace Word Direction Query or All Forward, Back Forward, Back Query, All 1. Top of Text 2. End of Text Chooses line to go to. 3. Goto Line 1. Time 2. Position 9.
APPENDIX F3: Transmit 1. Transmit Message Priority Not used. Message File Station Name Destination Type Prefix Code (Prefix selected) Country/Ocean Code Station ID Modem Type (FAX, FAX prefixed selected) Address (For e-mail) Subject (For e-mail) Attach File (For e-mail) LED ID TELEX FAX E-Mail SMS PSDN X400 DNID SPEC TELEX (Prefixed) FAX (Prefixed) PSDN (Prefixed) X400 (Prefixed) DNID (Prefixed) SPEC (Prefixed) T30 FAX V21 V.21 300bps Duplex V22 V.22 1200bps Duplex V22B V.22bis 2400bps Duplex V23 V.
APPENDIX F5: Reports 1. Data Report 1. Data Report 1 Status Report Length 2. Message Report 2. Data Report 2 3. Data Report 3 4. Data Report 4 1.
APPENDIX LES ID Activation Interval Time (Regular Interval chosen) Report Times Start Time 1 (Daily chosen) Start Time 2 (Daily chosen) Start Time 3 (Daily chosen) Start Time 4 (Daily chosen) Report Contents 2. Message Report 2 3. Message Report 3 4. Message Report 4 File (FILE chosen) Same as Message Report 1 Same as Message Report 1 Same as Message Report 1 3. Data Network ID F6: Logs 1. Send Message Log 2. Receive Message Log 3. EGC Log 4. Log F7: Options (FELCOM functions as Inmarsat MES) 1.
APPENDIX F8: Setup 1. System Setup 2. Editor Setup 3. Terminal Setup Date input System Date & Time IMN input IMN MES Operation Mode INMARSAT-C, EGC Nav Port* Active Port* Message Output Port* EGC Output Port* Network Setup* Command Window * Not used. (For service technicians.) Telex, Ascii Text Mode Insert, Overwrite Edit Mode Word Wrap ON, OFF ON, OFF Line No.
APPENDIX 4. EGC Setup 5. Auto Mode Setup Additional Position Navarea Fixed Area Waypoint* Station Code Type of Message Ice reports Meteo. forecasts Pilot service DECCA messages LORAN messages OMEGA messages SATNAV messages Other navaid msg QRU (no message) Auto Log Print Receive Alarm Auto Receive Message Save Auto Receive Message Print Data Report & Polling Print Auto EGC Message Save Auto EGC Message Print 6. E-mail Setup 7.
APPENDIX AP-7
APPENDIX International Telex/Telephone Country Code List Area and Country Afghanistan Telephone Telex Country Country Code Code 93 79 Alaska 1 200 Albania 355 604 Algeria 21 408 American Samoa 684 770 American Virgin Is. 1 208 Andorra 33 590 Angola 244 991 Anguilla 1 391 Antigua & Barbuda 2 393 Argentina 54 33 Armenia Remarks for Telex Code Telex calls to former WUI subscribers, insert the figure "9" after the destination code "208".
APPENDIX Area and Country Telephone Telex Country Country Code Code Cambodia 855 807 Cameroon 237 970 Canada 1 21 Canary Is. 34 52 Cape Verde 238 993 Cayman Is. 1 293 Central Africa Rep. 236 971 Chad 235 976 Remarks for Telex Code Kampuchea Rep. Disregard the figure "0" at head of subscriber number. 26 Destination code is the same as for Spain.
APPENDIX Area and Country Telephone Telex Country Country Code Code Falkland Is. (Malvinas) 500 306 Faroe Is. 298 502 Fiji 679 701 Finland 358 57 Remarks for Telex Code France 33 42 French Guiana 594 300 French Polynesia 689 702 Gabon 241 973 Gambia 220 996 Georgia 7 683 Germany (Fed, Rep.
APPENDIX Area and Country Jamaica Telephone Telex Country Country Code Code 1 Japan 291 72 81 Jordan Remarks for Telex Code KDDI (for 5 digits) NTT 962 493 7 785 Kenya 254 987 Kiribati 686 761 Korea (Demo, People's Rep. of) 850 (899) Korea (Rep.
APPENDIX Area and Country Telephone Telex Country Country Code Code Montserrat 1 396 Morocco 21 407 Mozambique 258 992 Myanmar (formerly Burma) 95 83 Namibia 264 908 Nauru 674 775 Nepal 977 891 Netherlands 31 44 Netherlands Antilles 599 390 New Caledonia 687 706 New Zealand 64 74 Nicaragua 505 375 Niger 227 975 Nigeria 234 905 Niue Is. 683 776 Northern Mariana Is. 670 Norfolk Is.
APPENDIX Area and Country Telephone Telex Country Country Code Code Remarks for Telex Code Reunion 262 961 Subscriber numbers are 916XXX Romania 40 65 Disregard the figure "0" at head of subscriber number. Russian Federation 7 64 Rwanda 250 909 Saipan 670 760 San Marino 378 505 Sao Tome & Principe 239 967 Saudi Arabia 966 495 Senegal 221 906 Seychelles 248 965 Sierra Leone 232 998 Singapore 65 87 Slovak 42 66 Slovenia 386 598 Solomon Is.
APPENDIX Area and Country Turks & Caicos Is. Telephone Telex Country Country Code Code 1 296 Tuvalu 688 774 U. A. E. 971 893 Remarks for Telex Code Abu Dhabi 2XXXX, 3XXXX, 5XXXX Ajman 695XX Dubai 4XXXX Fujairah 8XXXX Ras Al Khaimah 9XXXX Sharjah 68XXX Umm Al Qaiwain 697XX Uganda 256 988 Ukraine 7 680 United Kingdom 44 51 United Arab Emirates 971 893 Upper Volta 226 978 Uruguay 598 32 7 786 Uzbekistan Same as "Burkina Faso". CCI subscribers 7XXXXXX U. S. A.
APPENDIX Area and Country Telephone Telex Country Country Code Code Zaire 243 982 Zambia 260 902 Zanzibar 259 990 Zimbabwe 263 907 Ocean Area Remarks for Telex Code Telex calls to places other than Kinshasa Subscriber beginning with 2XXXX can be made as Semi-automatic calls.
APPENDIX International Telex Abbreviations Abbreviation ADV ACK AGN BI (GS) BK CFN COL CRV DER DWN EEE FM GA MNS MOM MUTI NA NC NCH NP NR OCC OK P (or 0) PLS (PSE) PPR P (RCD) RAP RD RE RPT SRY SVP TAX TEST MSG THRU TKS (TNX) TLX AP-16 Meaning Advise Acknowledge Again Good bye I cut off. Confirm Collation How do you receive? Out of order Down Error From Go ahead. Minutes Wait (Waiting) Mutilated Correspondence to this subscriber is not admitted. No circuits Snbscriber’s number has been changed.
APPENDIX International Telegraphy Alphabet No. FIGURES 1 LETTERS No. FIGURES LETTERS A 17 1 Q 2 ? B 18 4 R 3 : C 19 ' S D 20 5 T E 21 7 U * 4 5 3 6 * F 22 = V 7 * G 23 2 W 8 * H 24 / X 9 8 I 25 6 Y 10 BELL* J 26 + Z 11 ( K 27 CARRIAGE RETURN 12 ) L 28 LINE FEED 13 . M 29 LETTERS 14 , N 30 FIGURES 15 9 O 31 SPACE 16 0 P 32 BLANK * = Cannot be entered.
APPENDIX Messages Below are the various operational messages and their meanings. Messages are arranged according to function key. [F1] File 1. "Overwrite?" You are asked if you are sure to overwrite file name entered. 2. "OK to save?" You are asked if you are sure to save a file. 3. "OK to delete file?" You are asked if it is OK to delete selected file. 4. "Can't delete." File cannot be deleted. 5. "Enter new filename" Enter a new file name (to save file under new name.) 6. "Can't rename.
APPENDIX [F3]: Transmit 1. "Input Error : Message File." Invalid message selected for transmission. 2. "Input Error : Country/Ocean Code." Invalid country/ocean code entered. 3. "Input Error : Station ID." Invalid station ID entered. 4. "Input Error : Modem Type." Invalid mode type entered. (For FAX, choose T30.) 5. "Input Error : E-Mail Address." Invalid e-mail address entered. 6. "Input Error : LES ID." Invalid LES ID entered. 7. "Input Error : Send Delay." Invalid send delay time entered. 8.
APPENDIX 6. "Input Error : Modem Type" Invalid modem type entered. 7. "Input Error : Report Contents" Invalid report contents entered. 8. "Input Error : Report Times" Invalid number of report times entered. 9. "Input Error : Destination" Invalid destination entered. 10. "Input Error : E-Mail Address" Invalid e-mail address entered. 11. "Don't support E-Mail service in this NCS." NCS does not handle e-mail. 12. "Input Error : Prefix Code" Invalid prefix code entered. [F7]: PV test 1.
APPENDIX Parts List This equipment contains complex modules in which fault diagnosis and repair down to component level are not practical (IMO A.694(17)/8.3.1. Only some discrete components are used. FURUNO Electric Co., Ltd. believes identifying these components is of no value for shipboard maintenance; therefore, they are not listed in the manual. Major modules can be located on the parts location photos on the next several pages.
APPENDIX Parts Location Communication unit PWR C Board (16P0227) PWR Board (16P0217) RF CON/CPU Board (16P0208 B) INT GPS Assy. (GN809 7) Communication unit, cover opened, INT GPS assy.
FURUNO FELCOM 16 SPECIFICATIONS OF INMARSAT C MES FELCOM 16 1 GENERAL 1.1 Transmitting Frequency 1626.5 to 1646.5 MHz 1.2 Receiving Frequency 1530.0 to 1545.0 MHz 1.3 Channel Interval 5 kHz 1.4 G/T Better than -23 dB/K (elevation angle 5°) 1.5 EIRP 7 to 16 dBW (elevation angle 5°) 1.6 Modulation BPSK 1.7 Modulation Rate 1200 sps 1.8 Coding Convolution with coding rate 1/2 and constraint length 7 1.9 Decoding Viterbi decoder 1.10 Internal GPS Board 2 ANTENNA UNIT 2.
This page is intentionally left blank.
INDEX A Aborting, 6-1 C Colors background, 2-3 foreground, 2-3 Communication unit description, 1-1 testing, 7-2 Currency unit, 2-3 D Data report preparing, 5-2 printing, 5-7 Date format, 2-3 manual input, 2-2 Delivery status automatic confirmation, 4-17 manual confirmation, 4-19 Diagnostics, 7-2 Directory creating, 2-31 specifying directory for message storage, 2-33 Display indications, 1-7 DNID displaying, 5-12 enabling/disabling, 5-13 E Editor setup, 3-4 EGC description, 2-8 EGC channels, 2-13 ENID, 4-
INDEX Message report, 5-4 Messages deleting received, 4-30 preparation of confidential, 3-3 preparation of routine, 3-2 printing received automatically, 4-28 saving received automatically, 4-29 Messages (alerts), AP-18 MIME, 3-18 N NCS adding channels, 2-17 channel selection, 6-4 scanning, 6-2 P Parts list, AP-21 Parts location, AP-22 PC window setup, 2-3 Polling printing commands, 5-7 Polling commands, 5-8 reception, 5-11 Position input, 2-30 POWER switch (Communication unit), 1-1 Printer selection, 1-13
INDEX Transmitting canceling, 4-16 code number services, 4-20 delivery status (automatic receipt), 4-18 file stored on hard disk, 4-15 message to station not on station list, 4-8 message to station on station list, 4-2 W Warning messages, 7-10 Window color, 2-3 IN-3